Meng 1/35 Panther-D (Early) Sd.Kfz.171 #TS-038

Edbert

Well-Known Member
Joined
May 16, 2024
Messages
693
I've never built a Panther before, chose this one to break that streak. I knew it after the fact, but at time of purchase I was thinking the A-model was early D was intermediate and G was late-war. Oh well.

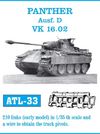
The kit is really nice overall, biggest complaint is the tracks. I do not mind having three parts per link, tedious yes, but strangely relaxing as well. However, these linked tracks are not workable, in fact one must glue them in a way to provide curves (around sprocket and idler) as well as slack from weight. I thought that was bad enough to order a set from Friul, they should arrive today or tomorrow.

The static track-links are made more odd when you see the suspension is 'workable', meaning the control arms move with pressure. Why do that is the tracks are completely glued solid. It makes matters a bit worse with aligning the road-wheels, they wobble too much to be able to get perfect alignment.

One item I found frustrating was that I needed to drill/cut out three holes in the upper deck to make a provision for a view-port for the radio-operator (there's no bow MG), this was harder than it should have been and no explanation of why those three holes were not there for the 4th port like they were for the other three. Maybe I should be grateful that I did not have to make all four. These are the three holes I'm talking about the jagged messy ones...
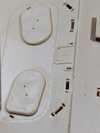
1736784758898.png

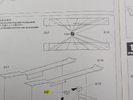
Another strange omission is the hole in the upper glacis for the starboard driving light. The port side had a great tapered hole that the shaft fit in quite nicely. But the other side had none. I decided to cut off the post (part that would be invisible in the hole) and just eyeball the location and glue it on. You can see my little pencil marks for locating it below, but you also see the instructions say there's a hole there.
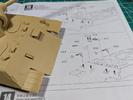
1736784949853.png

That is about it for the negatives, one could add a high part-count (1,048 is a lot for a 1/35 tank), but I kinda like having lots of parts. Some of the detail is quite good, here's an example...
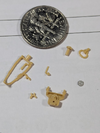
1736783700421.png
These are a few of the small bits for the commander's cupola. The entire assembly, including the pintle-mounted MG34 is 21 parts, just for the cupola!

The 1k+ parts are a bit misleading. Of course the tracks count for a lot of that, but they also provided a bunch of "extra parts" that will not be needed, I assume that they count them even though they go into the box of leftover bits. Here are some examples of parts that I do not need.
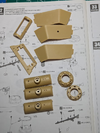
1736783901840.png

Meng also includes three sheets of PE, one thin brass as is normal, but two other sheets of steel parts, one of which was really thick since it is the hatch cover. The thinner sheet of steel PE is for the side skirts, they fit really well and I'm debating if they should be glued or held on with gravity.

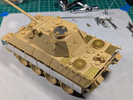
I've still got a ways to go before assembly is finished, and I'm going to keep the upper & lower hulls separated until after a lot of the painting phase since I need to install some clear parts that require access to the insides unless I want to try and mask them. No thanks. But even incomplete, she's a handsome unit in my opinion.
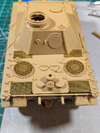
1736784579089.png
I fixed that handle on the round "thing" above, that is the wrong part, clearly too short.
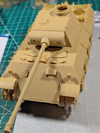
1736784595449.png
 
The static track-links are made more odd when you see the suspension is 'workable', meaning the control arms move with pressure. Why do that is the tracks are completely glued solid.
It would help with putting the model into a diorama, going over uneven ground. But other than that … I take it there's no little nodule on the suspension arms that puts them into a "default" position, and they only articulate if you cut that off?

One item I found frustrating was that I needed to drill/cut out three holes in the upper deck to make a provision for a view-port for the radio-operator (there's no bow MG)
In the Panther Ausf. D, that vertical letterbox is for the bow machine gun. It was in the Ausf. A that this was replaced by a ball mount. The radio operator normally looks out through the periscopes in front of his hatch.

no explanation of why those three holes were not there for the 4th port like they were for the other three.
Looking at your photo, I assume that with "viewport" you mean the periscope with its protective guard in the hull roof? The fourth one probably needs to be drilled out, is my guess, because in later Panthers the radio operator had only one periscope, not two as in early Ds. By doing it this way, Meng can have multiple kits without needing separate, expensive moulds for big parts like the upper hull. This is very common for nearly all manufacturers, with the instructions telling you which holes to open up for particular variants.

Another strange omission is the hole in the upper glacis for the starboard driving light.
Is there no recess on the inside of the armour plate for you to open up, which the instructions tell you to open up too? Because again, the D had two headlights while the A had only one, on the left.

I fixed that handle on the round "thing" above, that is the wrong part, clearly too short.
Yes :) Those round openings are — I think — for access to the oil filler caps for the air filters. At least, those are located on either side of the engine just inboard of the circular fans, so they should be underneath those round lids.
 
Here are some examples of parts that I do not need.
Nice looking build!

I especially appreciate the play-by-play!

And to have @Jakko contribute the half-time commentary, what else could a fella want?!

My box of spare parts slowly grows... when it gets large enough, maybe I'll suggest a group build: Spare parts only!
 
I take it there's no little nodule on the suspension arms that puts them into a "default" position, and they only articulate if you cut that off?
The part that inserts into the hull had a notch or cam to place it correctly, no torsion bar that reaches across. But the parts are small and thin which allows the movement up and down (which I think is intended) or wobble (as in toe-in or toe-out) which is bad and would fail my build in a show.
In the Panther Ausf. D, that vertical letterbox is for the bow machine gun.
They included an extra MG34, but no provision to mount it, just that vertical plate you mention that could be attached open or closed. How did he get his MG into action, sticking it out himself?
The radio operator normally looks out through the periscopes in front of his hatch.
Yes, I used the wrong term, driver and radio operator have two periscopes each, after I cut the holes for the 4th.
Meng can have multiple kits without needing separate, expensive molds for big parts like the upper hull. This is very common for nearly all manufacturers, with the instructions telling you which holes to open up for particular variants.
I think they did. To be more clear the upper glacis plate is a separate part from the upper hull. I think I missed making that hole, so that one is on me. I just counted though and there are over 50 holes I had to make. So your assertion is definitely right, they make parts for multiple marks. This image is for 32 holes alone.

1736796706837.png
The yellow highlighter is just a clear part I've left off, have to keep my old brain aware of stuff like this so I do not forget when sealing it up :)

Here's a newer picture with more do-dads attached. I think I'll leave all or most of the pioneer tools off until the weathering stages. A bit concerned about the steel parts. I find Mr. Surfacer is adequate to prime the brass, but the steel is showing fingerprints BAD, and I'm worried about the paint adhering.

1736796919500.png

What are those two arms sticking out to the side of the turret?
 
Last edited:
That stuff is horrible on pancakes .

It's an acid ? then yes , it will have an effect on steel .
Depends on the strength and the steel
be like when you remove rust from steel by soaking it in vinegar and it leaves that black , weak-azz oxide layer
 
And to have @Jakko contribute the half-time commentary, what else could a fella want?!
I see a thing I think I know something about, I comment ;)

My box of spare parts slowly grows... when it gets large enough, maybe I'll suggest a group build: Spare parts only!
In that case I'll have to see what I can build from about a hundred Sherman wheels …

The part that inserts into the hull had a notch or cam to place it correctly, no torsion bar that reaches across.
Ah, OK. That does sound like the idea is you build it "flat" but can pose it articulated if you want, for a diorama.

They included an extra MG34, but no provision to mount it, just that vertical plate you mention that could be attached open or closed. How did he get his MG into action, sticking it out himself?
Off the top of my head: yes. Not sure, though, the Panther isn't my specialty subject and my books are upstairs while I sit downstairs watching 24 Hours in A&E as I type this :)

This image is for 32 holes alone.
I looked at that before reading your comment and felt quite daunted :) I've not looked closely enough at the Dragon Panther G I bought recently, but I kind of hope it doesn't go this far :)

What are those two arms sticking out to the side of the turret?
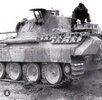
They're a rest for the commander's hatch, so that it opens horizontally and becomes a platform for someone to stand on. This is not a standard feature of any Panther, and looks to me like it's taken directly from photos of this particular tank:

IMG_2001.jpeg
 
looks to me like it's taken directly from photos of this particular tank
Hmmm, I've noticed similar 'generalizations' when searching up photos for some of my builds.
I just chalked it up to my lack of knowledge, but sounds like the 'practice' is more common out there than I would have thought. Interesting.
 
They're a rest for the commander's hatch, so that it opens horizontally and becomes a platform for someone to stand on. This is not a standard feature of any Panther, and looks to me like it's taken directly from photos of this particular tank:

View attachment 134296
Nice pic, I searched through my limited reference books for Panthers and did not find any vehicle with this modification.
 
This is not a standard feature of any Panther, and looks to me like it's taken directly from photos of this particular tank:
My dude, you are a walking and talking (or watching A&E) machine!

The tank they modelled this after (according to the included text) is at Bovington, or Boddington I think is correct. But those supports were not shown in my Squadron "Walk-Around" book.
 
I just chalked [similar 'generalizations'] up to my lack of knowledge, but sounds like the 'practice' is more common out there than I would have thought.
I think what happens is that kit manufacturers come across photographs of vehicles they find interesting enough to include in their kits, by including a few special parts, but usually don't indicate these parts are for a one-off real vehicle. Modellers then buy the kit and add the parts as if they're a standard feature because they simply don't know any better. Don't forget that most modellers simply build straight from the box and apply markings per the instructions, or paint and mark a model as strikes their fancy at the time. Inevitably, they will add parts like these to a model because they look interesting, not because they're historically accurate for what they're building.

It's a crew applied one-off
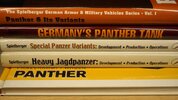
I see you also have the book by Uwe Feist with those photos in, the one with the yellow on the cover :) Here are my equivalents:

IMG_2004.jpeg

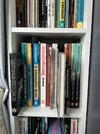
Plus that book by Feist, but I have no more room in this bookcase for it :( I'll have to find some way to reorganise this so I can keep it with my other Panther books. (The end-on book is too tall for the bookcase, but it's Tiger I & II: Combat Tactics by Tom Jentz.)

(or watching A&E) machine!
That last bit is mainly because there's nothing much else of interest on :(

The tank they modelled this after (according to the included text) is at Bovington, or Boddington I think is correct. But those supports were not shown in my Squadron "Walk-Around" book.
Bovington :) It's where the Tank Museum is, near the village of Wool in southern England. It's been over twenty years since I was last there, but if you ever find yourself in the UK, it's definitely worth making a detour for to go there. Do count on spending at least a full day there, though :)

However, the only Panther I can remember on display there is an Ausf. G, which the sign next to it said was assembled after the war from leftover parts so the British could test a brand-new example instead of a war-weary one.
 
I'll have to find some way to reorganise this so I can keep it with my other Panther books. (The end
Awesome collection!
I hear ya, I quickly ran out of room on my tiny bookshelves... so now, when possible, it is Kindle (to the tune of about 80 so far). At least they are generally cheaper, and easy to search.
Thank goodness my interest is limited to the WW2 vehicles (mostly soft skin), campaigns and armies in North Africa and south/east Mediterranean!

I still prefer the hard copy for reading, however I can't complain when I zoom in on a photo reference at the bench on my display!

Then it occurred to me that I could put up photo/scan of the model instructions too, to free up space on the bench! (And zoom in when necessary)!
After a few of these, I finally realized that sites like Scalemates often have the .pdf I could download, d'uh!
 
Awesome collection!
Each of those shelves is just 25 cm of my ca. 9 to 10 metres of books related to military, aviation, naval etc. subjects … And that's not even counting the modelling magazines, which are probably a couple of metres more :)

when possible, it is Kindle (to the tune of about 80 so far). At least they are generally cheaper, and easy to search.
I've got a large number of PDFs on my computer, and a good number of them also on my iPad. They overlap with the physical books but not all that much.

I still prefer the hard copy for reading, however I can't complain when I zoom in on a photo reference at the bench on my display!
I use my iPad to look up pictures etc. while building a model, in addition to having some of the relevant books in my hobby room as well. Those return to the shelves when the model is done, though.
 
I got these delivered from Andy's, great service. I did find it interesting that "232" is depicted on the box. Since I mounted those braces, I've little choice unless I invoke the "it is my kit" mantra. But the decals and paint scheme were included by Meng, and the camo was 2nd best of the options. Sooo...

1737070491377.png

Disregard that warning sticker, it is from a sonic parts-cleaner, accidentally in the shot.

1737070304688.png

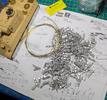
That is my wire "to obtain track pivots", sorry, instructions were teh funnay.

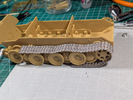
They were really easy to assemble, instructions poorly worded enough that I missed the part about not drilling the hole all the way through. But it proved to not be a problem. Had both loops done in less than 2.25 hours, second one flew by after I built a primitive jig to be able to cut the wires to length faster. I think I have an extra link on each side (not pictured), I was worried about stressing the weak plastic suspension to squeeze then on, they do have some weight to them as well, being metal.

1737070682930.png
 
Last edited:
Fancy, I have some aftermarket tracks in the stash, watching how you handle 'em.
What type, or brand?

I bought some from AFV club for my Nashorn, was underwhelmed.

My Bradley and Merkava came with independent links as well. They went together well and look great, the Merkava were 2-parts per link, but the Bradley were basically snap-togethers.

But the Friul kit is at least one notch above the individual tracks that came in both of those, maybe two. Not cheap, but not crazy either.

The individual tracks that came in this kit (thread topic) were well made (the casting and details) but poorly designed as far as assembly is concerned. The idea was each link was solidly glued to each adjacent one. As I was thinking it was terribad, I found that Meng makes an "add on" type kit to improve both the suspension and the tracks.
 
What type, or brand?
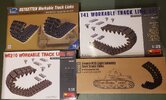
Not knowing any better, having only ever built two tracked vehicles, the universal carrier and the carro M13/40,
I purchased these sets for:

(TL) the Italeri panzer lV, (TR) the Dragon M7 priest,
(BL) the i❤kit M3 Grant, and last, (BR) the Tamiya R35.

17370752355984153959285283778777.jpg

None are the primo metal, perhaps that will be something to consider when I do more armour.
 
Last edited:


Write your reply...
Back
Top