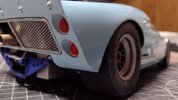
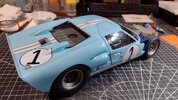
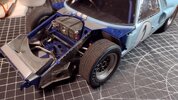
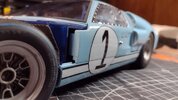
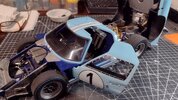
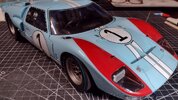
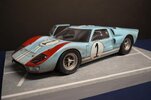
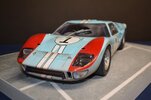
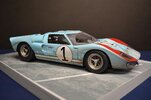
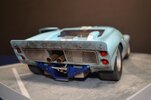
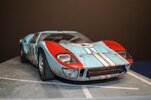
1/12 GT-40 MkII 1966 (Ken Miles version?)

IMG_20240404_152127488_1600x900.jpg

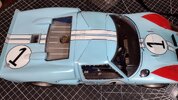
lol this model continues to be my headache, but I am resigned to finishing it and accepting it with all its ill fitting parts and problems.
Admittedly, I am inexperienced in many areas of the build, and its a learning experience.

I'm close to wrapping up the build, with only a few things left to do.
Once I get the final few parts in place, I plan on attempting some race weathering.
I want to dirty up the glass and other surfaces, and airbrush the race track grime and rain residue that I see in old photos.

Heres the latest set of photos for you to peruse at your leisure.
Let me just point out a few things (that may or may not help anyone else building this model).

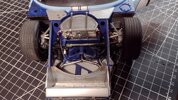
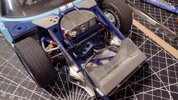
The Brake ducting (front) are flexible tubes that would NOT glue to, and stay in place on the front frame plates.
I had to install a small sleeve inside to support the tube and allow more gluing area.
But this just added to the inflexibility of the tube. It kinks, rather than curves towards the brakes/wheels.
And that interferes with the wheels and suspension.
I tried cutting the tubes shorter but it didnt help, they still are kinked.

Steering...the model has moveable rack and pinion steering. The entire rack is what moves to turn the wheels.
And is is attached by gear teeth to the steering column.
Unfortunately everything is a bit sloppy and not very accurate. The column keeps sliding out of place, allowing the rack to jump up and out of place, allowing the upper control arms (at the wheels) to disconnect, etc etc
And, I had to cut and re-glue the rack and pinion part (shorten it) to fix the excessive toe-out of the wheels!
Do yourself a favour and set the wheels in one position and glue the steering parts in place!

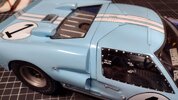
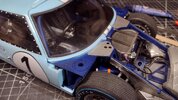
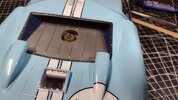
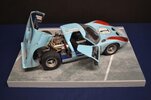
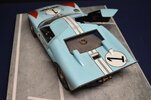
The swivel mounting points for the rear body part (engine cover) are a big issue. I wish I had tried to fit the body earlier on and fine tuned the size of the parts and made a better connection. Its a struggle to get the parts to mate and extreme care is required not to break the swivel pins and dislocate other parts in the process. Even now, I have one side that isn't fully seated and may come dislodged.
Even after the engine cover is attached, it doesn't align well. It doesn't close and seat well.

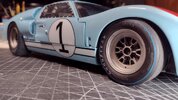
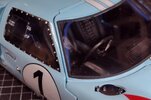
I used a silver paint marker for the side window rivets... what a mess. Rivets of many different sizes and shapes. lol

IMG_20240404_152149748_1600x900.jpg

IMG_20240404_152207558_1600x900.jpg

IMG_20240404_152216397_1600x900.jpg

IMG_20240404_152259204_1600x900.jpg

IMG_20240404_152311586_1600x900.jpg

IMG_20240404_153217515_1600x900.jpg

IMG_20240404_153342516_1600x900.jpg

IMG_20240404_153359582_1600x900.jpg

IMG_20240404_153414088_1600x900.jpg
 
Well I am finally getting to the end of this build...couldn't come fast enough.
While I started out with glee, it has slowly turned to a frown.
What with all the mistakes I've made, and the ill fitting parts.
Not to mention the body colour paint issues and the crappy decals.
lol

IMG_20240415_094242942_1600x900.jpg


The latest problems are the ill fitting front body part that not only doesn't align well,
but will not locate onto the pins that are supposed to allow it to flip up.
In fact, I don't see how it can swivel from the location of those pins...it just doesn't work in my mind.
*I did notice a note in the Instructions to "select open or closed", so did they not intend for it to actually flip?

IMG_20240415_094231108_1600x900.jpg

IMG_20240415_094141422_1600x900.jpg


But the most annoying thing...
I forgot to fit the rear view mirror inside the cabin.
It seemed like an easy thing...grabbed some tweezers, put a little glue on the support, and fit the mirror.
During this I pushed on the roll cage a bit too hard, which snapped from its glued point on the dash, causing me to drop the mirror.
The mirror lodged itself on the opposite side of the cabin, between the roll cage and the windshield.
I had to force it free with tweezers and a stick, at the same time dragging styrene glue along the inside of the windshield!

Since I plan on airbrushing race weathering all over this thing, I will be spraying the windshield too.
Hopefully I can hide some this glue stain.
Can things go any worse?

IMG_20240415_094215942_1600x1061.jpg
 
Calling this one done!!!
I've had enough of it! lol
Not all has gone smoothly or to plan, but

I cannot get the front body to fit well. the gaps are huge and theres a small twist to the part.
And...the hinge mounting is ridiculous.
The too short pins don't line up with the holes in the chassis, and the swivel point seems to be way off.
It just doesn't work.
So I'm leaving it closed.

I spent a few hours airbrushing dirt and crap onto the body as per some photos of the original LeMans car.
Its not perfect but I like how it distracts you from the body imperfections.
And I managed to hide most of that glue stain on the windscreen with a not historically accurate dirt pattern.
(The original photos do not show this pattern, even in heavy rain. Probably because the car was so aerodynamic)

Moving on to my next build. Will it be big Hawker Hurricane? or big Jungle Jim funny car?

eye candy follows
DSC_9979_1600x1060.jpgDSC_9980_1600x1060.jpgDSC_9990_1600x1060.jpgDSC_9991_1600x1060.jpgDSC_9981_1600x1060.jpgDSC_9982_1600x1060.jpgDSC_9983_1600x1060.jpgDSC_9984_1600x1060.jpgDSC_9986_1600x1060.jpgDSC_9987_1600x1060.jpg
 
Last edited:
Despite all the 'issues', you had with this kit - It still turned out to be an extremely good look'n model... I've thought of this one [larger scale and all] - The 1/24th(s) were enough for me... Thanks for sharing. - Ed
 
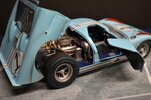
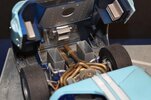
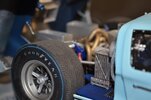
So this is it for the motor...for now.
I like it, and some of it, I don't like...some of the paint work isn't what I had hoped for.

I followed the Assembly book, item by item...and wished I hadn't.
There are a couple of things that would have easier before other things.
Like running the braided oil lines...one of which goes up under the exhaust to the rear of the engine block.
The exhaust fits so tight to the block, there was just no room to put it where it was supposed to go.

And the exhaust, thats another hair pulling adventure.
Fitting those pipes one by one, after they have been painted, trying not damage the paint.
And they don't all line up...I had to heat gun half of them, to stretch them into shape.

Anyway, this is what I've got...I aint' going back now!
There are a few more details I want to add, but plenty of time for that.

View attachment 96868View attachment 96869View attachment 96870View attachment 96871
That is sweet! Nice work
 
Calling this one done!!!
I've had enough of it! lol
Not all has gone smoothly or to plan, but

I cannot get the front body to fit well. the gaps are huge and theres a small twist to the part.
And...the hinge mounting is ridiculous.
The too short pins don't line up with the holes in the chassis, and the swivel point seems to be way off.
It just doesn't work.
So I'm leaving it closed.

I spent a few hours airbrushing dirt and crap onto the body as per some photos of the original LeMans car.
Its not perfect but I like how it distracts you from the body imperfections.
And I managed to hide most of that glue stain on the windscreen with a not historically accurate dirt pattern.
(The original photos do not show this pattern, even in heavy rain. Probably because the car was so aerodynamic)

Moving on to my next build. Will it be big Hawker Hurricane? or big Jungle Jim funny car?

eye candy follows
View attachment 117417View attachment 117418View attachment 117419View attachment 117420View attachment 117421View attachment 117422View attachment 117423View attachment 117424View attachment 117425View attachment 117426
Fantastic build!


Write your reply...

Latest posts

Back
Top