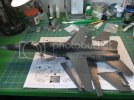
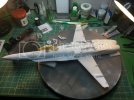
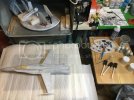
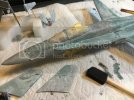
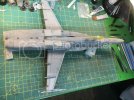
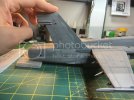
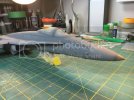
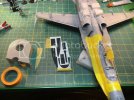
1/32 Kinetic CF-18 Hornet complete!

Re: 1/32 Kinetic CF-18 Hornet

Thanks SMoke for the suggestion. As well, I found this tutorial for straightening plastic parts:
http://www.austinsms.org/Straightening-Warped-Plastic-Parts.php It works...REALLY well. Too well, for my lack of experience. I braced the part against a thick steel ruler. The water bath softened the plastic so much that the profile of the wing caved in, and the plastic bent over a couple lumps on the surface of the wing.

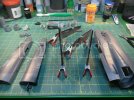
I only tried this on one wing, and decided instead to straighten the plastic on both wings with brute force, square brass channel, and CA glue. Hopefully it holds.
65BCEC87-53A1-4D70-80FE-962AE479B082_zpscytwnwpl.jpg
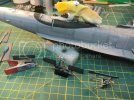
Here's the result of the brass channel bracing: wings are now straight! I'm using some Mr Surfacer to fill in some sink marks I found over the model right now. As well, I have some seamless resin intakes in prep right now.
 
Re: 1/32 Kinetic CF-18 Hornet

Today and tomorrow are intake installation days...
C590F680-2DE0-4E98-9FA7-FB3D9554E6FB_zpsegn7qtyl.jpg
These are Rhino's seamless intakes for the F-18C. They were the only seamless intakes I could find for this thing. ::) These are my first seamless intakes ever. The fan blades at the end of the tubes are very fragile and were actually slightly damaged, either from the molding or in transportation. But way down at the end of the intake there, you would never tell.
The intake fans were sprayed with Tamiya Aluminum XF-16. While I brush-painted this for metal parts all through my youth and teens, I now see the enormous metal flake size it has. But way at the bottom of the intakes, you'll never see it. They got a wash with some Citadel Black/Nil Oil? then a dry brush with their medium and bright silver Chainmail and Mithril. They were CA glued in, but there were a couple small gaps. They were puttied closed with some Ave's Apoxie Sculpt.
The intakes on most F-18's are white, until the last few feet when they get painted the body color of the jet. It's a sharp demarcation so I cut up some 3/8" thick foam pads and glued them inside. The rest of the intake is cast in white resin, so I just added a little enamel weathering streaks down the pipe. You can still see some of it around the intake pipes.

AF777BA4-D0B5-4D17-AAF7-8CF63BA50559_zpsnxyauqoa.jpg
The intake pipe just sort of 'floats' inside the body, so I added some Apoxie Sculpt and wedged it in-between the pipe and the jet's body. This should support the intake and hold it steady.

E9F2BA21-C14A-4D0C-83ED-F4EBB53F82C2_zps72yrjy9v.jpg
I drilled a hole and glued in a piece of brass wire to reinforce the join between the jet body and the resin intake. More Apoxie Sculpt was wedged in around the inside top of the jet intake.

I will be doing more with this side and I'll start with the other side once the Apoxie Sculpt cures in 24 hours.
 
Re: 1/32 Kinetic CF-18 Hornet

Even the best laid plans don't necessarily translate in to an effective execution...

A09CBB9C-A40E-4620-99F1-338AF33D5821_zpsscpu9m1i.jpg
I've been spending the last few days filling in gaps and steps that are appearing all over the model. Big gaps and parts that needed more support (gaps around the intakes, cobra fins alongside the cockpit) got plugged and filled with Ave's Apoxie Sculpt. Small gaps were filled with Tamiya polyester filler. I'm now taming these gaps with some Mr Surfacer 1000.
I will have a couple more rounds of this once the nose cone and canopy parts go on. But before that happens, I need to do final assembly of the stowage area behind the cockpit. Right now, it's about half done.
Why is my nose gear already in? It needs to be installed before the cockpit halves get closed up. Otherwise, it won't fit between the available gap. I imagine that it will go flying off at some point during the build. :p
 
Re: 1/32 Kinetic CF-18 Hornet

That thing is huge! Generally I think that seam work and filling gaps sucks, but it looks like you've got it under control.
 
Re: 1/32 Kinetic CF-18 Hornet

3E9617F4-A207-4B94-AE03-0AE2987A2EFF_zpspaixwwwr.jpg

I am almost ready to spray down some of that Stynylrez primer! I resprayed NATO Black around the cockpit and on the front instrument panel cowling to check the seams around the resin insert behind the cockpit. Looks good! I sprayed the excess around a lot of the seams I was working on around the nose, cobra fins, intakes, etc. They also look good!

I have to do a little more assembly and prep of the gear doors, various other bits, and mask up & attach the canopy. After that, it's time for primer and paint! ;D
 
Re: 1/32 Kinetic CF-18 Hornet

7F2B2C33-3E8B-4F54-828F-9DE3D773F1F7_zps4xnrd5om.jpg
Primer! That is all.

Well, I also gloss-blacked the exhaust parts that will get some sort of Vallejo Metal Color finish.
 
Re: 1/32 Kinetic CF-18 Hornet

Looking great mate! Fancy doing one of these myself, probably in 1/48 though. I have the Hasegawa kit in the stash somewhere....

Chris
 
Re: 1/32 Kinetic CF-18 Hornet

Hey everyone, Lots to show!

I've been slowly grinding away at this, taking my time, and I finally have some real progress...
D70BA91E-B5B4-449F-90E1-A7BB5AB5195B_zps6b3ndkwc.jpg
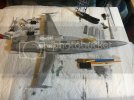
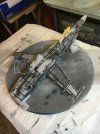
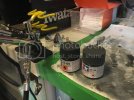
Before pre-shading, paint, and anything that may actually be seen on the model, I wanted to do some pre-weathering? I gathered some cheap paint brushes and foam 'chip' brushes that had been torn up at the tips, some basic gray, black, white and blue-gray Vallejo paints, some water and some flow improver. And of course, the old bird herself, fresh with her final coat of spatter-sanded Stynylrez. I know lots of guys love it, but I'm really having a tough time with it and my crappy Patriot airbrushes.

52CD1BD9-6547-4F22-8252-1A5B9AE229E8_zpsgigxsuoa.jpg
As you can see, I let my inner kindergartener out on my CF-18. I wanted to add some texture and a touch of colour under the base coats of paint it would soon receive.

D4D62497-25C6-4F85-AD25-A0B6F625A064_zpscdswvmde.jpg
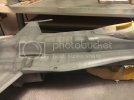
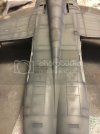
I kept the underside a little neater, but I did randomly paint in the odd panel, just for a little variation. I was using a thin mix of paint, water, and a dot of flow improver. It cut the surface tension of the paint and made an incredibly smooth-coating and slower-drying paint, perfect for this application. As the paint was drying after application, I would sometimes dab at some panels with the foam chip brush to impart a pebbly, different texture. On some panels, I started streaking them instead.

IMG_1165_zpsqpiyjwbo.jpg
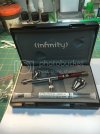
Like I said, I was sort of spinning my wheels over the last week or two, waiting for this bad boy to arrive! ;)

IMG_1166_zpskrhus8mk.jpg
I broke in the new toy with a 0.15 needle, some heavily diluted Tamiya XF-1 black paint, and a freshy cleaned spray booth. Putting graph paper on a plane!

3DA61E98-E0C3-4ADF-915F-7ED6559C976C_zps3idnptzp.jpg
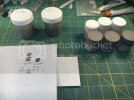
With no ready access to acrylic FS colors, I mixed up my own from Tamiya acrylics and some tried and true CF-18 color recipes from the Canadian IPMS chapters' websites. I made up a big pot of FS-36375 and FS-35237, the light and dark grays on these birds. I can probably use these same paints for an eventual Canadian C-130 in 1/72, a Canadian Sea King in 1/48, probably a USAF F-16, and perhaps even a scale model prison! :p

620DD1A9-8D09-45FA-896E-6126F9D5AF51_zpsbark3zrh.jpg
My new Infinity has both the 0.4 needle set and a 0.15 set. My Evolution will have a 0.2 set, which ought to be fine for everyday modelling when it arrives. Until then, my Patriot will spray the light gray just fine.

Let me know if I went too far an killed off too much of the pre-shading, or if I should go a little further. I am currently rediscovering my love for modern jet aircraft scale modeling, and I don't have much experience with this sort of thing.
 
Re: 1/32 Kinetic CF-18 Hornet

I just want to send a shout-out to Scott at Elm City Hobbies. I was looking to start with a nice Evolution CR Plus 2-in-1 airbrush, since it has the pinch tips, the paint cup lids and the triple-chromed easy to clean body for not too much more than a standard Evo 2-in-1.
Scott didn't have the CR Plus in stock, but he had just got in the Infinity CR Plus 2 in 1. It went out the door within a day or two of its arrival in New Brunswick and it arrived here this afternoon!
I searched high and low for a better price on Harder & Steenbeck airbrushes, but Scott's prices are impossible to beat, especially for us Canadians and our current low-ball Dollar.
 
Re: 1/32 Kinetic CF-18 Hornet

4CE42038-C1C4-4F94-8CE3-B02884D65794_zps6dcrhiso.jpg
I sprayed the top layer of paint. I like the demarcation line I got! Fuzzy and wavy, just like the real thing! The paint color difference is nice and subtle too.

CF8F1BD1-CE86-41E0-8B08-081A6AA71E4B_zpsce3b4v67.jpg
I just need to do a little touch-up around the nose cone and gun ports.
 
Re: 1/32 Kinetic CF-18 Hornet

Preshade looks great - Freakin HUGE jet man. Nice.
 
Re: 1/32 Kinetic CF-18 Hornet

Thanks guys for the comments and compliments! :D

If my aviation history is right, us Canucks or Colonials are known for maple syrup, Mounties, Poutine, and the first 'false canopy' markings on our jets:
EABACE1E-E34A-4E65-A798-879F49D29691_zpswoblud1t.jpg
The kit decals thankfully are not all black, but they have a far too uniform dark gray color. To make the paint masks from the decals, I laid them on top of some tape, loaded a fresh new scalpel blade, and cut the necessary curves into the tape through the decal sheet. The curved cutout was then applied to the model.

E85A54E4-8958-430B-86DA-8E45F1264E72_zps9iyh5hmk.jpg
I used some NATO Black as the base color, shot without dilution, through my Evo with a 0.2 needle at around 25 PSI. Subesquent bleaching layers had more and more Dark Gray added to the color cup. I did the post-shading since you would never ever see any pre-shading through the NATO Black.

3093C3DE-B3A8-4B34-A99C-C8CC7824F437_zpsqccniuuy.jpg
The color looks a little un-natural right now, against the glossed paint work. I'm currently putting a couple coats of Future on right now to protect all of my paint in the next step: salt weathering!
 
Re: 1/32 Kinetic CF-18 Hornet

Thanks for all the kind words on my build so far, everyone! My update:
0048BBF9-83D2-4D29-A020-72F5E41E77AC_zpsep39c9ci.jpg
1F8DBD4F-5072-46C4-BCE9-E0F631A62D65_zpsuetxddib.jpg
I think 409 Squadron took delivery of this jet from McDonnell-Douglas way back in 1984. That puts this jet at over 30 years old! Our new government is now going to shelf our deal we had for some future replacement F-35 jets, so we'll be using these for at least another 10 years, I think.
Bottom line: they are old, beat up, and covered in patchwork repair jobs. I used some pre-shading black to create some patchwork or corrosion repair spots, then mostly over-coated it with the body color of the jet.

2A10CDDC-61E9-4391-9A26-5A88CFAB5531_zpst4ngwguj.jpg
Our birds do have walkways around the cobra-neck fins around the cockpit, but I think they are painted the body color. You can only see them if they are dirty. I masked off the appropriate area of the fins, then stippled on some Mr Surfacer. Warning: Mr Surfacer eats into vinyl curve masking tape, and will leak under the tape. It happened to me here, but it didn't leak under any other Tamiya or washi tape I laid down.

3ABF86BF-67B1-4BC1-915C-DF6EC847F65C_zpspzrxc1kp.jpgAfter a couple coats of Future to seal all the paintwork in, I moved onto decaling the plane. I'l be at this for the rest of the week, I think.

THEN I'll do my salt wash! :p
 
Re: 1/32 Kinetic CF-18 Hornet

Rest of the week, indeed! And then some! :p But, she's done decaling. I put on two coats of Future over the last 48 hours to seal everything in before I do any weathering from this stage forward:
73E538C3-6E59-4C07-8F4A-F1E60A6094F5_zpsffpstzix.jpg
DFB613FE-DC46-4932-9FD4-89F8C25EFF60_zpsptjgnz0g.jpg
1F205EC3-11DB-45CE-A2A0-63F88E07041A_zpsh1tqfjla.jpg
I'll do some post-shading to help the decals blend into the paint a little better this weekend.
The two wingtip Sidewinders also got their color stripes painted tonight. I'll move onto painting the Paveway II bombs this weekend, and perhaps detail & decal up the Sidewinders.
 
Re: 1/32 Kinetic CF-18 Hornet


Pretty impressive plane you have there ;D

That cockpit is spectacular !
 
Re: 1/32 Kinetic CF-18 Hornet

urumomo said:
Pretty impressive plane you have there ;D

That cockpit is spectacular !

Meh, that's mostly the Aires resin cockpit, I doubt I had much to do with that... :p

1784F1B6-9F46-4132-93F7-FF2B6854BD98_zpsydvmtvpo.jpg
Let it snow, let it snow, let it snow! :p

Actually, I just finished drying off the water on this. I sprayed a liberal amount of water from a squirt bottle, then used a pepper mill to grind up some rock salt all over the model. This was then dried with a blowdryer. Once the salt was dried, I did some further bleaching of panels with a thin mix of the top colour + some white. I also mixed up a grimy black-brown color to accent some panel lines and the repair work seen all over the bird.

F9AFC0D0-6A2D-495A-B040-81EFA6CC6955_zpskw7ohkol.jpg
After the paint dried, i took the model to the kitchen sink and gently wet and wiped off the salt using a wide paint brush and plenty of water. I patted down the panels dry with some paper towel. This pic has a lot of reflective sheen ,and it really highlights the textures where the paint took hold and the salt washed the other paint away.

DB8C2CC9-B496-4061-BEE3-9D441A6C2C0D_zpsnogwywz1.jpg
Tomorrow night, I'll do the same with the plane's underside, the fuel tanks, flap undersides, gear doors, and the bomb racks.
 
Back
Top