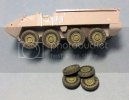
1/35 M1130 TACP Stryker & 1/72 M1126 ICV Stryker with slat armor

Bulldog 09

New Member
Joined
Aug 14, 2012
Messages
28
Hello all,

Well let me first start off by saying I am mainly an aircraft and helicopter builder so armor is not my strong point. With that said here are my latest builds. The TACP Stryker is for a local museum that contacted me and the ICV Stryker is for me. Both builds will have Eduards PE utilized and the 72nd project will have some resin. So without further ramblings here is the progress so far.

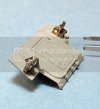
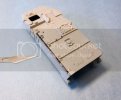
1/35 TACP Stryker. Soldered together the Eduards suspension pieces and installed them, installed the lower forward armor plates, and started work on the forward and rear differentials.
IMG_0066_zpsa4f3faa3.jpg

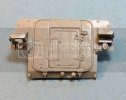
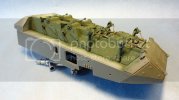
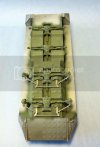
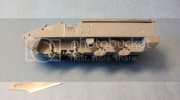
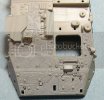
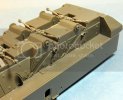
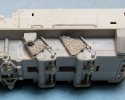
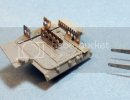
1/72 ICV Stryker. Added perforated suspension covers and pinner compartment hinge. Soldered together the fuel can racks, along with their associated side lights. Soldered together the rear troop access door slat armor brackets, plates, and bracing.
IMG_0072_zps5fd5c66d.jpg

IMG_0081_zpsee88c55c.jpg

IMG_0086_zps9aa5beb7.jpg

IMG_0089_zps30632358.jpg

I am presently working on the left side armor plate brackets for 72nd kit and finishing up the clean up of the suspension components on the 35th kit. I will try and get some more photos posted by next weekend as the work progresses. PLEASE FEEL FREE TO GIVE ME YOUR FEEDBACK, COMMENTS, CORRECTIONS , AND CONCERNS. Again armor is not my strong point so any help will be much appreciated. Thanks for looking and have a great day.

Dave Fassett
 
Thank you Wyoroy. I use a Weller model W60P soldering iron, Oatey 30011 No.5 solder paste/flux, and 60/40 rosin-core solder to do all of my soldering work. It is really easy just takes patience and practice, but it is well worth it.

Well here is a small update. Work, family, and me working on my degree's have left me little time this week to work on my Stykers. I did manage to get some paint laid down on the under side of the 1/35 kit. I have yet to add the filter, wash, and mud so it looks a little "bright" to me, what do you all think, any recommendations? I think that the filter and wash will tone down the color and add some depth.

IMG_0100_zpsa6519807.jpg

IMG_0102_zps9d7e6dec.jpg

IMG_0110_zpsfb7ec65e.jpg

Now for the 1/72 kit. Work continues applying PE to the left side and rear troop door. All of the left side molded on detail has been removed and holes filled. The upper armor mounting bracket was finished and installed along with some of the slat armor bracing plates. A grab handle and door latch handle were added to the rear troop door.

IMG_0134_zpsb5ac6dbc.jpg

IMG_0129_zpsa1572e1a.jpg

IMG_0122_zpsd866e4d5.jpg

I have started work on the lower armor mounting bracket and the assembly, painting, and weathering of the wheels and tires for the 72nd kit. I am still working on the lower suspension for the 35th kit. I should have this all done and primed by this weekend. I will try and post some more pictures this weekend, time permitting. PLEASE FEEL FREE TO GIVE ME YOUR FEEDBACK, COMMENTS, CORRECTIONS , AND CONCERNS. Again armor is not my strong point so any help will be much appreciated. Thanks for looking and have a great day.

Dave Fassett
 
looking forward to seeing this ive got the stryker with the slat in my stash..doing a great job so far
 
Thanks for the information. From your work and that of SMA member Tbadger, solder seems to be the way to go. I would thing it holds better than using CA.

Great work.
 
I suggest solder for as many joints as possible. It's changed my tactics with PE for the better....just make sure to rinse your parts in lacquer thinner and sand them clean. If not, paint will just peel off later
 
wyoroy said:
Thanks for the information. From your work and that of SMA member Tbadger, solder seems to be the way to go. I would thing it holds better than using CA.

Great work.

You are welcome Sir. I must say that I do still use CA on PE, but only on items I know will be out of "harms way" if you will. Now if there is a possibility that the part can be snagged, bumped, or handled a lot I will solder it.

Dave Fassett
 
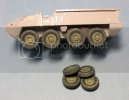
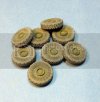
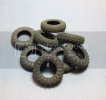
Morning to all. I need y'all (as we say here in Texas) to give me some honest feedback. I was able to get the tires/wheels together and weathered on the 1/72 Stryker. This is where I need your feedback, do you think the weathering is just right, not enough, or to much. The 72nd build is going to portray an in theater (Iraq) vehicle during the summer months (which is very dry, and HOT). So give me what you got, thanks in advance.

IMG_0148_zpsbd677599.jpg

Dave Fassett
 
Bulldog 09 said:
Morning to all. I need y'all (as we say here in Texas) to give me some honest feedback. I was able to get the tires/wheels together and weathered on the 1/72 Stryker. This is where I need your feedback, do you think the weathering is just right, not enough, or to much. The 72nd build is going to portray an in theater (Iraq) vehicle during the summer months (which is very dry, and HOT). So give me what you got, thanks in advance.

IMG_0148_zpsbd677599.jpg

Dave Fassett

The weathering on the tires looks good to me, other than the dust looks to be a little on the green side, would think is should be more sandy color seeing since it is supposed to be Iraq. However that could be how the picture turned out and/or my screen.
 
OK, take two. Thank you all for the feedback and comments. After looking at several pictures of Strykers in the time frame I am depicting, and hearing from a couple of armor guys, I decided I needed to redo the weathering. So here we go, what do y'all think? Do we have a winner?

IMG_0150_zps6dbc074c.jpg

Dave Fassett
 
They look much better, I was gonna say they looked a bit green but you remedied it with a quickness. Great Work
 
wow this does not look like a 1/72 kit. its Fantastic so far
 
Look better now. Glad I wasn't the only one seeing green, least I know it wasn't my eyes playing tricks on me.

I too didn't think it was 1/72 until I saw a shot with the X-acto blade....and I was like WTF? That is much smaller than 1/35.
 
Looking cool so far. I've been wanting to do a Stryker as well. There are lots of kits to choose from, what is a good 1/35 scale kit?

The tires look great and damn, that 1/72 is small heh
 
Cave_Dweller said:
Looking cool so far. I've been wanting to do a Stryker as well. There are lots of kits to choose from, what is a good 1/35 scale kit?

The tires look great and Gee whiz, that 1/72 is small heh

AFV Club, the only way to go. While I do have a couple of the Trumpeter ones, the AFV Club kits are much better!
 
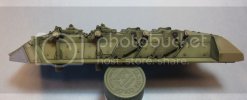
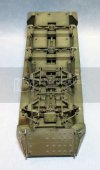
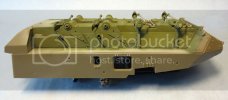
Thank you everyone for the great feedback. Ok,its been a couple of weeks since my last update, so I figured I would post some more progress. Work, family, and working on my duel degrees have left me with little time the last couple of weeks, but I did manage to get some building in. I was able to finish, paint, and weather the suspension area of the TACP Stryker. To me the color looks a lot better after the washes where applied (pictured), and darkened up some when I coated it with Future (not pictured). The pinner compartment in the third photo in just set in place for now, I will attach it after the upper and lower hulls are glued together. I was also able to get the tires weathered and ready for the wheel, which is next on my agenda. As for the 72nd Stryker, I started removing the detail on the right side and adding non-skid to the upper surface. My goal this week and over spring break is to catch up on the small Strker and start on the top side of the 35th Stryker. More pictures to come in the next week or so. PLEASE FEEL FREE TO GIVE ME YOUR FEEDBACK, COMMENTS, CORRECTIONS , AND CONCERNS. Again armor is not my strong point so any help will be much appreciated. Thanks for looking and have a great day.

IMG_0172_zps7577ee99.jpg

IMG_0176_zps3b2593ea.jpg

IMG_0180_zps0588f7e3.jpg

IMG_0182_zps5b550cbf.jpg

IMG_0187_zpsccad110a.jpg

Dave Fassett
 

Latest posts

Back
Top