1/48 Academy CH-46 A/D

DavidsScaleModels

Well-Known Member
Joined
Sep 16, 2022
Messages
133
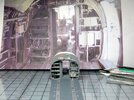
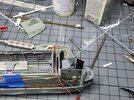
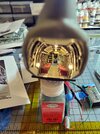
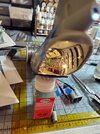
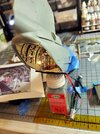
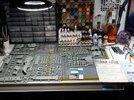
This is the first of two special builds. In July of this year the International Plastic Modelers Society (IPMS) is holding their National Convention in Madison, Wisconsin. This is only a couple of hour drive from my home. I am building two different projects and depending on their outcome I will be taking one or both to the convention. So for the first build I am using Academy's 1/48 CH-46A/D - U.S. Marines –Vietnam kit. The scheme will be from HMM-165 also known as the "White Knights". They were based at Chu Lai Combat Base in central Vietnam from 1966 thru 1968 then transferred to the USS Valley Forge LPH-8. I will be super detailing the interior using scratch building techniques and adding LED's/Fiber optics to illuminate the aircraft. The Eduard cockpit photo etch set will also be used and will be modified for illuminating the instrument panel. I will be having it displayed on a base representing a typical air field from the Vietnam War.

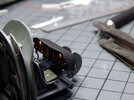
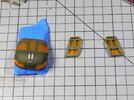
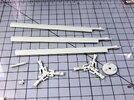
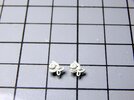
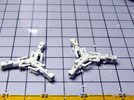
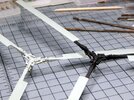
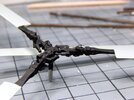
Starting off the build I first worked on the rotors. I opened up the holes on the parts of the hubs. With the hubs assembled I filled in the mold marks with putty and then added the 30 gauge wire for the hydraulic lines and some photo etch parts for the mounts. The hub was painted flat black as well as the underside of the blades. The topside was then painted olive drab. The reference photos showed red seals for the joint where the rotor blades pitch. I used red paint to represent these. I finished off the rotors with decals from the kit.

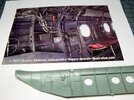
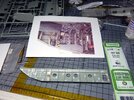
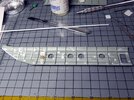
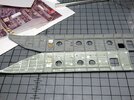
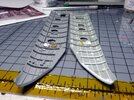
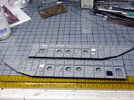
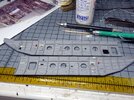
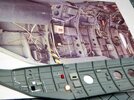
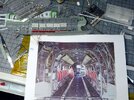
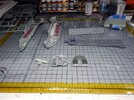
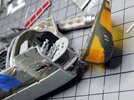
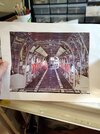
I set aside the rotors and am now starting on the interior walls of the crew/cargo area. There are quite a few mold marks on these that needed to be filled before I can start detailing. I also compared the walls with numerous reference photos. There are quite a few things that need to be relocated and added. As soon as the putty is cured I will begin the correction and adding details to the port wall first.


You can see the start of this project in the build log at: https://davidsscalemodels.com/build-log/1-48-ch-46a-d-helicopter/
DSCN9660.jpg


DSCN9662.jpg


DSCN9664.jpg


DSCN9669.jpg


DSCN9673.jpg


DSCN9674.jpg


DSCN9675.jpg


DSCN9686.jpg


DSCN9687.jpg


DSCN9677.jpg


DSCN9678.jpg
 
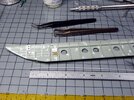
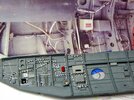
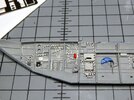
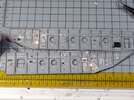
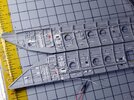
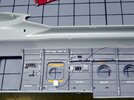
The second week of the CH-46 was spent working on the interior walls. Starting with the port side I filled all the mold marks with putty. Then I cut out the incorrect details and added the correct ones. For some of the avionics that were correct these were molded too thin so I added some sheet styrene to build them up. The first three ribs of the frame were also too small. I used some 1.0 mm square rods to correct these.

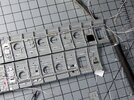
I then used .05mm round rods to add the spars between the ribs. Some of the details of the avionics were done with spare photo etch parts. I drilled some thru-holes in the ribs for the hardlines and cables and painted the interior with FS36231 (Dark Gull Grey) and the avionics was painted gull grey, black, and white. The molded pipes were painted silver.

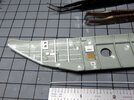
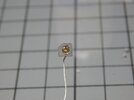
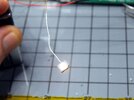
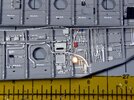
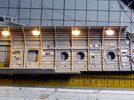
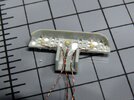
On each side just before the rear door are two cargo lights. I cut out two pieces of sheet styrene and made the lens with clear resin. I used a Pico sized LED on the backside and attached it with acrylic gel. The wiring will join up with the overhead lights when I get to the overhead.

I am currently adding all the hardlines onto the port side. I am working on each section at a time. I am using 28 gauge solid wire for these. Once all the hardlines are placed I will be using 30 gauge white wire and some stranded wire for all the cabling. I will also be making some decals for the avionics ID plates that go into the equipment as well.

You can see this build from the start in the build log at: https://davidsscalemodels.com/build-log/1-48-ch-46a-d-helicopter/


DSCN9679.jpg


DSCN9683.jpg


DSCN9684.jpg


DSCN9689.jpg


DSCN9692.jpg


DSCN9695.jpg


DSCN9696.jpg


DSCN9698.jpg


DSCN9702.jpg


DSCN9705.jpg
 
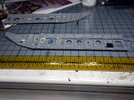
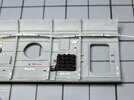
I spent the third week of the CH-46A/D working on the port wall. I am using 30 gauge wire for the cables, 28 gauge bare wire for all the hard lines, and 38 gauge bare wire for the smaller wires. The first thing I did was amount the port side cargo light. For all the lighting I will be running the wires up to the spine. They will then run in-between the forward bulkheads to the bottom side of the fuselage. Ultimately the two power wires will run thru the landing gear to the underside of the display base.

I continued adding details using the reference photos. All of the cables ties were painted on and I also detailed painted some of the equipment. With all the details added I then applied the custom identification plates on to the few avionics and the kit decals to the wall. I then test fitted the wall into the fuselage. One modification I needed to do was to make is for the port side formation light. This is going to be made with a 0.75mm fiber optic line and illuminated with a small light box housing a pico sized LED. I drilled a hole thru the wall and the outer fuselage. (see red arrow on last photo) I will need to wait until I install the wall before adding the light box. This is because the fiber optic line will need to be trimmed from the inside and then the light box will need to be aligned correctly over fiber optic.

I am now working on the starboard side wall. Once this is done I will be detailing the interior roof and then onto the cockpit which will feature an illuminated instrument panel. I need to see how the lighting will affect the order of assembly. I will need to run the wiring from the tail and the belly lighting before closing up the fuselage.

You can see this build from the start in the build log at: https://davidsscalemodels.com/build-log/1-48-ch-46a-d-helicopter/


DSCN9708.jpg


DSCN9709.jpg


DSCN9715.jpg


DSCN9717.jpg


DSCN9722.jpg


DSCN9724.jpg
 
The fourth week of the Academy 1/48 Academy CH-46A/D project

The fourth week of the CH-46A/D project was spent detailing the starboard wall. I used the same items that were used on the port side. I modified this side for the fuselage formation light as well. I performed a light check on the cargo lights. The view from the rear looks very good when compared to the reference photos.

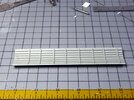
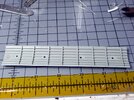
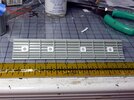
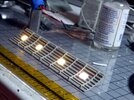
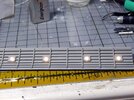
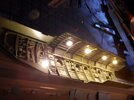
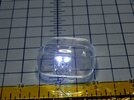
I then started on the roof. Using some 2.5mm sheet styrene I made four housings and made clear lenses. I then mounted Pico sized warm white LED's for each of the lights. I spaced the light housings and modified the roof for them to fit between the ribs. I did some light checks and it looks like they are spaced to illuminate the cargo area correctly. I still need to paint the light housings so just the round lens shows. I am now working on detailing the roof and should be starting the cockpit soon.

You can see this build from the start in the build log at: https://davidsscalemodels.com/build-log/1-48-ch-46a-d-helicopter/


DSCN9734.jpg


DSCN9735.jpg


DSCN9741.jpg


DSCN9742.jpg


DSCN9744.jpg


DSCN9745.jpg


DSCN9746.jpg


DSCN9749.jpg


DSCN9750.jpg
 
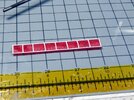
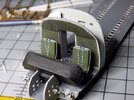
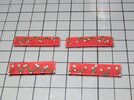
Here I am at the fifth week of the CH-46D build and am still working on the cargo/crew area. To begin with I painted and mounted the overhead lights. I ten ran various wires and lines on the roof. Inside the cargo/crew area are upper panels with what look like moving blankets and folding seats for the crew. The kit crew seats look a little small compared to the reference photo so I opted to build my own. I started with using 0.75mm styrene rods and made the seat frame. I then used some nylon red cloth and created the seats. I am thinking of having one side folded up and the other side folded down or both sides down.

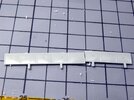
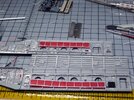
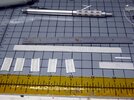
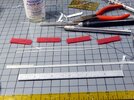
Next for the upper panels I have some very thin "L" channel styrene strips. I used these as the upper and lower supports for the upper panels. For the blanket area I used some 3M glass cloth tape. The nice thing about having these panels mounted is they will aid in hiding the wires for the rear door and tail lights which need to be routed forward and then down.

I then finally started on the floor. I panted it gunship grey to simulate the non-skid surface. The roller tracks were then taped off and painted. I sanded down the cockpit center console and added the photo etch panel. I still need to add the various levers and details but will wait until I actually start doing the cockpit so they won't accidently get lost. With all these details in the cargo/crew area I still need to figure out how the order to get all these mounted inside and rout all the wiring. I am now working on the bulkheads between the cockpit and the cargo/crew area. There will be a channel so all the LED wiring can be routed to the bottom of the fuselage. Then I can start working on illuminating the instrument panel and finishing off the cockpit.

You can see this build from the start in the build log at: https://davidsscalemodels.com/build-log/1-48-ch-46a-d-helicopter/


DSCN9753.jpg


DSCN9758.jpg


DSCN9761.jpg


DSCN9763.jpg


DSCN9765.jpg


DSCN9770.jpg


DSCN9773.jpg


DSCN9774.jpg


DSCN9775.jpg


DSCN9780.jpg
 
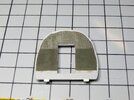
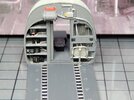
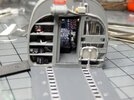
For the sixth week of the CH-46 project I began detailing the bulkheads between the crew/cargo area and the cockpit. Starting with the cargo area bulkhead I cut open the panels to replicate the ref photos. I used some scrap photo etch pieces to create the panels. I then adding the cables for the avionics on the left side and ran the cables and hydraulic lines on the right side. Just to note the wiring for the upper LED's will route thru the right side as well once I start hooking all the wires together. In the reference photo there is a folding jump seat by the doorway. I scratch built the seat frame, mount, and support rods out of styrene tubing and then used the 3M glass tape for the seat cloth. Finally, I made a decal for the warning sign on the left. For the cockpit bulkhead I used the 3M glass tape on the panel which was then painted with green drab and then olive drab to give it some color depth. The panels were then mounted to the floor.

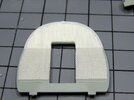
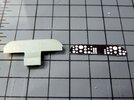
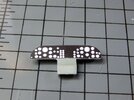
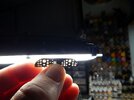
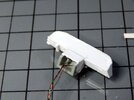
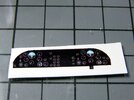
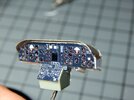
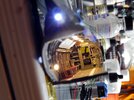
Next I began the work on the cockpit instrument. I sanded down the face and removed the shroud. I then needed to modify the backside by removing the supports just behind the panel so I can fit the three LED's and drill out the holes for the gauges. I then scanned the Eduard panels for the gauges and instrument panel into my PC and made a guide for drilling the holes and also make a decal for the gauge faces. The guide for the holes was then taped to the face of the kit instrument panel and I used drills that matched the gauge sizes. With the holes drilled I covered the face of the instrument panel with a 0.001 sheet of white styrene. The photo etch instrument panel was held onto the panel face and checked to make sure the holes lined up with the panel. To keep the gauges from having bright spots due to the LED's I mounted them facing to the rear. The rear panel I will be making being white will diffuse the light so all the gauges have the same brightness once the instrument panel is finished.

I am now working on finishing the instrument panel then I will finish off the cockpit with the detailed seats, control sticks, and pedals. I then need to make the mount on the nose of the cockpit to hold the twin landing lights that shine thru the nose.


You can see more photos and details of this build from the start in the build log at: https://davidsscalemodels.com/build-log/1-48-ch-46a-d-helicopter/


DSCN9783.jpg


DSCN9784.jpg


DSCN9785.jpg


DSCN9787.jpg


DSCN9792.jpg


DSCN9795.jpg


DSCN9796.jpg


DSCN9798.jpg


DSCN9800.jpg


DSCN9801.jpg
 
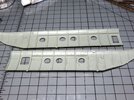
Arriving at the seventh week of this CH-46 project I worked on the cockpit. I continued on the instrument panel. I used this sheet styrene to make a light box and then used the photo etch hood on the top. I then used the decal of the instrument faces on the front of the panel. The photo etch face was then mounted on top of the decal. I finished the instrument panel with two coats of flat black paint and verified I had no light leaks.

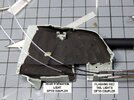
The pilot and co-pilot seats were assembled and detailed with photo etch seat belts. The control sticks, seats and instrument panel were then mounted to the cockpit. During the various steps where the instrument panel was drying I was able to mount the interior walls to the inside of the fuselage. For the side navigation lights I made two opto-couplers to hold the LED's. I used a 0.75mm fiber optic line and used a flame to slightly melt the one end. This melted end is the lens for the side navigation light. It was fed thru the fuselage and then trimmed flush on the inside. The opto-coupler was then mounted with the LED aligned to the fiber optic. The wiring for the LED's will be painted and routed to the forward bulkhead to join the rest of the wiring.

One of the things that are beneficial is when I post these weekly updates. It allows others to see how I do things but it also allows others to provide insight on details I may have missed or gotten wrong. As an example I was informed by a fellow modeler that the crew seats were not one long bench but rather they are in four seat sections. I searched and found a reference photo that shows this as well as the seat belts. I then modified the seats into sections and using the glass cloth tape I made the seat belts and using some spare photo etch pieces I made the buckles and the mounts for them.

Moving forward I have one more detail to add the interior, the machine gun mounts. I looked over the kit guns and these lacked a lot of details. I decided to use aftermarket items to replace these. I ordered a set of Royal Model .50 caliber photo etch ammo belts and the Eduard resin waist guns. These should be delivered this coming week. I will have one aimed outside the port side and the starboard side will be in the stored position with the cover over it. While I am waiting for these to be delivered I am going to start work on the tail rotor section. The tail section has two red flashing lights on the top and a white navigation light out the back. These will be done with LED opto-couplers and fiber optics.

You can see more photos and details of this build from the start in the build log at: https://davidsscalemodels.com/build-log/1-48-ch-46a-d-helicopter/


DSCN9813.jpg


DSCN9813A.jpg


DSCN9815.jpg


DSCN9819.jpg


DSCN9822.jpg


DSCN9823.jpg


DSCN9831B.jpg


DSCN9832.jpg


DSCN9833.jpg


DSCN9834.jpg


DSCN9835.jpg
 
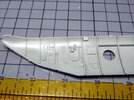
Arriving at the seventh week of this CH-46 project I worked on the cockpit. I continued on the instrument panel. I used this sheet styrene to make a light box and then used the photo etch hood on the top. I then used the decal of the instrument faces on the front of the panel. The photo etch face was then mounted on top of the decal. I finished the instrument panel with two coats of flat black paint and verified I had no light leaks.

The pilot and co-pilot seats were assembled and detailed with photo etch seat belts. The control sticks, seats and instrument panel were then mounted to the cockpit. During the various steps where the instrument panel was drying I was able to mount the interior walls to the inside of the fuselage. For the side navigation lights I made two opto-couplers to hold the LED's. I used a 0.75mm fiber optic line and used a flame to slightly melt the one end. This melted end is the lens for the side navigation light. It was fed thru the fuselage and then trimmed flush on the inside. The opto-coupler was then mounted with the LED aligned to the fiber optic. The wiring for the LED's will be painted and routed to the forward bulkhead to join the rest of the wiring.

One of the things that are beneficial is when I post these weekly updates. It allows others to see how I do things but it also allows others to provide insight on details I may have missed or gotten wrong. As an example I was informed by a fellow modeler that the crew seats were not one long bench but rather they are in four seat sections. I searched and found a reference photo that shows this as well as the seat belts. I then modified the seats into sections and using the glass cloth tape I made the seat belts and using some spare photo etch pieces I made the buckles and the mounts for them.

Moving forward I have one more detail to add the interior, the machine gun mounts. I looked over the kit guns and these lacked a lot of details. I decided to use aftermarket items to replace these. I ordered a set of Royal Model .50 caliber photo etch ammo belts and the Eduard resin waist guns. These should be delivered this coming week. I will have one aimed outside the port side and the starboard side will be in the stored position with the cover over it. While I am waiting for these to be delivered I am going to start work on the tail rotor section. The tail section has two red flashing lights on the top and a white navigation light out the back. These will be done with LED opto-couplers and fiber optics.

You can see more photos and details of this build from the start in the build log at: https://davidsscalemodels.com/build-log/1-48-ch-46a-d-helicopter/


View attachment 115633


View attachment 115634


View attachment 115635


View attachment 115636


View attachment 115637


View attachment 115638


View attachment 115639


View attachment 115640


View attachment 115641


View attachment 115642


View attachment 115643
The details are fantastic. Pantherman
 
I've spent many years crawling all over and working on the civilian version of the CH-46. Looking forward to following your progress!!
 
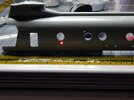
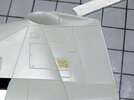
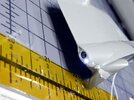
Eight weeks into the CH-46D and I am still working on the interior details. The guns are due in this week. While waiting for delivery I started modifying the tail. I opened up the vent on the port side and added a photo etch screen. The inside was then painted flat black to block and light from showing thru. The opto-couplers were mounted to the bottom and I used 0.75mm fiber optics to run to the light points. For the navigation light I melted the tip of the fiber optic to replicate the navigation light. The upper flashing lights will go to the lenses supplied in the kit later after the fuselage is painted. Next I made the twin lights in the nose using two pico sized bright white LED's. I used kapton tape to mask the nose and the cockpit doors so these can be painted later as well.

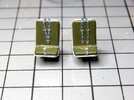
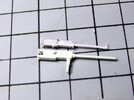
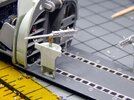
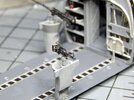
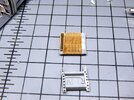
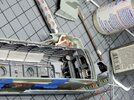
The guns and ammo belts arrived! The resin guns look way better and their size is more accurate for the scale. I used some scrap photo etch to make the axial mount for the guns. The rear gun sights looked a little thick so I replaced these with photo etch versions. The gun mounts were then cleaned up and painted. I found a few more reference photos that detailed the area around the gun mounts. One thing I noticed was there are a few fire extinguishers near them. I am going to scratch build these. The kit instructions have a very good detail photo of this and the kit section was really bad. The stairs are very thick and the rail was a thick wall. I tried to clean this up and modify it but there was just way too much to modify. I decided to scratch build it from photo etch and styrene scraps. I am hoping to start on the fuselage assembly later this week.

You can see more photos and details of this build from the start in the build log at: https://davidsscalemodels.com/build-log/1-48-ch-46a-d-helicopter/


DSCN9838.jpg


DSCN9840.jpg


DSCN9842.jpg


DSCN9845.jpg


DSCN9857.jpg


DSCN9862.jpg


DSCN9867.jpg


DSCN9868.jpg


DSCN9874.jpg
 
Fantastic details
Those upgrades and scratched [arts make a world of difference
 
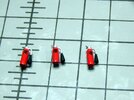
The ninth week is my "challenge week" on the CH-46A/D! I call it challenge week because trying to put the fuselage together with all the wiring routed requires all the subassemblies to be put together at the same time. To start with I scratch built the fire extinguishers for the cabin using styrene rods and some solder. Two of these were mounted near each of the gun mounts. The third one will mount near the rear door later.

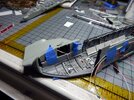
I then began routing the wiring. Starting with the tail the wiring was routed thru the upper panels into the forward bulk head with the other wiring. I used acrylic gel to hold down the wires so they would not interfere with the forward rotor shaft. They were then routed over the bulk head and between the bulk heads between cockpit and cabin. All of this wiring was routed thru the floor and tied in with the wiring for the instrument panel and lower flashing navigation light. The nose light wiring was then run under the cockpit floor and all of the wires were tied together where the rear landing gear assembly will be mounted. I then performed a light check to make sure all the lights were wired in.

The starboard side wires were also routed the same way. I then performed a light check to make sure all the lights were wired in. The fuselage halves were then carefully aligned and were glued together in sections making sure not to pinch any wires. With the halves glued together I used some long tweezers to mount the starboard side seats and the upper panels. The wiring was all dressed up and a second light check was done. The lighting effects are exactly how I wanted them to look.

I need to clean up the fuselage seams and then assemble and install the rear landing gear assembly. The wiring will be routed thru each of the rear landing gear and tires so they can pass thru the base. There are still a few more details to add the fuselage as well and then I can start with the base coat of paint.


You can see more photos and details of this build from the start in the build log at: https://davidsscalemodels.com/build-log/1-48-ch-46a-d-helicopter/


DSCN9876.jpg


DSCN9877.jpg


DSCN9879.jpg


DSCN9881.jpg


DSCN9883.jpg


DSCN9885.jpg


DSCN9889A.jpg


DSCN9893B.jpg


DSCN9893C.jpg


DSCN9893D.jpg
 
The ninth week is my "challenge week" on the CH-46A/D! I call it challenge week because trying to put the fuselage together with all the wiring routed requires all the subassemblies to be put together at the same time. To start with I scratch built the fire extinguishers for the cabin using styrene rods and some solder. Two of these were mounted near each of the gun mounts. The third one will mount near the rear door later.

I then began routing the wiring. Starting with the tail the wiring was routed thru the upper panels into the forward bulk head with the other wiring. I used acrylic gel to hold down the wires so they would not interfere with the forward rotor shaft. They were then routed over the bulk head and between the bulk heads between cockpit and cabin. All of this wiring was routed thru the floor and tied in with the wiring for the instrument panel and lower flashing navigation light. The nose light wiring was then run under the cockpit floor and all of the wires were tied together where the rear landing gear assembly will be mounted. I then performed a light check to make sure all the lights were wired in.

The starboard side wires were also routed the same way. I then performed a light check to make sure all the lights were wired in. The fuselage halves were then carefully aligned and were glued together in sections making sure not to pinch any wires. With the halves glued together I used some long tweezers to mount the starboard side seats and the upper panels. The wiring was all dressed up and a second light check was done. The lighting effects are exactly how I wanted them to look.

I need to clean up the fuselage seams and then assemble and install the rear landing gear assembly. The wiring will be routed thru each of the rear landing gear and tires so they can pass thru the base. There are still a few more details to add the fuselage as well and then I can start with the base coat of paint.


You can see more photos and details of this build from the start in the build log at: https://davidsscalemodels.com/build-log/1-48-ch-46a-d-helicopter/


View attachment 116077


View attachment 116078


View attachment 116079


View attachment 116080


View attachment 116081


View attachment 116082


View attachment 116083


View attachment 116084


View attachment 116085


View attachment 116086
Speechless. The details are incredible. Pantherman
 

Latest posts

Back
Top