You are using an out of date browser. It may not display this or other websites correctly.
You should upgrade or use an alternative browser.
You should upgrade or use an alternative browser.
1/48 AT-ST
- Thread starter Unreality
- Start date
nicholassagan
sippin on gin + juice
- Joined
- Dec 28, 2011
- Messages
- 2,013
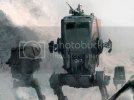
Yeah that's an awesome ref and good on you for adding those details!
Darn it. That's it, I'm ordering 2 more....
Darn it. That's it, I'm ordering 2 more....
Unreality
or Jonathan if you prefer
- Joined
- Dec 19, 2012
- Messages
- 332
nicholassagan said:Yeah that's an awesome ref and good on you for adding those details!
Darn it. That's it, I'm ordering 2 more....
I know, right?
JohnSimmons
For Spud: I was once Merseajohn
- Joined
- Jan 4, 2011
- Messages
- 5,645
That is an awesome picture.....
cargoman5126
Anything in scale I'm into it...
- Joined
- Nov 7, 2012
- Messages
- 829
Looks great... You and Scott , Mano- A- ATST!!! LOL.. but that would be cool....
UncleDredd
New Member
- Joined
- May 9, 2011
- Messages
- 30
Alright. That's it. You and Scott just sold another one of these kits for Ban Dai. 
Unreality
or Jonathan if you prefer
- Joined
- Dec 19, 2012
- Messages
- 332
Well, everyone else has been updating their AT-ST logs, so I thought I'd update mine. Chicken-power!!
Today, I took the brass strip and bent it to make the leg tensioners. I also took a bit of brass rod (.81mm), and I bent it to replace the bar around the top hatch. I had to solder the ends together at the back of the bar...but it's barely noticeable.
I also took the time to try out my new AK Brass Burnishing fluid. I thinned it half and half with water and submerged the parts for about 10 minutes resulting in a nice dark patina on the parts.

As always, thanks for the comments and the support. Enjoy the pic.
Today, I took the brass strip and bent it to make the leg tensioners. I also took a bit of brass rod (.81mm), and I bent it to replace the bar around the top hatch. I had to solder the ends together at the back of the bar...but it's barely noticeable.
I also took the time to try out my new AK Brass Burnishing fluid. I thinned it half and half with water and submerged the parts for about 10 minutes resulting in a nice dark patina on the parts.

As always, thanks for the comments and the support. Enjoy the pic.
Unreality
or Jonathan if you prefer
- Joined
- Dec 19, 2012
- Messages
- 332
Today, I worked on the legs, adding some detail to the inner panels. Granted, there wasn't anything on the studio models, but it just looked too blank for me.

I also started painting the cockpit......blue. Yes, blue. I was inspired by Soviet jet interiors (particularly the Sukhoi jets) and used a greenish-blue. I painted the other details as well, which took a bit of work and rework.

I then added a brown filter. I also had knocked off one of the joysticks. In my attempt to remake the missing one, I found a neat way of creating those ribbed control sticks. I took styrene rod and clamped it with my pliers. The result was a thin joystick with rippled texture you see on a lot of vehicles.

Finally, I added more weathering...mostly mud/dirt via pigments and enamel products. You can see the blue has toned down a lot.


I also started painting the cockpit......blue. Yes, blue. I was inspired by Soviet jet interiors (particularly the Sukhoi jets) and used a greenish-blue. I painted the other details as well, which took a bit of work and rework.

I then added a brown filter. I also had knocked off one of the joysticks. In my attempt to remake the missing one, I found a neat way of creating those ribbed control sticks. I took styrene rod and clamped it with my pliers. The result was a thin joystick with rippled texture you see on a lot of vehicles.

Finally, I added more weathering...mostly mud/dirt via pigments and enamel products. You can see the blue has toned down a lot.


nicholassagan
sippin on gin + juice
- Joined
- Dec 28, 2011
- Messages
- 2,013
LOOKING GOOD! Love the blue in the cockpit!
JohnSimmons
For Spud: I was once Merseajohn
- Joined
- Jan 4, 2011
- Messages
- 5,645
Yes this is brilliant! Nick you better get his address 

