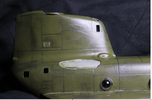
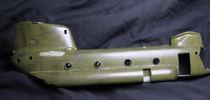
1966 CH-47A Chinook Helicopters

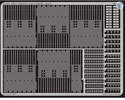
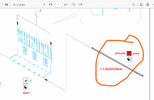
The Eduard cargo compartment set is mainly PE stuff that needs folding and joining. (Instructions)
00.jpg

You probably have also noticed the padded fabric lining throughout the interior which is not represented realistically in the Trumpeter kit.
As Jakko suggested I would recommend using plastic rod and tape/paper to model the seats. It will mostly be the hangers/belts that will be seen through the windows
I have always thought it very disappointing that Trumpeter did such a poor job of the interior on the Chinooks, leaving out so much detail and providing a very diagrammatic representation of what they did include (like the ramp mechanicals etc.).
best regards
John Waller
 
This is going to be my last post for a while. I'm waiting for more money to show up so I can buy the PE seats. (They're within my budget when I get my allowance.)

This is what I'm buying :: Seatbelts

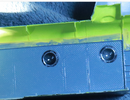
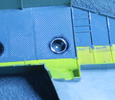
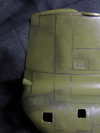
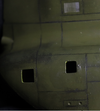
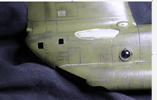
I just installed windows. In my opinion they look like real windows. I used a pointy paintbrush and painted the window seal black.
EDIT:: the Lemon Yellow is ready to be peeled.... (Tamiya masking tape is ready to be peeled off...)

windows.png

wibdows2.png

window3.png
 
Last edited:
Trumpeter models did it wrong. The rear door doesn't go on as shown in the instructions.

Here is the real movement on a video:: cargo door video.
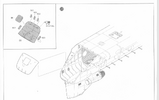
Here are the instructions... I'm going to go look for a support email... Maybe I need to try and find something else so I can Help?
1731875377528.png
 
Probably — I get the impression that the set only includes the etched parts. 1 mm plastic rod is easy enough to get, though: Evergreen sells bags of it, as do other manufacturers. 1 mm copper wire is easy enough too, at least outside the USA, where I suppose you may have to look for whatever the equivalent American copper wire gauge is.

When I look at the instructions, BTW, that set looks like a lot of work. Folding the lower edges of the seats will be tricky because it's such a small lip you have to fold over, and cutting tons of seat supports all to the same size is also not that easy (or fun) a job.
 
DO I have to supply my own plastic or wire?
I have the Big Ed combo (which also has cockpit and exterior stuff) and wire and rod are included in the set. As I said earlier, and as Jakko stated, there is a lot of PE to fiddle with and really suits having prior experience. In addition the brass needs further manipulation to make it look like fabric. I would again recommend scratching the seats from more manageable material, which will cost you next to nothing and be a good exercise in extending your skills.
best regards
John Waller
 
The Eduard cargo compartment set is mainly PE stuff that needs folding and joining. (Instructions)
00.jpg

You probably have also noticed the padded fabric lining throughout the interior which is not represented realistically in the Trumpeter kit.
As Jakko suggested I would recommend using plastic rod and tape/paper to model the seats. It will mostly be the hangers/belts that will be seen through the windows
I have always thought it very disappointing that Trumpeter did such a poor job of the interior on the Chinooks, leaving out so much detail and providing a very diagrammatic representation of what they did include (like the ramp mechanicals etc.).
best regards
John Waller
I just bought the PE seats. I'm going to try posing them with the seats up if I can. wait.. I THINK I did it correctly.... Only Time Will Tell... when I get the packages in the mail. I had to buy a new prepaid Creditcard because the old one wouldn't refill and stuff and things are difficult... I had to walk a long long ways to get the Prepaid Cars.
 
Last edited:
Found an easy and controllable way to make 'weathering' using pencils that are used for sketching. These come in a kit with different hardnesses and were only $15.00 and came with charcoal and stuff.

https://www.amazon.com/dp/B07CM9RTZ...N12GW&peakEvent=3&dealEvent=0&skipTwisterOG=1

I started with a B6 and that went on a little messy with graphite everywhere. I tried a 4B and that was better, but I can do different things with different pencils. I LOVE how I can control things and I can grind at the grooves with the HB and I can smear graphite everywhere with the 6B.

I did a second pass of graphite digging the point of the pencil into the grooves to making them deeper and harsher.

graphite005.png

graphite004.png

graphite003.png

graphite002.png

graphite001.png
 

Latest posts

Back
Top