8th NB Hussar's old ride.....WW2 Sherman Firefly VC

Beobachtungsbereich

Prep for STAB....STAB ON!
Joined
Oct 7, 2011
Messages
254
Recently my wife's grandfather passed away. He served with A Sqn in the 8th New Brunswick Hussars(PL) during WW2.

He made it through Italy and then through Holland. He drove in Sherman M3's, Stuarts (they nicknamed them Honey Tanks for their speed) and the last tank he crewed was a Sherman Firefly VC.

Involved in many battles and seen the nasty end of a few Panthers and Tigers made him appreciate his Firefly. I sat with him many times and he'd tell me of his antics throughout the war and the things he saw and the things that still bothered him. Unfortunately, with age came his slow decay and his ability to speak, move was on the decline....so getting any further information was not a priority, just making him comfortable.

That being said, I have an old photo of him and the rest of the crew he was with in the latter days of the war somewhere in Holland. He said he thought it was somewhere near the northwest corner just before they crossed into Germany.

My current build is making an exact replica of his tank, however I only have the rear left portion to go off of that clearly shows the nickname of his tank, "Abegweit". His widow, my wife's grandmother, got rather choked up to say the least when she saw what I was making when she dropped by for a visit.

But I digress.

I'm researching for details on the radio box, the applique armour (if there was any) on the turret and hull sides, the style of sprockets and if they had .30cals on top for the commanders. Markings and indicators would definitely be top on the list. It'd be awesome to find out what CT number was on the side of his tank, but I think It'd be a very long shot.

There are many examples of Firefly VCs out there but none specific for NW Holland and then the action going into Germany near the end of the war. Many examples online are either Brit or captured Fireflies. There are a lot that are completely mislabeled as well such as ICs and 1950s Shermans being marked as VCs.

I'll be posting more shots of the build as I get further information but as of right now I'm kinda at a stop due to lack of accurate information on the interwebs.

Also this build is the most PE I've ever put on any model. Now that I have the proper tool, it's making things go much more smoothly.

Any help/ tips/ pointers would be greatly appreciated!


[attachment deleted by admin]
 
Very nice beo, will be interesting to see how you do with this, all the best in your research
 
That Firefly is getting solid, Beobach...

The PE attachment that I can see seems pretty clean... I´m not so proficient with PE...

Taking a look at the photos, the only thing that I´m able to suggest to you is to drill the draining holes near the fuel taps: look:

fuelcap_drain.jpg


Cheers, Beobach...
RG
 
Thanks all for the feedback.

Guess I need to buy a micro drill set soon then. Never thought of that, but have seen them on many AFVs.

I'm just starting to get used to using CA glue more precisely due to a tip from the local hobby shop owner. This has allowed me to assemble a Leo2 track set from Bronco that fully flexes and moves without binding and to place the mounts with minimal glue. Mind you I only found out about it half way through that build.

Better late than never IMHO.
 
Beobachtungsbereich said:
Thanks all for the feedback.

Guess I need to buy a micro drill set soon then. Never thought of that, but have seen them on many AFVs.

I'm just starting to get used to using CA glue more precisely due to a tip from the local hobby shop owner. This has allowed me to assemble a Leo2 track set from Bronco that fully flexes and moves without binding and to place the mounts with minimal glue. Mind you I only found out about it half way through that build.

Better late than never IMHO.
That´s a good philosophy... ;)

You better share with us that tip! I feel as comfortable with tiny PE parts as dancing ballet with pink panties and that kind of dress and foot stuff ;D
 
Jelly said:
You better share with us that tip! I feel as comfortable with tiny PE parts as dancing ballet with pink panties and that kind of dress and foot stuff ;D

http://www.luckymodel.com/scale.aspx?item_no=BRO%20AB3528

Take a look a the photo of the track and enlarge it.

See the horizontal slats on either side of the end connectors? That where you put the CA.

Assemble the track dry and hold it in place with a set of tweezers. Put a drop of CA on a steel or glass plate and use a needle to gather a small amount and place it in the slats. It will get "sucked" in and adhere only the top and bottom half of the shoe and leave the pins dry. I put a small amount in each slat to ensure a good bond.

I used the same technique to attach the small mounts on the Sherman as well. I placed a small droplet of CA where I want the rungs to go and placed the rungs into the extremely small droplets of CA with tweezers. After they were slightly bonded, I went back and did it two more times to ensure they won't come off if touched. The glue just gets "sucked" into the seam!

Now that I know how to do it, the slat armour for the Leo2 Barracuda Kit I'll be building soon will be somewhat of a breeze.

Thanks again Scott for the tip!

Regards
 
Beobachtungsbereich said:
Jelly said:
You better share with us that tip! I feel as comfortable with tiny PE parts as dancing ballet with pink panties and that kind of dress and foot stuff ;D

http://www.luckymodel.com/scale.aspx?item_no=BRO%20AB3528

Take a look a the photo of the track and enlarge it.

See the horizontal slats on either side of the end connectors? That where you put the CA.

Assemble the track dry and hold it in place with a set of tweezers. Put a drop of CA on a steel or glass plate and use a needle to gather a small amount and place it in the slats. It will get "sucked" in and adhere only the top and bottom half of the shoe and leave the pins dry. I put a small amount in each slat to ensure a good bond.

I used the same technique to attach the small mounts on the Sherman as well. I placed a small droplet of CA where I want the rungs to go and placed the rungs into the extremely small droplets of CA with tweezers. After they were slightly bonded, I went back and did it two more times to ensure they won't come off if touched. The glue just gets "sucked" into the seam!

Now that I know how to do it, the slat armour for the Leo2 Barracuda Kit I'll be building soon will be somewhat of a breeze.

Thanks again Scott for the tip!

Regards

;) OK, Beobach, I think I understand that in this case the fluidity of the CA plays fully in your side.
I.- Those "two more times" that you apply CA to the seam... you are still using the needle to add the droplets, don´t you?

II.- I understand also that this method works with fluid CA... you are not using "thick CA", right?
RG
 
Jelly said:
;) OK, Beobach, I think I understand that in this case the fluidity of the CA plays fully in your side.
I.- Those "two more times" that you apply CA to the seam... you are still using the needle to add the droplets, don´t you?

Yep, still using the needle to apply the CA.

II.- I understand also that this method works with fluid CA... you are not using "thick CA", right?
RG

The type I am using, believe it or not, is Krazy Glue. It's very thin and goes in very easily, leaving nary a mark on the outside on the raw surface. Anything that is left will be obscured/ covered by paint you apply later.

I haven't used thick CA yet, but I'm sure I will in the future on the next project.

Regards
 
Question for ya, and I'm sure there's someone who will know the easiest way to do it.

Welds seams for the cheek armour for this particular tank. Any tips or tricks?

I had some putty, but it's way to old to attempt and it won't even stick to any styrene at all.

Thoughts?
 
I'll be trying a soldering iron with an old X-Acto blade attached to the tip with some old wire. Just heat it up, touch it to the surface, and you should get a series of ridges. Smooth it out with some Extra Thin cement or some sparingly applied Tenax. I've got some sprue right on a couple weld lines on my turret, so I'll have to do that to clean it up.

Spud posted another solution when I asked the same question on my Cougar thread in the War Wheels section, on page 2, I think.
 
Just take some of the finest Evergreen rod, or half round, run a bead of Tamiya X-Thin (or similar) over the piece and use an old #11 Xacto to put in your welding marks. The cement will soften the thin Evergreen so the knife will slide through it pretty easily.

Another method is to buy the resin-decal weld beads from Archer Fine Transfers. They work just like a decal, but are made from resin on a 3D printer. Put them on where needed before you paint, and viola instant weld bead.
 
Elm City Hobbies said:
Just take some of the finest Evergreen rod, or half round, run a bead of Tamiya X-Thin (or similar) over the piece and use an old #11 Xacto to put in your welding marks. The cement will soften the thin Evergreen so the knife will slide through it pretty easily.

Another method is to buy the resin-decal weld beads from Archer Fine Transfers. They work just like a decal, but are made from resin on a 3D printer. Put them on where needed before you paint, and viola instant weld bead.

Either way, I guess I'll be making a vist to see you Scott! LOL

Thanks all for the tips! Keep 'em coming.

Regards
 
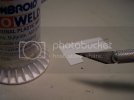
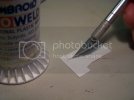
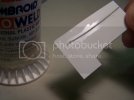
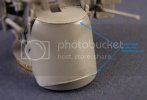
You can just grab some sprue from the kit, a candle/match/lighter and make some stretched sprue and use that. It's a whole lot softer and easier to make welds from than styrene rod and best of all, you already have tons of it in stock. I use a knife with a well used blade that has the very tip broken off to produce the weld.


100_1089.jpg
100_1088.jpg
100_1090.jpg
M16-SPRUE-WELDS.jpg
 
Its just the liquid glue in the picture, the same used to soften the stretched sprue.

It's messy but it was done quickly just to show the method.
 
Well, I said screw it with the welds. I tried my best and just can't seem to get the hang of it for now. Compared to the model welds, mine looked like some crack head went at it with a chisel.

I'll try it on another project. Keep the tips coming though, I'm always wanting to improve on my projects.

Back to this one. I've done a fair bit of research on the Firefly VC and the armour welds were not that apparent, at least in the Canadian ones I found in the National Archives. Besides, grime and mud did a fair share of masking.

Point to note - Yes, I understand that Firefly VCs had the plates over the bow gun for the most part for most units. I was assured by my wife's grandfather many years ago that they retained the bow gun until they pushed into Germany and then went into a retrofit and then lost the bow gun and seat as well for more ammo storage.

This is to replicate what he had in Holland and I believed him after hearing his first hand accounts of his bow gunner ripping Germans apart at very close range in one engagement with a Panzerfaust team.

But I digress...

So, got the primer coat on tonight. I'm a convert to Vallejo. Easy clean up is the selling point and NO MORE FUMES!

One thing though, I think I may need to thin it out a bit as it does tend to clog my airbrush tip.

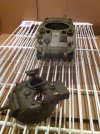
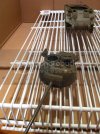
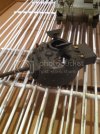
Here's some shots:

Hull is done and the turret is next
IMG_0202.jpg


Turret half way done. A bit too much in some spots. It's been a while since the last time I did any airbrushing.
IMG_0205.jpg


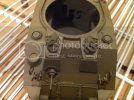
Close up of the turret before:
IMG_0203.jpg


Can still see the casting data in between the hatches.
IMG_0208.jpg


Again, not the prettiest model with all the seams somewhat opened, but it's a humble beginning.

Regards
 
If you need decals for the 8th Hussars then Ultracast has what you need.


http://www.ultracast.ca/products/D35/015/default.htm

They belonged to the 5th Armoured. 5th Armoured regiment

"A" squadron would be the yellow triangle.

The CT number will be pretty hard to come by. The set includeds a generic one to use.

Good luck with your build.

I have yet to see any pic of a Firefly with the bow machine gun. Not saying he was wrong. Memories get hazy with time. As I understand it when these tanks were built this position was eliminated due to the size of the 17 pounder rounds. Having said that I am sure someone will post a picture of one now!
 
Thanks much for pointing me in the right direction with the decals. I'll be ordering them up soon.

I've now gone on to doing a bit of a wash on it and I'll post some pics later tonight of the progress being done.

On Remembrance Day some family members told me that they've seen the project and the progress so far.

Now they want one as well.

Guess I'll be visiting Scott and placing an order....for at least one more Tasca kit as soon as I get the cash from them.


One question though - what does everyone do for the muzzle break for recreating the carbon residue?


Regards
 

Latest posts

Back
Top