A Clumsy Build: Star Wars Virago starfighter

ClumsyModeler said:
I may have a second Virago kit land in my stash in a day or two - this one for free. It won't be getting built as a Virago, but will rather be a parts stash for kitbashing. There's some nice shapes in there for sure. :)

I picked up a few for something like 2 or 3 dollars a piece many years ago when KB toys went under. I didn't even know what the Virago was since I never played the game or followed the expanded universe stuff back then

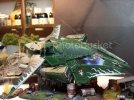
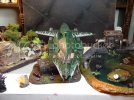
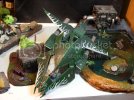
At the time I was playing Warhammer 40K and they came out with Vehicle design rules, so I created my own Eldar vehicle and this kit hard parts that looked like they fit the "look" of the other stuff

At any rate, this is what I kitbashed from one of the kits. I sure you can recognize most of the parts. It was still a work in progress and you can see where the cockpit glass slipped since it was glued in yet. I just wanted to get it painted for a tournament at the time
CustomVehicle01.jpg
CustomVehicle03.jpg
CustomVehicle02.jpg
 
Wow, I like what you did with it. Funny to say but it looks like it flows better as your Warhammer build than as the original model. :D
 
ClumsyModeler said:
Grendels said:
One thing that would help is to put a moisture trap on that compressor, they are not expensive and it will take out quite a bit of the water.
I've got one that came with the compressor, attached at the compressor itself. The problem was pronounced with just that one at that location and I've heard the water vapor condenses into droplets the further the air travels from the compressor. My AB came with another water trap, so I added it as well and it has helped a bit. Looks a bit goofy with two traps, but what are you going to do? LOL!

I might be headed to San Antonio in the next week or two, drop you a note if I do.
Awesome, perhaps the Mrs and I can host you for dinner or something? Let me know!

I will....
 
That build is a bit off topic, but I really like your approach, I have an old 1/48 Trumpeter Su-27 that was given to me by a freind- it's a clunky kit with terrible fit - I think this is where I'm going with it.
 
I really don't mind if the threads I make go a bit off-topic. As long as I can glean ideas from the conversation at hand, I'm good with it! :)

I took the day off work so I can play Mass Effect 3, but I'll be spending a little time working on the Virago as well. I have two more wings to mask off for paint, and I have to repaint the canopy/cockpit piece as the Mr. Masking Sol I decided to experiment with stained the paint. Blech. Ah well, it's all part of the learning process!

So what I have left is this:

-Mask last two wings
-Repaint canopy
-Shoot the darker secondary color on all req'd pieces
-Final assembly
-Last bit of gap filling between fuselage halves and fuselage to canopy fitting
-Final painting to cover putty used to fill the gaps
-Stand/placard painting and assembly
-Final review of lessons learned, move on to next kit (Wife decided it's going to be the 1/48 Revell P-61 Black Widow)

And of course, the obligatory pic:

zxl4k7.jpg

EDIT: Ugh, why don't hard returns and spacings between paragraphs display properly?! LOL
 
Hey I thought this was supposed to be a clumsy
build? It's looking pretty tight to me .......LOL
The masking looks good can't wait for the paint!
 
Yeah that masking is tight!
And had to pick this kit up (£4 inc postage on evilbay) cheers CM!
 
Thanks all. Believe it or not my technique for masking is pretty easy to do. If there's some interest or it may help someone out, I can do a how-to on it. Tonight I'll finish masking the other pieces and start getting this build put to bed. 'sides, I got a P-61 to build. LOL.
 
So, let me share with everyone what has stopped me in my tracks with this build - pic below:

ruoaom.jpg

So, this was enamels shot from a double action airbrush, but I didn't get to experiment much with pressures or thinning. What typically causes paint to hit the model and feel like sandpaper? Too much pressure? Paint too thick?

I've got a new compressor and a better way to regulate the air accurately, now I suppose I need to learn how to thin my paint. So, any pointers based off of what you can tell from the pic?
 
That's usually caused by the paint drying almost before it hits the plastic, IIRC.
You may want to lower your pressure
 
Yup, looks like your pressure was too high.
Don't overlook the paint consistency either; if the paint is too thick you'll end up bringing the pressure up just to get some paint out of the airbrush. 2% milk is the consistency your looking for. Just let us know what kind/brand of paint you're using so someone can give you a rough mixing ratio to start from.

Cheers
 
Thanks for the replies. The paint was model master brand enamel. I'm thinking I'll strip the paint and try again. Any pointer for paint stripping of enamel? Would Simple Green work?
 
Turpentine will work, and won't hurt the plastic. Just make sure you wash the parts before you paint again.
 
Thanks, Grendels. I'm still soaking the parts in Simple Green simply because I was busy working on something else this evening, but if it isn't good to go by tomorrow I'll pick up some turpentine to get them stripped.
 
Forgot I primed this sucker before I started painting. Will probably scrap this build. Already started on a Gundam, instead.

Yeah, I'm a quitter.
 
Let it soak in normal brake fluid in a sealed container,....
It'll still be there when you feel like it again,...
With no paint on it :D
 

Latest posts

Back
Top