Academy 1/48 F-15I
- Thread starter yanpol
- Start date
Maverick said:Did u mask and then airbrush your camo pattern or did you do it by hand?
I used masking tape.
adampolo13 said:all your hard work is paying off for sure! She looks great!
tigrazor said:Oh well. How could I miss that - one of my favourite planes, and its a non USAF version (sorry guys, no hard feelings please). Adam is absolutely right, thats a nice looking bird!
Quaralane said:Camo's looking pretty decent there. Good work
Thank you for your comments guys.
Scott Girvan said:That's looking great. The build looks really solid and the paint scheme is very cool. I like a jet that isn't grey or silver (well I like those too, but this is different)
Thank you very much Scott. The paint scheme is the only reason behind choosing this version instead of a F-15E.
BTW, if anyone has any tips on how to remove tape glue residue, I would be much obliged, it turned out to be a real problem.
rookie said:Great work, I think you have nailed the faded paint job.
Hey, thanks Rookie! I'm OK with the light brown and green. The dark brown took a surprisingly high number of coats to cover the primer and, as I said before, it looks a little bit overdone. We shall see how it turns out after some coats of Future and matt varnish...
nicholassagan
sippin on gin + juice
- Joined
- Dec 28, 2011
- Messages
- 2,013
Looking good!!!
nicholassagan said:Looking good!!!
JMac said:Totally wicked on the camo scheme.
jzsn said:nice dual-color scheme, i'm currently working on a tri-colored F-15I
Thank you for your comments lads. Jzsn, this kit has a three color camo pattern, at least in my monitor the different color are noticeable.
Hi everyone, here's a short update.
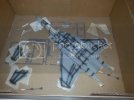
I preshaded and painted the underside:
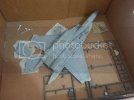
Ordnance.
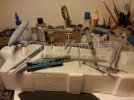
I painted the radome. I also gave a gloss black coat to the parts that will be painted with metallic enamels.
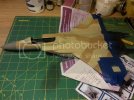
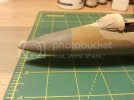
As you can see, the radome is too dark (although it was only a drop of black on 30 drops of gray), so I'll have to mask it and try again. Thanks for looking.
I preshaded and painted the underside:


Ordnance.

I painted the radome. I also gave a gloss black coat to the parts that will be painted with metallic enamels.


As you can see, the radome is too dark (although it was only a drop of black on 30 drops of gray), so I'll have to mask it and try again. Thanks for looking.
dogfish7 said:Paint work is looking great! 8)
Thanks, Dogfish! This build is creeping along, I hope to have finished it in a couple of weeks.
Well, after nearly suffering three heart attacks this afternoon (good game, Netherlands), I decided to finish the last details of this kit and update this post.
I thought I had done a good job airbrushing Blem/Future (five coats) but had some issues applying the decals nonetheless. I did everything you're supposed to do to reduce silvering, but without success.
Cartograf groups different markings into big decals with lots of film. Case in point:
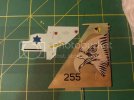
This is a single decal, so I cut all the film that I could:
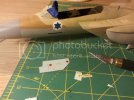
I didn't read the instructions thoroughly, and I had to cut the decals that wrap both AGM-142s (I should have applied them before gluing the fins). Also, these missiles are little kits unto themselves: eleven parts and 33 decals each (37 in my case).
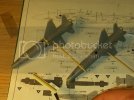
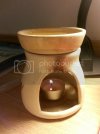
As a side note, these essential oil burners are great for keeping your water warm:
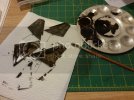
After applying all the decals, I tried to do a sludge wash:
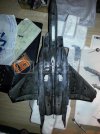
A bit unnerving and ultimately ineffective, as I unintentionally removed almost all of it. I found it easier to soak a paper towel in the wash and then rub it over the kit. After that, I applied a matt varnish and glued the missiles, pods, and the rest of the pieces that were left.
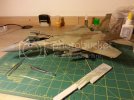
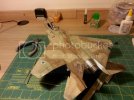
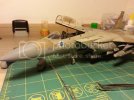
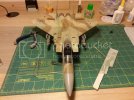
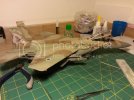
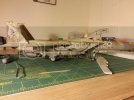
I'm not very happy with the results. Made a lot of mistakes and it took way too much time. Here's hoping that the next one turns out better.
Thanks for looking.
I thought I had done a good job airbrushing Blem/Future (five coats) but had some issues applying the decals nonetheless. I did everything you're supposed to do to reduce silvering, but without success.
Cartograf groups different markings into big decals with lots of film. Case in point:

This is a single decal, so I cut all the film that I could:

I didn't read the instructions thoroughly, and I had to cut the decals that wrap both AGM-142s (I should have applied them before gluing the fins). Also, these missiles are little kits unto themselves: eleven parts and 33 decals each (37 in my case).

As a side note, these essential oil burners are great for keeping your water warm:

After applying all the decals, I tried to do a sludge wash:


A bit unnerving and ultimately ineffective, as I unintentionally removed almost all of it. I found it easier to soak a paper towel in the wash and then rub it over the kit. After that, I applied a matt varnish and glued the missiles, pods, and the rest of the pieces that were left.


I'm not very happy with the results. Made a lot of mistakes and it took way too much time. Here's hoping that the next one turns out better.
Thanks for looking.
