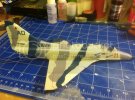
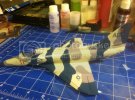
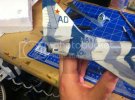
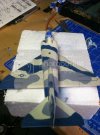
Adversary A-4E

Thanks! It's been a crazy month round here, so I haven't been able to get on the boards very much. But model progress continues, slowly - I got the other two camo colors sprayed:
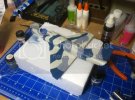
-F94A-4560-ABF7-05EAE05520E9-8269-00000682F9984331.jpg

Just some minor touching up to go and I should be able to apply the first clear coat before pressing on with details, decals, and weathering.

Now, to finish packing and hit the road for Sunday night football and the holidays!
 
Quick update - got my first coat of Future sprayed.

For whatever reason it didn't go on as smoothly as it usually does for me, but as it's started to cure the 'self-leveling' magic is doing it's work and I'll still have a good surface for decals. After that is another coat of Future before a wash, then a dull coat so I think there's still plenty of time for the finish to wind up nice and level ;)
 
Looking good! love the camo in blue, looks great, looking forward to seeing your progress with the weathering.
 
Still going. Had the chance to sit down and get some work done this afternoon after a training run (my first half marathon of the year is next Sunday!). I was supposed to help my girlfriend shop for a new TV since her old one died, but since the US federal governments fiscal woes mean she will probably be furloughed for 22 work days soon (we're hoping it will be spaced out!), she decided to defer the purchase. So, modelling time for me - and decals are finally on. Being a fairly uncomplicated adversary scheme, I could knock it out in one session - not one 'sitting' as i had to get up for more beer a couple times...

FF8-6637FDE85F04-1347-000000DF3419B7A2_zps3d905405.jpg

FAF-73941DC83EF5-1347-000000DF38BE552D_zps25364e38.jpg

As you can see, on the left side forward of the intake, that blue band is too big so the end of the 'RESCUE' arrow kind of disappears. However, this is the first scheme I can remember doing where multi-part decals cross color demarcations like in this one, so if that's my biggest faux pas, I feel OK about it. How the intake warning, 'NAVY' titles, and national insignia (fear not, after seeing the picture, I fixed the one on the right speedbrake before it totally set) all came out makes me pretty happy!
 
Thanks gents! Hoping to get to a wash soon, but have been pretty busy lately with travel and flying (my little corner of the government doesn't seem to be getting much quieter!)
 
A long overdue and, regrettably, incremental update - panel line wash and some artist oil weathering, plus the exhaust painted (Testor's Metalizers on both inside and out).

BD1A-839217B4472B-456-0000002902FE2425_zps852cf779.jpg

9E34-33C85007013B-456-0000002906A23A34_zps16c290a0.jpg

Next up is replacing the mounting brackets (for lack of a better term) for the slats; as you can tell I broke quite a few off during the painting process. I figure I should do the replacement work before attaching things like landing gear and doors. I've got a plan - the brackets themselves may not look 100% accurate but will be close, and stronger, and any glaring inaccuracy will be hidden under the slat itself. Wish me luck...
 
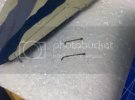
Right then. Here's my improvised solution for the busted off slat tracks - HO scale locomotive handrail stanchions.

85D-388D98942AF0-1315-000000B5E2F4CEAF_zps369bccd5.jpg

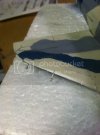
As you can see above, the soft metal means the eyelets are easy to mash flat with pliers to more closely match the one still on the kit. Then I just nipped off the angled part. I drilled holes (the hardest part since it's on the leading edge of the wing), slid them in, and secured them with CA. Below is the first one I installed next to the only one that survived on the wing. Just needs touch up paint and then once the slats themselves are installed I think it should be pretty good.

384-6E8864EF12F9-1315-000000B5E7B9582D_zps6de10a65.jpg
 
Nice paint work kolja. That slat fix looks like it'll work out nice.
 
Thanks, JMac!

So, 'real life' has conspired to keep me off the boards much of late, but I have been able to continue tinkering along with this project. However, as I got into the detailing - and fixing whatever I managed to break during construction - phase, i found my incremental accomplishments to be not quite as photo-worthy.

Having said that, things like slats and flaps, landing gear and doors, antennae and pitot tubes are all installed. A coat of flat tied everything together, and I got the masking off the clear parts with remarkably little problems from the admittedly excessive amount of time they were taped up.

Now my only problem is I boneheadedly forgot to weight the nose and have myself an unrepentant tailsitter, but I'm working on a base to fix that. I found a small wooden plaque at Michael's and have already stained the beveled edges. I only need to put a varnish coat on. The flat center part of the plaque will get a sheet of plastic cut to fit that I'm already painting up to look like concrete. I'll either use fine wire or something like fishing line, along with a discretely located hole, to thether the nosewheel to the 'ground' yet still let me remove the model in case I have to pack it for moving.
 

Latest posts

Back
Top