AMT/ERTL 1/72 Eagle Transporter Complete.
- Thread starter rastanz
- Start date
- Joined
- Jan 27, 2011
- Messages
- 205
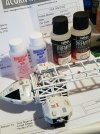
Sorry late reply, I used the only primer I had available on my paint shelf for my airbrush which is the 60ml Vallejo negro black acrylic surface primer.Cool ,
what are you using as primer ?
I have a couple of 400ml spray cans of Army painter matt black (I used to prime my Bandai 1/144 Falcon) which I usually spray outdoors because it gets everywhere but since the weather outside is crap I just used the Vallejo which is spray booth friendly.
Also testing out my new compressor which come with a free airbrush, my old compressor didn't have a tank and was noisy so I retired it.
I'm flying out for work tomorrow (domestic) and wont be home til Sunday night (Wednesday here), hopefully the sun will come out for my day off on Monday so I can lay a base coat down and finally get to laying some decals on it.
- Joined
- Jan 27, 2011
- Messages
- 205
A little bit of progress, the sun come out for a few hours yesterday and today so I laid a base coat down, did some masking and painted the passenger pod which btw was a challenge trying to mask off the shapes on the doorways, liquid mask would blob out and make more of a mess than anything... first attempt fail, second attempt fail again... so after a throw-down of some colourful gangster vocab towards my feeble masking attempt I finally ended up using a mixture of 1mm masking tape and blu-tack which worked out better on my third attempt.
Ripped off one of the passenger pods landing feet when removing the masking tape. .. cement to the rescue after yet another colourful rhyme to the homies.
Clean up with a fine tip paint brush and clear coat next then apply the JBot decals, haven't figured out how I'm going to deal to the seams... and speaking of decals, I think I'll just use the window decals for the pod that came with the kit, save me having to mask more.
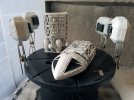
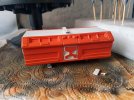
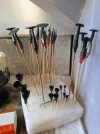
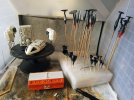
Ripped off one of the passenger pods landing feet when removing the masking tape.
Clean up with a fine tip paint brush and clear coat next then apply the JBot decals, haven't figured out how I'm going to deal to the seams... and speaking of decals, I think I'll just use the window decals for the pod that came with the kit, save me having to mask more.


- Joined
- Jan 27, 2011
- Messages
- 205
Nice! Always good in my book to have multiple projects going to bounce around between when pregress on one or the other gets stalled.
Thank you, yeah, not much one can do when the sun is hiding most of the day so painting is off of the to do list... so may as well play with another build
- Joined
- Jan 27, 2011
- Messages
- 205
Well, a little more progress, and I've started the first stages of weathering on my Eagle.
Fail #1... My JBot decals started deteriorating as I was handling them and some of the ink rubbed off from touching the surface of the original bag that they had come in, although I managed to salvage the one's I needed, most of the numerals and some of the stripes were too far gone to save, I think the sheet may have passed it's expiry date, so I masked off and painted the orange rectangular shapes on the pods after the one's on the decal sheet had been ruined.
Fail #2... Found Passenger Pod on floor after returning from making lunch, looked like my cat (Ahsoka) jumped through window on to bench where model was drying, model crashed to the floor landed on rubber mat on it's side, paint wasn't fully dry and it ended up with dust and lint in the paint finish
Wet sanded and managed to clean most up, I think I'll leave as is because it adds to the weathering, so, I'll un-fail that fail #2 and let Ahsoka the cat live to see another trilogy and just bust some harsh rapper lyrics at her.
Using a mix of dry brushing, pastels and chalks for weathering.
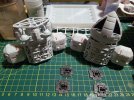
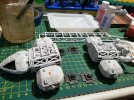
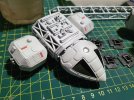
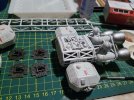
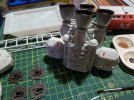
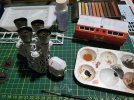
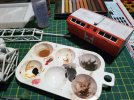
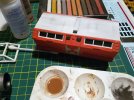
Thanks for looking.
Fail #1... My JBot decals started deteriorating as I was handling them
Fail #2... Found Passenger Pod on floor after returning from making lunch, looked like my cat (Ahsoka) jumped through window on to bench where model was drying, model crashed to the floor landed on rubber mat on it's side, paint wasn't fully dry and it ended up with dust and lint in the paint finish
Wet sanded and managed to clean most up, I think I'll leave as is because it adds to the weathering, so, I'll un-fail that fail #2 and let Ahsoka the cat live to see another trilogy and just bust some harsh rapper lyrics at her.
Using a mix of dry brushing, pastels and chalks for weathering.


Thanks for looking.
- Joined
- Jan 27, 2011
- Messages
- 205
Thank you.Looking VERY good here
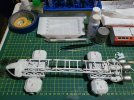
I'm on the home stretch but it's moving slowly thanks to the cold winter weather here which isn't ideal for painting but I've managed to sneak in a session here and there when the sun pops out for a bit.
The decals I managed to salvage (orange rectangles) didn't really go with the ones that had painted on, so I removed them (paint drying at the moment), I also added the stripe decals on to the spine and around the cages of the cockpit and rear engine.
The sun visited for a couple of hours and I managed to lay a couple of coats of future to my eagle, I decided to keep weathering to a minimum for I want this thing to look nice and clean since it's the VIP version which meant I had to remask the pod and give it a light coat of orange to bring it back from some of the weathering I had already done to it.
I trimmed the piping on the ends of the spine so it would fit into the recesses of the cockpit and rear end more snugly.
Will continue adding the rest of the salvaged decals once the clear coat has dried enough.
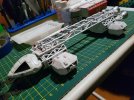
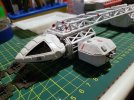
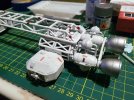
- Joined
- Jan 27, 2011
- Messages
- 205
The finish line is in sight.
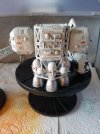
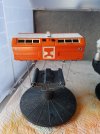
As I sat back and looked over my progress I got to thinking how I could improve the look, although it looked cool I also thought it looked a little boring being just white with an orange pod in the middle, so not following any reference I painted some random grey shapes on the command module, landing gear pods and spine just to give my Eagle some contrast.
I lightened the grey by adding in a couple of drops of white just to add some lighter patches, although the lighter greys are very subtle and more noticeable close up I think it improved the look somewhat... as for the grey stripes on the spine, I kept the color uniformed so they'd all match, if only I had lined them up proper ... some light weathering and touch ups here and there as I want this to look fairly clean being a VIP craft... a final coat of flat clear or semi-gloss and then I will call this done.
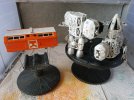
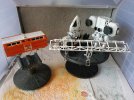
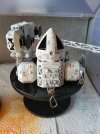
Cheers.
As I sat back and looked over my progress I got to thinking how I could improve the look, although it looked cool I also thought it looked a little boring being just white with an orange pod in the middle, so not following any reference I painted some random grey shapes on the command module, landing gear pods and spine just to give my Eagle some contrast.
I lightened the grey by adding in a couple of drops of white just to add some lighter patches, although the lighter greys are very subtle and more noticeable close up I think it improved the look somewhat... as for the grey stripes on the spine, I kept the color uniformed so they'd all match, if only I had lined them up proper


Cheers.
ArtChromer
Active Member
- Joined
- Jul 17, 2020
- Messages
- 92
Truly amazing work. I envy your ability to work with such detail at this scale!
- Joined
- Jan 27, 2011
- Messages
- 205
Just don't let Alan Carter at the controls.This beaut's about done
Yeah, that guy just loves to crash Eagles
Truly amazing work. I envy your ability to work with such detail at this scale!
Thank you very much.
Richard Baker
New to this Forum
- Joined
- Apr 19, 2016
- Messages
- 34
Fantastic build!- it is amazing once you realize the scale you are working with, well done!
- Joined
- Jan 27, 2011
- Messages
- 205
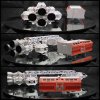
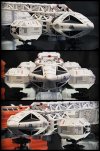
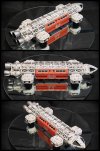
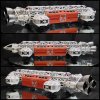
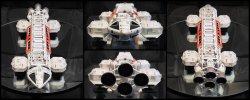
YAY!, last of the build log updates.
I did a bit of tidy up on bit n pieces here and there with a fine tipped paint brush and some of the base color (I forgot the color mix ratio so I winged it) for there were some places that I rushed through and it showed, I did minimum weathering with some pastels (no wash), applied some wear n tear / chipping / scratch marks on the paint work with some fine grit sandpaper and my hobby knife in random places.
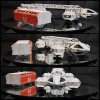
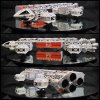
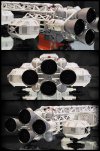
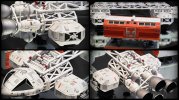
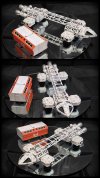
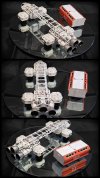
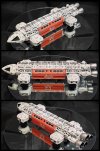
I then gave the model a few light coats (about 6 passes) of flat clear all over except for the silver parts on the engine bells since I wanted those to shine, I can finally call this complete YAY!
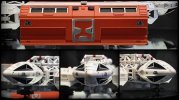
Looking at acquiring some decals down the track sometime for the pod entrances, but for now the passenger pod will be displayed in docked mode.
It's been a fun and educational build especially with scratching some of the more tiny pieces which was a huge learning curve for me, some trial and error here and there but I managed to find a work around, I didn't encounter any issues with the kit which couldn't be modified, fixed or hidden with my average modelling skills, I think I did okay in achieving all I set out to improve on it to turn it into a decent display piece for my model shelf.
It's quite a decent size model when put together, and I can honestly say it is a very good kit fit wise for it's age with only one or two minor adjustments.
If I were to build another AMT / Ertl kit of this model I would definitely be more patient because sometimes I felt like I rushed through some of the build process just to be done with it and move on, at times I was thinking too far ahead constructing parts for other sections of the model in my thoughts while actually working on parts for another, I'd also try and simplify the techniques I used because there's always an easier way as well as room for improvement.
Been a cool journey, thanks for popping in and joining me on this build, your comments fuel my confidence and even seeing some of your guys fantastic work inspired me to finish this project.
Photo time... excuse the poor quality, I do not own a decent camera so they're all taken from my mobile phone.


Similar threads
- Replies
- 2
- Views
- 197

