Uncle_Bang
a.k.a. Brandon Hodge
- Joined
- Oct 17, 2012
- Messages
- 19
Here is where I will be posting part 2 of my 1/2500 Enterprise builds.
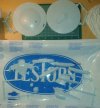
This one will the the AMT Enterprise-C kit. I've already done a little bit of work on it behind the scenes, however I did remember to log the steps I did do. So first off here's an image of the box and a link to the instruction sheet if you are interested.

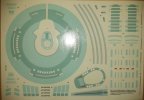
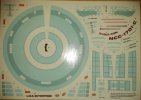
The round 2 website mentions an error on the decals with this kit, but they don't actually say what was wrong. I looked at mine and couldn't see anything, maybe you guys can spot something:
If you guys do spot something I'll send out another post card to them to get a replacement, if not I'll just work with what was provided (I tried sending a post card to them a while back, but I think I put on the wrong amount of postage and it never made it ).
).
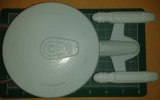
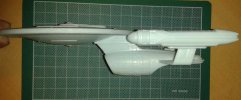
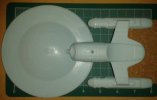
So what I've done on this so far is washed all the parts, assembled the major sub-assemblies, and did an initial sanding. Next I will use some Bondo Glazing & Spot Putty to fill in some minor seam areas and do a finer sanding before I give it the first hit of primer. For that big giant hole in the bottom of the secondary hull I might try some epoxy putty to fill it in. The only snag there is that I've never used epoxy putty before so I have no idea what brand I should use for this. Here are a few photos of the ship thus far (the saucer is just dry fitted to the secondary hull):
This model has some great detail, and the ship is a really nice size. It's just too bad that practically all of the molded detail on the saucer portion is raised instead of recessed like on the secondary hull. Even so, I'm still really tempted to apply a dark blue wash or something during the painting process to really bring out the detail modeled into the plastic.
Thanks for reading!
~Uncle Bang
This one will the the AMT Enterprise-C kit. I've already done a little bit of work on it behind the scenes, however I did remember to log the steps I did do. So first off here's an image of the box and a link to the instruction sheet if you are interested.

The round 2 website mentions an error on the decals with this kit, but they don't actually say what was wrong. I looked at mine and couldn't see anything, maybe you guys can spot something:
If you guys do spot something I'll send out another post card to them to get a replacement, if not I'll just work with what was provided (I tried sending a post card to them a while back, but I think I put on the wrong amount of postage and it never made it
So what I've done on this so far is washed all the parts, assembled the major sub-assemblies, and did an initial sanding. Next I will use some Bondo Glazing & Spot Putty to fill in some minor seam areas and do a finer sanding before I give it the first hit of primer. For that big giant hole in the bottom of the secondary hull I might try some epoxy putty to fill it in. The only snag there is that I've never used epoxy putty before so I have no idea what brand I should use for this. Here are a few photos of the ship thus far (the saucer is just dry fitted to the secondary hull):
This model has some great detail, and the ship is a really nice size. It's just too bad that practically all of the molded detail on the saucer portion is raised instead of recessed like on the secondary hull. Even so, I'm still really tempted to apply a dark blue wash or something during the painting process to really bring out the detail modeled into the plastic.
Thanks for reading!
~Uncle Bang

