ATHENA - Steampunk Airship
- Thread starter Klaus not Santa
- Start date
Klaus not Santa
Member
- Joined
- May 15, 2013
- Messages
- 281
Thanks guys! I really appreciate your feedback!
As mentioned yesterday the next piece for the ATHENA is a second CIWS "NEMESIS Mk MCMLXIX CWIS Trieste Pattern".
I initially thought I could use one of the gatling barrels I had lying around from some previous project, but realized its too flimsy.
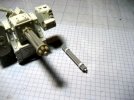
So I started to create another gatling barrel.
First cutting two disks and drilling the appropriate holes, then cutting the 6 barrels and 1 central rod to the proper length and push them through the first disk, aligning them in length. Then through the second disk and straightening everything and gluing it together.
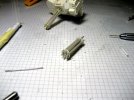
Satisfied with the barrel I started the main gun housing.
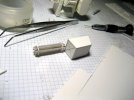
Next were the two sides connecting the main turret body with the gun. For the proper curve I used a disk of plastic card that I used as a scale, with two markings for the upper and lower corner and then simply traced the outline.
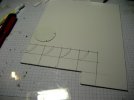
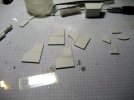
a set of 5mm spacers to keep the sides apart.
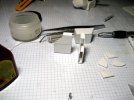
To cover the gap and give it a nice smooth surface, I cut a 8mm wide strip of .25mm plastic card, which I glued to the sides,
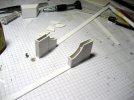
and as each side cured I wrapped it around the next side, following the curve nicely.
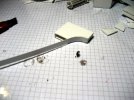
Most of the base parts already completed!
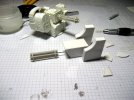
Since I had a few minutes left last night I also started the main turret body, but only got a part of it.
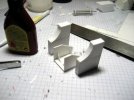
That went pretty well.
Now I have to complete the main body, then the sights box and the ammo drum. And after that:
details, details, details
I hope you like todays update and look forward to your feedback
Cheers
Klaus
Klaus not Santa
Member
- Joined
- May 15, 2013
- Messages
- 281
Thank you!
Painting? well, yes....
It will definately take a lot of my guts and patience to get her painted
The plan is to do a basic "cloud" camo pattern, add a lot of weatehring, and then add slogans and banners like on the ZEUS.
So, somewhere along the lines of what I did with the old ATHENA bridge, when she was still an aircraft carrier...
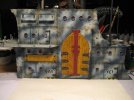

So you can imagine this will be a lot of work.
I had a pretty busy weekend with lots of good weather, family and friends. So hobby time was relatively limited.
But I got to work on the CIWS a bit more. First I completed the main turret body - I had to do some gap filling and sanding.
Next I drilled the holes for the main gun axle.
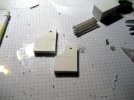
and then I was able to glue the two sides in place. The gun body fits nicely and elevation and depression is like on the original NEMESIS.
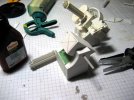
Once this was verified I mounted the barrels to the gun body and started with the sights box.
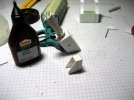
I'm not sure if the weather was too hot for me, but when building the sights housing I created some rather big gaps, so I had to fill and sand a lot...
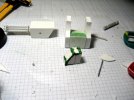
While the putty cured I started with the ammo drum. Using the marked disk as scale again, I drew the 3 sections onto the plastic card.
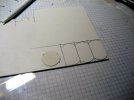
When cutting such rather "delicate" shapes I tend to keep the main section still attached to the plastic card (cutting the curves first).
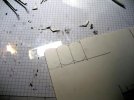
The three sections look rather good, but they are not really identical. For this purpose I tape them together (ensuring they are aligned perfectly) and then sand them together to the same exact shape.
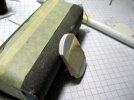
Once I was satisfied with the shape, I glued them together, separated by 1cm strips of plastic card. While the basic shape for the ammo drum now cured, I sanded down the sights box.
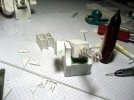
This NEMESIS will be a mirrored model, so the sides for the sights and ammo drum will be swapped. That's as far as I got.
Yes, it looks a bit warped right now, but as soon as I glued the spacers in position, the sights will align properly.
Cheers
Klaus
Painting? well, yes....
It will definately take a lot of my guts and patience to get her painted
The plan is to do a basic "cloud" camo pattern, add a lot of weatehring, and then add slogans and banners like on the ZEUS.
So, somewhere along the lines of what I did with the old ATHENA bridge, when she was still an aircraft carrier...


So you can imagine this will be a lot of work.
I had a pretty busy weekend with lots of good weather, family and friends. So hobby time was relatively limited.
But I got to work on the CIWS a bit more. First I completed the main turret body - I had to do some gap filling and sanding.
Next I drilled the holes for the main gun axle.

and then I was able to glue the two sides in place. The gun body fits nicely and elevation and depression is like on the original NEMESIS.

Once this was verified I mounted the barrels to the gun body and started with the sights box.

I'm not sure if the weather was too hot for me, but when building the sights housing I created some rather big gaps, so I had to fill and sand a lot...

While the putty cured I started with the ammo drum. Using the marked disk as scale again, I drew the 3 sections onto the plastic card.

When cutting such rather "delicate" shapes I tend to keep the main section still attached to the plastic card (cutting the curves first).

The three sections look rather good, but they are not really identical. For this purpose I tape them together (ensuring they are aligned perfectly) and then sand them together to the same exact shape.

Once I was satisfied with the shape, I glued them together, separated by 1cm strips of plastic card. While the basic shape for the ammo drum now cured, I sanded down the sights box.

This NEMESIS will be a mirrored model, so the sides for the sights and ammo drum will be swapped. That's as far as I got.
Yes, it looks a bit warped right now, but as soon as I glued the spacers in position, the sights will align properly.
Cheers
Klaus
Cave_Dweller
New Member
- Joined
- Mar 18, 2011
- Messages
- 812
WOW is that mural freehand? Amazing, and cool gun too, very detailed. Will this be used in 40k games? Hah I could envision some ridiculous house rules Apocalypse games with it.
the Baron
Ich bin ja, Herr, in Deiner Macht
- Joined
- May 12, 2009
- Messages
- 2,279
How have I missed this thread? Outstanding and truly amazing work! Thanks for the progress pics and the look into how you designed and sketched out your ideas, too.
Do you have more shots of the figures you used and others that you'll be adding?
Do you have more shots of the figures you used and others that you'll be adding?
Klaus not Santa
Member
- Joined
- May 15, 2013
- Messages
- 281
Thank you 
I try to keep this build report as detailed as possible.
@the Baron - well, lets see...
Here are some guys and gals I planned to add to the flight deck:
http://fischers-design-shop.blogspot.de/2012/07/athena-steampunk-airship-86.html
The crew on the bridge and conference room:
http://fischers-design-shop.blogspot.de/2012/06/athena-steampunk-airship-79.html
The STRIX aircraft "Nighthawk" and its crew:
http://fischers-design-shop.blogspot.de/2011/04/nighthawk-9.html
and the "Tiger Taxi" CHARON I had originall planned for the AC version of the ATHENA
http://fischers-design-shop.blogspot.de/2010/08/tiger-taxi-completed.html
I think that's pretty much all the models around the ATHENA...
but a lot has happened since May 2009
http://fischers-design-shop.blogspot.de/2009/05/new-project-code-name-athena.html
Weeell,
the weather outside is beautiful and time is fleeting...
But I still got some hobby time.
First I used my Secret Weapon, the .25mm Plastic Card to do the ammo drum
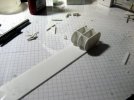
While the first section cured, I started detailing the sights box. As these little pieces set, I started to wrap the plastic card around the ammo drum housing. I also used the .25mm card for the little sight.
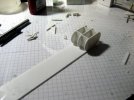
With rivets and details the sights box looks nice, but it is quite considerably slimmer than the original
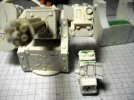
The next item on my agenda was the ventilation grill on the rear of the gun mount. For this I cut some strips of (you guessed it!) .25mm card...
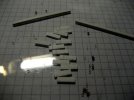
And carefully glued them in place, slightly overlapping.
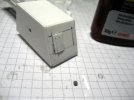
Its quite a task to keep them aligned and spaced properly.
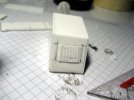
But with the little frame around it, it looks great
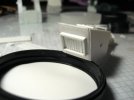
Some more details on the gun top, and I was able to glue the gun to the central axle.
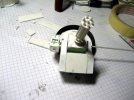
Nice
Due to my unique, unrivaled and superior calculation skills, I was able to....
...well...
...create a rather thin and flimsy ammo drum!
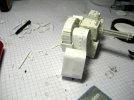
Crap on toast.
Aaargh!
I don't know what I calculated, but the drum is a good 1cm to small.
So I ripped the plastic card back off.
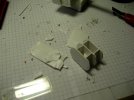
The mistake was that I used 1cm wide spacers instead of 1.5cm wide one. Somehow I calculated with the sections I'd need 3 spacers...
Haha, I only have 2 spacers.
So you see - I AM NOT SANTA
Well, I hope I can wrap this NEMESIS CIWS up by the end of the week.
Cheers
Klaus
I try to keep this build report as detailed as possible.
@the Baron - well, lets see...
Here are some guys and gals I planned to add to the flight deck:
http://fischers-design-shop.blogspot.de/2012/07/athena-steampunk-airship-86.html
The crew on the bridge and conference room:
http://fischers-design-shop.blogspot.de/2012/06/athena-steampunk-airship-79.html
The STRIX aircraft "Nighthawk" and its crew:
http://fischers-design-shop.blogspot.de/2011/04/nighthawk-9.html
and the "Tiger Taxi" CHARON I had originall planned for the AC version of the ATHENA
http://fischers-design-shop.blogspot.de/2010/08/tiger-taxi-completed.html
I think that's pretty much all the models around the ATHENA...
but a lot has happened since May 2009
http://fischers-design-shop.blogspot.de/2009/05/new-project-code-name-athena.html
Weeell,
the weather outside is beautiful and time is fleeting...
But I still got some hobby time.
First I used my Secret Weapon, the .25mm Plastic Card to do the ammo drum

While the first section cured, I started detailing the sights box. As these little pieces set, I started to wrap the plastic card around the ammo drum housing. I also used the .25mm card for the little sight.

With rivets and details the sights box looks nice, but it is quite considerably slimmer than the original

The next item on my agenda was the ventilation grill on the rear of the gun mount. For this I cut some strips of (you guessed it!) .25mm card...

And carefully glued them in place, slightly overlapping.

Its quite a task to keep them aligned and spaced properly.

But with the little frame around it, it looks great

Some more details on the gun top, and I was able to glue the gun to the central axle.

Nice
Due to my unique, unrivaled and superior calculation skills, I was able to....
...well...
...create a rather thin and flimsy ammo drum!

Crap on toast.
Aaargh!
I don't know what I calculated, but the drum is a good 1cm to small.
So I ripped the plastic card back off.

The mistake was that I used 1cm wide spacers instead of 1.5cm wide one. Somehow I calculated with the sections I'd need 3 spacers...
Haha, I only have 2 spacers.
So you see - I AM NOT SANTA
Well, I hope I can wrap this NEMESIS CIWS up by the end of the week.
Cheers
Klaus
The Nylon Gag
New Member
- Joined
- Nov 14, 2011
- Messages
- 829
Servus dude,
That gatling gun is wicked Father Klausmass ;D
I love the way you build, just as if you were making it in real life out of steel plates
Brilliant my friend
Gagster
That gatling gun is wicked Father Klausmass ;D
I love the way you build, just as if you were making it in real life out of steel plates
Brilliant my friend
Gagster
THE NEW ONE
follow me on twitter @SpaceSavy
- Joined
- Oct 4, 2011
- Messages
- 346
looking good, but that gun looks 
great job
great job
Klaus not Santa
Member
- Joined
- May 15, 2013
- Messages
- 281
18. July - ATHENA - Steampunk Airship
Thank you guys - I really appreciate the positive vibes!
After the last little disaster I rebuild the ammo drum, now in the proper width
And while the PC around the drum cured I added rivets and ornaments to the rest of the gun.
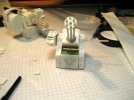
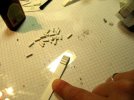
Next up was the ammo feed. For this I cut a 1cm wide strip of 0.5mm PC and wrapped it around a pencil (to give it a round shape)
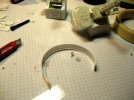
For the "ammo" I cut 3mm wide stips of 1.5mm thic PC
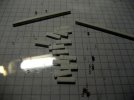
I glued these onto the strip with slight gaps between them.
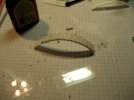
Once the ammo drum was cured, I added two small stips of .25 PC for the ornaments. When the ornament strips cured I finally mounted the drum to the main axle.
One thing I realized is that the axle I used this time was rather thin (compared to the rod in the original gun) and it has a tendency to bend....
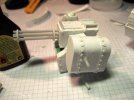
While the drum cured on the axle I prepared the connection to the ammo feed.
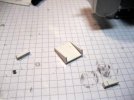
In between these steps is always time for some rivets
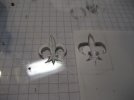
Another needed ornament is the Fleur-de-lys for the front of the ammo drum.
Finally I mounted the ammo feed to the gun body and the ammo drum.
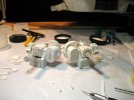
And with this the NEMESIS twins are completed
Yeehah!
But I'm not 100% happy with the position on the deck....
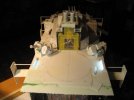
I will have to wait until I have the 4 manouver engines and rotors on the central stubby wings before I can decide where I will position those two babies.
I hope you enjoyed this little build
Cheers
Klaus
Thank you guys - I really appreciate the positive vibes!
After the last little disaster I rebuild the ammo drum, now in the proper width
And while the PC around the drum cured I added rivets and ornaments to the rest of the gun.

Next up was the ammo feed. For this I cut a 1cm wide strip of 0.5mm PC and wrapped it around a pencil (to give it a round shape)

For the "ammo" I cut 3mm wide stips of 1.5mm thic PC

I glued these onto the strip with slight gaps between them.


Once the ammo drum was cured, I added two small stips of .25 PC for the ornaments. When the ornament strips cured I finally mounted the drum to the main axle.
One thing I realized is that the axle I used this time was rather thin (compared to the rod in the original gun) and it has a tendency to bend....

While the drum cured on the axle I prepared the connection to the ammo feed.

In between these steps is always time for some rivets
Another needed ornament is the Fleur-de-lys for the front of the ammo drum.

Finally I mounted the ammo feed to the gun body and the ammo drum.
And with this the NEMESIS twins are completed

Yeehah!
But I'm not 100% happy with the position on the deck....

I will have to wait until I have the 4 manouver engines and rotors on the central stubby wings before I can decide where I will position those two babies.
I hope you enjoyed this little build
Cheers
Klaus
Klaus not Santa
Member
- Joined
- May 15, 2013
- Messages
- 281
;D
Thanks guys!
;D
As written in the last post, I'm not so sure about the final position of the two CIWS', so I decided to finally go for the 4 engines and rotors on the short stubby central wings.
A while back, I had build 1 engine that I tried to duplicate via casting.
Unfortunately I had quite some issues with it, and I finally gave up casting the 4 engines. Pondering what else to do, I remembered the CHARON's rotors and decided to give it a try.
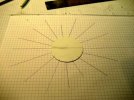
For this I cut 8 disks out of an A4 sheet of PC and then out of these another disk.
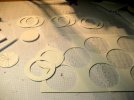
Out of the cut disks I cut the actual rotor blades. For this I drew the lines on a sheet of paper and then it was relatively easy to draw these lines on the PC disk.
Next step was to cut the actual blades and round them off nicely.
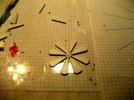
Then they were mounted onto a central axle.
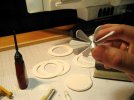
The rotor was then glued onto one of the outer rings.
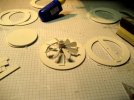
Then some spacers (about 2cm high) glued to the lower of the two rings.
Please also note the larger spacer on the left, that already has the axle to mount the engine glued in place.
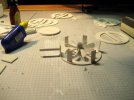
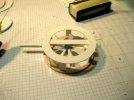
Then I glued the upper ring in position, and wrapped it with .5mm plastic card.
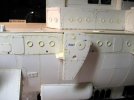
Then I had to drill a hole into the stubby wing and rudder.
Into which I can now mount the engine-rotor combo
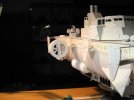
The combo is rotatable, so it can be used for lift as well as propulsion.
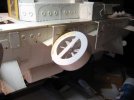
I think it looks rather good on the ATHENA, don't you think?
Cheers
Klaus
Thanks guys!
;D
As written in the last post, I'm not so sure about the final position of the two CIWS', so I decided to finally go for the 4 engines and rotors on the short stubby central wings.
A while back, I had build 1 engine that I tried to duplicate via casting.
Unfortunately I had quite some issues with it, and I finally gave up casting the 4 engines. Pondering what else to do, I remembered the CHARON's rotors and decided to give it a try.
For this I cut 8 disks out of an A4 sheet of PC and then out of these another disk.

Out of the cut disks I cut the actual rotor blades. For this I drew the lines on a sheet of paper and then it was relatively easy to draw these lines on the PC disk.

Next step was to cut the actual blades and round them off nicely.

Then they were mounted onto a central axle.

The rotor was then glued onto one of the outer rings.

Then some spacers (about 2cm high) glued to the lower of the two rings.
Please also note the larger spacer on the left, that already has the axle to mount the engine glued in place.

Then I glued the upper ring in position, and wrapped it with .5mm plastic card.

Then I had to drill a hole into the stubby wing and rudder.

Into which I can now mount the engine-rotor combo

The combo is rotatable, so it can be used for lift as well as propulsion.

I think it looks rather good on the ATHENA, don't you think?
Cheers
Klaus
