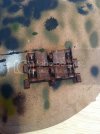
Big Kitty - Tamiya's Leo 2A6

Got on a bit of a roll tonight...a rolling chassis that is.

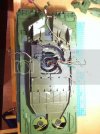
IMG_0350.jpg


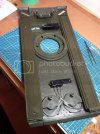
top side looking down on the power pack, sound box and wiring harness.

IMG_0351.jpg


Time to move on to the top portion of the hull. Never played with fiber optic wire before, should be interesting.

TANKS for looking!
 
Well, it's been quite a while since my last update. I've been doing some rather mundane building and setting up the electronics in the past few days.

Here are some pics:

Installing fiber optics
. These things are hard to cut and have a mind of their own
IMG_0352.jpg

IMG_0353.jpg


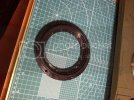
Turret ring

IMG_0354.jpg


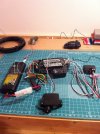
Setting up the electronics
IMG_0355.jpg


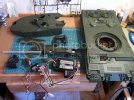
What has been built since the last update.
IMG_0357.jpg


All episcopes and lights are masked off and I'll be shooting some primer today.

Time invested in the project so far is standing at approx 58 hours.

TANKS for looking!
 
Thanks all. The time on it now is 63 hours with 3 hours of shooting primer and 2 hours assembling things for the turret, like the 16 x 76mm MBGDs and they have the cap chains that have to be installed. These buggers are 18 mm in length and are a strain on the ol' eyes at 0030 in the morning. ;D

Hopefully today I'll be able to get the base coat on the bottom portion of the turret and main gun assembly and start the slow road to final assembly.

I still have more primer to shoot on the turret top, applique armour and turret side baskets.

IMG_0358.jpg

IMG_0359.jpg


I had to go slow on the primer due to the nooks and crannies being at odd angles on the top of the hull. I'd shoot some at one angle and then go back and shoot it at another angle with ample time for it to dry in between applications. I also hit the edges and areas where it's going to be bumped often a few more times to build up thin layers.

Of course just when I thought I was done I'd take another closer look after grabbing a coffee and find more bare spots.

TANKS for looking!
 
Your making me very jealous this tank is coming together very nice soon it be moving around pulling your child on his bike


Geegad
 
Well, shot the base coat and black is now on the areas of the panzer in areas that would make it extremely hard to get after assembly - namely the turret ring, underside of the turret, ballistic ring, mantlet, barrel base and forward portion of the back deck.

It only took 4 hours. I've heard slow and steady wins the race, but come on! ;D

I let it sit for about 4 hours and then started the building process. It was a late night.....my second cup of coffee and Baileys is now going down range at this time!

Sprocket drums, idlers and track now installed
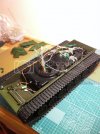
IMG_0360.jpg


I thought it looked pretty good and wondered what it would look like with the upper hull on the tub....after all, the paint is dry.
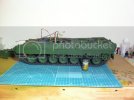
IMG_0364.jpg


Then I figured the turret ring should be installed and the lower turret should be in place so I can start assembling the wiring harness in the morning....
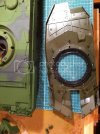
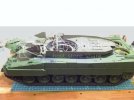
IMG_0365.jpg

IMG_0366.jpg

IMG_0367.jpg


Since I made it that far, might as well get the gun together and put in on the recoil mech.
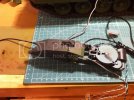
IMG_0368.jpg


Next thing you know....

IMG_0369.jpg

IMG_0370.jpg

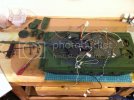
The wiring was a nightmare....thank zombie Jeebus for twist ties!
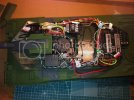
IMG_0373.jpg


It kinda snow balled on me ::)

IMG_0371.jpg


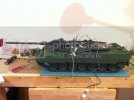
It's up and running. I tried it out last night at 0230....you know, just to make sure that no cables get kinked up or jammed in the turret. ;)

Stab works and reacts well, main gun fires just like the real panzer. The sounds of the engine starting up/ switching off, accelerating with the sound of the turbos screaming and traversing the turret brings back tons of memories of operations in Panjwaii and Zhari.

Quite a kit...still needs more painting and assembly of the upper turret. Then there is the weathering, washing and adding of dust and scratches with hints of rust.


TANKS for looking!
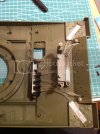
 
BEO ,

Sah-Weet !! IT's cool when you put all of that time into something & it fires up th 1st. time & acts right !!

I'm lookin' forward to th weathering etc !!

Smokin' Job Bro !!
 
Thanks guys. Once it's finally all done including weathering I'll get a video done with an obstacle course to show the stab in action and the articulation of the suspension.

So It's getting down to the finer details now before final priming and paint and then on to weathering.

Elephant ears and frontal turret applique armour now secured

IMG_0375.jpg


Upper turret on and almost completed for parts to be attached.

IMG_0378.jpg


Not too sure on how I'm going to do the "winkie dink" on the turret so I can detach it at any time, so I've left it off for now. It's supposed to be screwed into the turret top. It's used for dry training and maintenance to alert personnel that the tank is occupied and the turret can move at any time.

Scratch built the hull indicator on the driver's back up camera housing out of an acupuncture needle. The turret is so big that you can not see the hull at all in either the commander's hatch or the loader's hatch. The only way I could see the side of the hull was to literally hang myself out of the hatch waist high and lean out. To back up and get an idea of where the hull was you have to look for the little ball on a stick to see where the center of the rear hull was. If you're buttoned up, the PERI sight in the pix 6 position couldn't see it....it's all up to the driver to get you where you wanted to go.

I've put on some of the NATO black on it in the areas where it would have been literally impossible to get later on during the build.

TANKS for looking!
 
ohh love the cup :) the tank is ok too :p na she is getting close to done now eh..
 
Well it's been a while since I've last updated you on the big cat. Been rather busy on a career course and the build had to take a back seat for the past 2 weeks. Still have 5 weeks to go.....

But I digress....

The paint scheme is now done. I laid it all out and shot the paint only to find that the brown was way too dark. On a real Leo C2 that's still wearing some NATO tri colour on for comparison it was a close match. Put it on something smaller scale and it gets dark real fast. That being said, had to go in and get a shade lighter brown and shot it again.

It was still a touch too dark....time to start mixing.

Finally shot it the other day and it's looking fairly decent. Still have to shoot on some clear to even out some mistakes and paint some other parts as well. It's getting close to being completed for paint.

Then it's on to weathering.

I'll be posting pics shortly.
 
Damnit....life got in the way yesterday. Sorry for the delay.

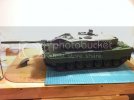
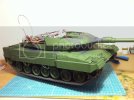
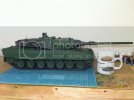
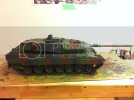
Here she is:

IMG_0381.jpg


Started to paint the pioneer tools and get them ready for wear and tear last night. Have to touch up the barrel a bit.

One thing I've learned is the techniques used for 1:35 does not work well for 1:16.

For example, applying rust to the spare track links that's carried on the front of the tank.

IMG_0383.jpg


Thoughts?
 
Hi ya Beobach,

My only thoughts are that your model looks really impressive and that the camo scheme is top nocht.

A very good one - so cheers, Beobach,
RG
 
BEO ,

I too dig th look !! I can't wait to see it weathered !! It's lookin Hot !! Great Job.

I actually like th look of th track. maybe add another wash to tone down th rust ?? Did they rust that bad in th field ?
 
panzerace007 said:
BEO ,

I too dig th look !! I can't wait to see it weathered !! It's lookin Hot !! Great Job.

I actually like th look of th track. maybe add another wash to tone down th rust ?? Did they rust that bad in th field ?

Thanks. They can if they've been used and the protective coating (wax) has been worn off. Most times though, not that much. Any idea of how to tone it down?

Regards
 

Latest posts

Back
Top