Classic MPC C-3PO and R2-D2 uber detail build: Completed!

Re: Classic MPC C-3PO and R2-D2 uber detail build

I've spent the past few days racking my brain and testing my patience trying to get this circuit working and almost have it. Here's a photo of the breadboard with the circuit on it:


r2-ciralmost.jpg


It's still not finished and I gotta get the flashing rates fixed. Having trouble getting the second set of 3 lit at all. Don't know why. Here's a short vid of what it actually looks like when I run power to the circuit:

R2 Circuit Test 2


I've talked to a couple of people about this and hoping they may be able to shed some light into why this isn't working for me the way I want. Hope to hear back from them soon. Its getting there slowly!
 
Re: Classic MPC C-3PO and R2-D2 uber detail build

Solander said:
Whicked detailing is added to these two guys here. Great work so far!

Thanks guy... I'm glad you're enjoying the build!
 
Re: Classic MPC C-3PO and R2-D2 uber detail build

very good idea for the lighting I was tring to figure out how to do mine I am planing on having full motion for R2 but couldn't get the lighting figured out where it wouldn't interfer with the other electronics I may have to borrow your idea if you don't mind.
 
Re: Classic MPC C-3PO and R2-D2 uber detail build

arohk said:
very good idea for the lighting I was tring to figure out how to do mine I am planing on having full motion for R2 but couldn't get the lighting figured out where it wouldn't interfer with the other electronics I may have to borrow your idea if you don't mind.
I'm hoping I'll be able to fit all the lighting components into the dome itself. May be a tight squeeze, but it should work. I don't mind you using my idea as long as you give credit where credit is due! No problem! Have fun with the fiber optics... they were a nightmare! LOL
 
Re: Classic MPC C-3PO and R2-D2 uber detail build

WOW....
the wiring on that circuit is cah-razee!
I am looking forward to the over-weight glob of grease.
 
Re: Classic MPC C-3PO and R2-D2 uber detail build

ModelMakerMike said:
WOW....
the wiring on that circuit is cah-razee!
I am looking forward to the over-weight glob of grease.

I know right! LOL I just hope I'll be able to fit it all up in the dome.
 
Re: Classic MPC C-3PO and R2-D2 uber detail build

Today while waiting to hear back from some people, I decided to do the panel washing on the body.


r2-bodywash.jpg


Didn't come out too bad, but as I was working, I had an idea for fixing the shoulder joints. I went back and looked at the real joints and then looked at the one that comes on the kit. Doesn't look anything like it and isn't good at all.


r2-realjoint.jpg

r2-kitjoint.jpg


Now I know I can't get in there and sand out the detail without doing some heavy damage and I really don't want to drill out the whole section so I started digging thru my toolbox and found an old marker I had. The end fit perfectly in the joint hole and was hollow in the end, just right for a press mold.


r2-marker.jpg


So I took some of my epoxy putty, and filled the end of the hole. Using the marker cap (which had a perfect indention in it) and a flat piece of styrene, I began to form the details of the joint in reverse and let it dry and harden completely. This is what I came up with.


r2-pressmold.jpg


Now I'm ready, so I took some putty rolled it into a ball and stuck it into the hole. Not alot, just enough to make the impression. Then taking my new press mold negative, I pressed it into the hole over the putty pressing it in as deep and hard as I could to make sure it filled all the nooks and crannys of the mold.


r2-jointputty.jpg

r2-pressing.jpg


When I removed the mold, it came out looking pretty darn good. I'm sure when it's trimmed and painted it should look pretty good. Its not perfect, but looks alot better then that cross that it comes with.


r2-jointpre.jpg


More to come soon... lemme know what you think.
 
Re: Classic MPC C-3PO and R2-D2 uber detail build

In going over my reference pics (of which I gotta give a shoutout to and I love the R2 Builders club, they've got the best photos of the real screen used R2's on the web. You can find all the reference pics, and there are hundreds of pics, I've used in my construction here ILM's Uber R2-D2 Reference Photos - Via R2 Builders Club) I noticed a couple more things I'm gonna have to change. The first being the front eye box. The kit isn't too bad and should be pretty easy to fix with a couple of pieces of thin styrene on the bottom and cutting a notch out of the top right corner.


r2-realeyebox.jpg

r2-kiteyebox.jpg


The second being the front foot. The rear foot cowling actually look pretty good. Very much in detail to the original, but the front foot is completely devoid of any detail whatsoever. I'll have to add the square panel and the top detail raised piece. The one thing I hate doing is scribing and it also looks as if I'll have to scribe that line all around the edge with rounded corners and everything. Not looking forward to that at all. I've never been very good at scribing... if anyone has any tips or tricks they can share, please feel free.


r2-reallegs.jpg

r2-kitlegs.jpg


Another thing my friend Zombie_61 pointed out that I never really noticed is the upper dome panels. He was even kind enough to provide a picture as a reference. As you can see in the kit, the top panels are completely off by about 15 degrees, so, I'm gonna have to cut those out and reposition them or use some putty to make new ones in the proper position. Not quite sure how I'm gonna do that yet... but I'm sure I'll be able to come up with something! :)


r2-domecomp.jpg
 
Re: Classic MPC C-3PO and R2-D2 uber detail build

Yeah, the inconsistencies of the MPC kit are weird. They did good in some areas, and then others...are....well, you know. :)
BUT that was quite the clever fix for the should sockets!
Keep it up, and soon you will be hired at a astro-mech droid factory any day!!!!
:) ;D ;D ;D
 
Re: Classic MPC C-3PO and R2-D2 uber detail build

ModelMakerMike said:
Yeah, the inconsistencies of the MPC kit are weird. They did good in some areas, and then others...are....well, you know. :)
BUT that was quite the clever fix for the should sockets!
Keep it up, and soon you will be hired at a astro-mech droid factory any day!!!!
:) ;D ;D ;D

LOL... Ya think so?? I hopa hopa hopa! Would be my dream job! LOL Thanks bro!
 
Re: Classic MPC C-3PO and R2-D2 uber detail build

Grendels said:
Making good progress I see!

Its coming together slower then I anticipated. But things are progressing. Still trying to figure out a few things, but it's slowly getting there!
 
Re: Classic MPC C-3PO and R2-D2 uber detail build

Today I finished detailing the eyebox. I cut out a small notch in the upper right hand corner of the box and then cut a piece of styrene to a shape that resembles the bottom section of the box.

r2-eyebox1.jpg

r2-eyebox2.jpg


I glued it into place and painted it. Came out looking pretty good.

r2-eyebox3.jpg


Next I spent the rest of the day trying to figure out a consistent way of scribing the panel lines. I knew using a hobby knife wouldn't work. So after looking online for scribers I decided to try making my own scriber. First I took a piece of aluminuim sheet and cut out what looked like a good shape.

r2-scribev1.jpg


After filing it down and sharpening it a bit, it didn't work. The metal was too soft.

r2-scribev1-2.jpg


So, I took a piece of clothes hanger wire and pounded the end of it flat with a hammer. Then using my dremal, I shaped the end into a sharp tip about 1mm wide. Seems to work alot better, but still not quite right.

r2-scribev2.jpg


Seems to get hung up alot and can't have that when scribing. Here you can see a test scribing on the foot cowling. The top scribed line is that of the first failed tool. The bottom line (just above the half moon) is the improved wire tool. Still not quite right.

r2-scribeexp.jpg


Anyone else have any better ideas? Oh... and did I mention... I HATE SCRIBING panel lines? LOL
 
Re: Classic MPC C-3PO and R2-D2 uber detail build

You're doing some great work man. When I scribed the panel lines on my colonial viper, I used a dental pick. I got a set of them at ace hardware for 10 bucks. The trick with scribing, is doing several light passes. Label maker tape works as a great guide for scribing since it's nice and stiff, but comes off relatively easy, you can also cut it to the shape of the line you want to scribe.
 
Re: Classic MPC C-3PO and R2-D2 uber detail build

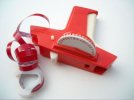
Are you talking about the tape that they used in these things?

labelmakerRed11711.jpg

Do they even make these anymore?
 
Re: Classic MPC C-3PO and R2-D2 uber detail build

ZOMBIEREPELLENT said:
Yep that exact stuff. you should be able to get it at wal mart.

May have to try that. WOW, I can't believe I'm up to 6 pages here! LOL
 
Re: Classic MPC C-3PO and R2-D2 uber detail build

You can also break the tip off of an exacto blade and use the back side as a scriber. Works pretty good.
 
Re: Classic MPC C-3PO and R2-D2 uber detail build

Grendels said:
You can also break the tip off of an exacto blade and use the back side as a scriber. Works pretty good.

I was thinking about that too... just not sure the thickness of the blade will be good enough... btu I may be able to grind out a good shape (like I tried with the aluminum) and hopefully that will work. We'll see.
 
Re: Classic MPC C-3PO and R2-D2 uber detail build

I found something in my closet today that spawned an awesome idea. I found an old spool of copper wire. Now if I remember correctly, I think I had this in a kit for making an alarm clock a long time ago (like when I was kid, can't believe I still have it after all these years and it was probably around the same time that i built my first R2-D2 kit so bringing a bit of nostalgia into this hehehehehe).

r2-spool.jpg


My wife thinks I'm a pack rat hoarder... but I'm not, I'm a re-purposer! :) Anyway, the idea I had was about the hoses on the feet. I found a piece of thin brass rod I had gotten for my falcon that I was gonna use for replacing some of the surface hoses with (came in a 3 pack). Anyway, I took a piece of rod and began wrapping the copper wire around it tightly and what do you know... it looks awesome!

r2-wind1.jpg

r2-wind2.jpg


Won't even have to paint it when I'm done either. Its the perfect color! After winding about 8 inches or so (just in case I messed up something I had some extra).

r2-hosecompare.jpg


I compaired it to the hoses that come on the chromed sprue. Seems as if they are even the right size and diameter. I might even be able to make some connector ends for the hoses using my dremal lathing technique... hmmmm... This is gonna be awesome! More to come...
 

Latest posts

Back
Top