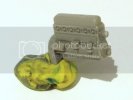
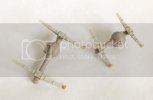
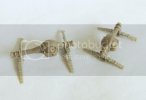
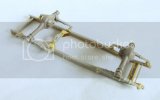
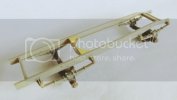
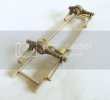
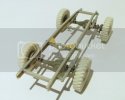
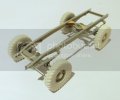
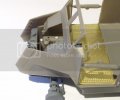
CMP C15TA Armored Ambulance....DONE :)

Chris S

Its a bit like being handcuffed to a lunatic !
Joined
Feb 14, 2011
Messages
4,573
Hi all :)

Its been a while since I dipped into any kind of Armor !! ...To be honest ,I simply lost all interest ,dont know why ? ..it just happened :(
But I've been asked to build one of the Mirror Models kits ..The Ambulance ,which might just rekindle my interest ...we'll see . Not only was I asked to build it ,but I have to build it in a hurry !!! ......No pressure then ???

I have to say tho , I have actually been interested in building one sometime (didnt expect to do it so soon tho ) They do look very impressive ,and indeed looking at the sprues ,etch ,resin in the box ,it looks very nice indeed :)
In case you dont know ,Mirror Models are produced in Ireland by Libor Zachoval, who also owns LZ Models .I got the chance to meet Libor,(albeit briefly) in Dublin at the IMSS show a few weeks back ,where he had a full range of products on his stand ,which seemed to go very quickly !!
Anyhoo ....The kit .
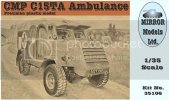
cmp-c15ta-armored-ambulance-soon.jpg

If you want to see the sprue shots you can do so here ....
http://www.mirror-models.com/135-CMP-C15TA--Ambulance.html

Libor also offers further build instructions on the Mirror Models site too ....
http://www.mirror-models.com/35106/c15taaassembly.pdf

Oh ...and just to make things more fun ,I have to build the vehicle displayed Open !!!
Should be a fun build :)

Thanks for looking .

Chris.
 
Re: CMP C15TA Armored Ambulance.

Looks like its a pretty sweet kit. I'm looking forward to seeing what you do with it!
 
Re: CMP C15TA Armored Ambulance.


Those online instructions are very cool, got a tutorial feel to them.

Open display will be cool, plenty of opportunity for stowage, perhaps even an unfortunate casualty ? I know your fig painting skills are up to it ! ;)
 
Re: CMP C15TA Armored Ambulance.

Great choice Chris!! Nice one breaking things up!! Grabbing some popcorn right now...It's good for breakfast too!! LOL!!
 
Re: CMP C15TA Armored Ambulance.

Looking great, Chris :D grabbing a seat and pointing to TRM on who's to blame lol
 
Re: CMP C15TA Armored Ambulance.

While I don't have this kit, I have the C15TA, Otter and Cargo truck. It is cool to see in just the first 4-5 kits the progression Mirror has been on to fine tune their kits, being able to do more in plastic and still keep the detail that the resin gives.

Can't wait for the Diamond T Wrecker!
 
Re: CMP C15TA Armored Ambulance.

Nice to have you all along chaps :)

Rookie ,the instuctions are very good ,the photos speak for themselves and make it really easy to follow ,he also supplies CD Rom instructions in some kits too .

Todd ,make sure you keep me some of that popcorn ;)

Scott , Cant wait to see the big 'T' myself :) , i've watched Libor progress over the last 4-5 years when he started mastering and casting all his own train parts ...fantastic to watch !! He's came a long way .

Well ...I made a start on the lil Ambulance today :)
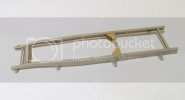
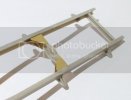
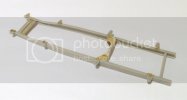
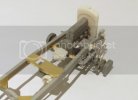
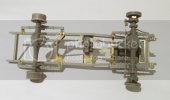
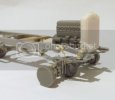
It doesnt look like much ,but there's actually quite a bit of work done . The first stages deal with putting the chassis together ,and you really do have to put every bit together !
Starting out with the two main frame rails ,they are joined via all the crossmembers ,then all the leaf spring mounting brackets are fitted .
At this point I left the frame for a while to dry ,its important that everything is fitted square and the chassis left on its flat to dry ,otherwise you could end up with everthing out of alignment .

With the fram dry ,I moved on and started with the first of the PE ...(of which there is plenty !! ) ,I not a big fan of PE but use it when its needed ,I got to admit it was the only thing I wasnt looking forward to in this kit ...BUT , The PE is simply the nicest I have ever worked with !! ,Its very thin and workable ,even bending up the brackets for the spring mounts (which are tiny ) posed no problems :)

DSCF2266.jpg

DSCF2271.jpg

DSCF2273.jpg

DSCF2267.jpg

Next up ....Axles ,leaf springs & engine :)

Thanks for looking .

Chris.
 
Re: CMP C15TA Armored Ambulance.

Thanks John :) The more I dig into it ,the more I like it too :D

Moving swiftly on :) ......

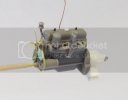
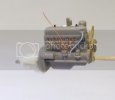
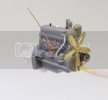
I assembled the basic engine ,still lots of parts to add ,but this being a petrol engine Im going to drill out the holes for the plug leads :) ,and a few other bits because the engine will be on view too .

DSCF2296.jpg

Going back to the chassis & running gear ,I put together both the front & rear axles complete with leaf springs ,these parts are nicely detailed and are pretty much two little kits on their own ! The 'U' bolts that attach the axles to the springs are made up from 0.5mm wire (supplied in the kit ) and add a nice touch to the detail ,there is also a PE mounting bracket on the rear ends of the springs .

DSCF2276.jpg

DSCF2277.jpg

Once those assemblies had dried they were fitted up to the chassis .......

DSCF2280.jpg

DSCF2281.jpg

DSCF2282.jpg

Then onto making up the hubs , The rear is just two large brake drums which attach to the ends of the axle , The front however consists of two made up Hubs ,again these are like little kits !! Six parts plus one PE part make each hub .. Note the Track rod ends need drilled out to accept 0.6mm wire (steering rod ) and again ,all wire is supplied in the box.....

DSCF2283.jpg

When attaching the Font Hubs to the axle care needs to be taken to get the correct alignment !! Notice the funny angle from the front ,This is correct as per the original ....you have been warned !!

DSCF2286.jpg

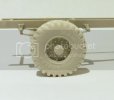
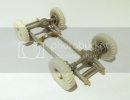
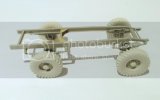
I set the wheels in place next to check everything was sitting square ..which it was ...whoop whoop !! , The wheels by the way are really nice resin pieces ,they still need cleaned up tho .

DSCF2291.jpg

View of the underside ....

DSCF2295.jpg

And right way up :)

DSCF2290-1.jpg

DSCF2289.jpg

DSCF2288.jpg

And thats it for tonight :)

Thanks for looking .

Chris.
 
Re: CMP C15TA Armored Ambulance.

I love these kits. I also really like the CMP vehicles. Aggressive looking bunch.
 
Re: CMP C15TA Armored Ambulance.

Hi chaps :)

Matt :) ..Thanks for looking in mate ,they are kind of aggressive looking aint they :D

John ...lol...wait no more :D

Old Hammer ...lots of detail in these kits ;)


Im just about finished assembling the chassis & running gear now :) ...But before I could do that I had to turn to some bodywork !

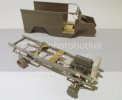
Libor suggests in the instructions that you need to assemble the floor & sides and position the floor on the chassis (temporarily) this is to ensure the engine and gearbox get fitted in the correct place .There is a certain amount of forward and backward movement in these parts ,so fitting the body is the only way to go . Dont try guessing where all the mounting brackets go ...it wont work !

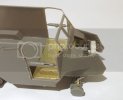
So with that I set about fitting the two body sides to the floor ,I must be honest here and say the fit of the sides is a little vague ? with only a few very small locating pins to help guide you . I think it would be an idea to have a small runner on the inside wall for the floor to sit on ,but thats just my opinion ...in hindsight i should have done that myself ,however What I did was hold each side in position and run some thin CA along the join ,which seems to have worked fine ,there is a little filling to be done on some gaps in the join ..but no big deal :)
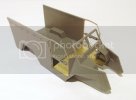
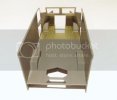
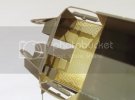
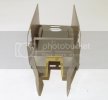
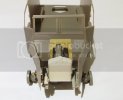
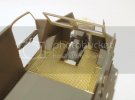
Once the sides were on I Temporarily fitted the front bulkhead/windscreen frame ,its just tacked in a few places so I can remove to add parts and paint it .Following that the the cab floor is fitted which is a nice shiney etch part & fitted perfectly in the gap :)

DSCF2297.jpg

DSCF2298.jpg

DSCF2299.jpg

DSCF2300.jpg

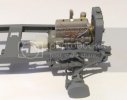
With that all together I moved on with the chassis again :) Its a good idea to start from the front when installing the engine ...etc .I first put the Radiator in ,its crucial to get this in the right place otherwise it may foul the slats on the front grille !! Indeed ,so tight is the fit Libor mentions filing the inside of the top slat .

DSCF2302.jpg

DSCF2301.jpg

Next comes the engine & gearbox ,two PE mounts and strap hold them in position

DSCF2303.jpg

Following that ,the main driveshaft to transfer box is made up and fitted along with the transfer box and including the top plate (pe) Please note ,the engine and gearbox are NOT fixed in place ,this will be done after the engine is detailed and painted ,but thats why some of the shafts appear out of line in the pics .

DSCF2308.jpg

That just left the rear driveshaft from the transfer box to rear axle :)

DSCF2305.jpg

I turned my attention to the smaller details next , the steering rod was bent up using the 0.6mm wire supplied ,then the steering box & linkages .The shock absorbers were added to the front leaf springs ,and an etch bump stop on the rear springs

DSCF2306.jpg

And thats about all the chassis work done :) ...well ..until I get the engine done ! (which is next )

DSCF2304.jpg

Thanks for looking .

Chris.
 
Re: CMP C15TA Armored Ambulance.

Off to a great start Chris!
 
Re: CMP C15TA Armored Ambulance.

Just looking at all that PE is giving me a headache.. :-X

Nice work Chris
 
Re: CMP C15TA Armored Ambulance.

John :D ..Thanks bro ,I'll try to keep up to speed for you ;)

CT ,thanks mate :)

Spud ...cheers mate ...sorry ,this one cant fly ...no wings :( :p

Rookie ,got to admit Im not a big fan of etch ,and finding three sheets of it in the box scared me a bit !!! lol ,but honestly ,its got to be the best etch I have ever used ...sooo easy to use ,just some very tiny parts tho !


Right then ....Engine time :D

Not really a big update this ,but I spent some time detailing the engine ,a bit pointless really as it gets buried deep in the bay ! :(

Anyhoo ...Once again ,Libor has done a nice job here ,not only with the moulding of the plastic parts ,but also in supplying some etch parts to add to the detail . I did however go a little further and drilled out the Distributor and plug holes and added the sparkplug leads ,plus a lead for the coil :) .I aslo removed the moulded on oil filler cap and studs from the top of the engine so I could clean up the join seam ,then replaced those parts with styrene stock ,I still need to trim down the studs a bit ,but I'll let them dry first .
The other thing I did was to add the fan belt using a thin strip of Tammy tape .

DSCF2309.jpg

DSCF2310.jpg

DSCF2311.jpg

A look at the engine in the chassis ....notice ,the chassis got a blast of primer :)

DSCF2312.jpg

Here you can see just how deep the engine sits within the bay , I still want to add a few more details around the top of the engine ,but these will be done later on .

DSCF2313.jpg

DSCF2314.jpg

Sooo....The plan now is to primer the engine ,then I can start paintwork on it and the chassis while building up the body :)

Thanks for looking .

Chris.
 

Latest posts

Back
Top