Dealing with clear plastic

durangod

Active Member
Joined
Aug 27, 2024
Messages
244
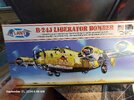
Hi, yesterday i started the 1:92 scale B24J Liberator Bomber
20240921_064819.jpg

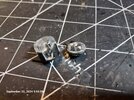
Almost immediatly i noticed the clear plastic sprue parts looked pretty rough. (2019 kit)
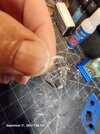
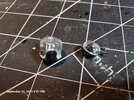
So i had to sand them a bit to fit. They are turret covers. The edges get all all funky when they are sanded. I also noticed that when cut from the sprue, they get like fractured glass in that spot.

All of this makes them look horrible, so is there a special way to handle clear plastic to minimize visible damage?

PS there is also a misprint on the sprue. The turret cover 21, should be 12. Its correct on paper but sprue is wrong #21 is engine covers not turret cover. So the clear sprue #21 should be #12
20240921_070633.jpg20240920_210729.jpg20240920_210649.jpg
 
Last edited:
I always dip my clear parts in Pledge. Try that and see if it clears those issues up. It may or may not work but it's worth a try. Also if you have gaps between the clear parts and the normal plastic you can fill those with white glue before painting.
 
I always dip my clear parts in Pledge. Try that and see if it clears those issues up. It may or may not work but it's worth a try. Also if you have gaps between the clear parts and the normal plastic you can fill those with white glue before painting.
What does pledge do, clear coat?
 
What does pledge do, clear coat?
Clears the blemish and or a form of clearcoat on clear parts.

Any sanding of clear parts will be "funky". But not all is lost. If it's the framework that's sanded, who cares. You're gonna paint it anyway.
Remember when I said good luck and have a flak hammer nearby? That Liberator is an old kit, not uncommon to find flash.

As a rule, I avoid Atlantis kits like the plague. They lack details, lots of flash, thick plastic, fit issues, misprinted parts assignment on instruction guides, etc…

Like I said… have the flak hammer nearby. ROFL!!!
 
No. Nail polish are enamel and or lacquer. Thick too.

Use Pledge instead. You'll be glad you did.
Whatever you do… DO NOT use CA glue to glue canopies or any clear part. CA glue and any super glue will fog them.
yeah i ruined that one with nail polish, luckily i saved it by using dark wash so it looks tinted.
Oops so thats why they fogged up. Well lesson learned on a cheap model. I also put the wrong gun in the tail so il have to play with some putty to cover up that boo boo. :)
 
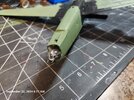
Actually the guns are correct according to artwork. So why this huge hole in tail section. The tail does not cover it. Hmmmm

One might think a taller turret but those are in right place.

Some real versions dont have the belly turret. Looks like i will have to break it to fix it, and switch out the belly and tail turrets. :)

20240922_061114.jpg
 
Last edited:
9ba46966c4126922776a8cfcc5adbeaf.jpg
8c6f65_468b63f20bf04acbb3d1abb1d165dc2d~mv2.jpg
cleaverb24jphoto.jpg
05%20B-24J%20N224J%20right%20side%20in%20flight%20l.jpg
 
yeah i ruined that one with nail polish, luckily i saved it by using dark wash so it looks tinted.
Oops so thats why they fogged up. Well lesson learned on a cheap model. I also put the wrong gun in the tail so il have to play with some putty to cover up that boo boo. :)
That's where Pledge comes in handy. It clears the fogginess from CA/super glue. Ask me how I know…
 
That's where Pledge comes in handy. It clears the fogginess from CA/super glue. Ask me how I know…
lol i dont have any so ill have to get some.

@urumomo Thanks for pics, yeah late last night i saw some pics on google and used acetone to help remove the turrets. Had to break the connector off of one but once reglued it will be hidden.

I totall goofed up, i rechecked the instructions last night and its so obvious from pic that the taller one goes in back, obvious detail missed, but its easy to fix and no big deal, im learning as i go :)

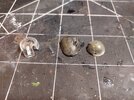
Here are the candidates, first one is almost perfect the other two are really bad and not sure if they can be salvaged

20240922_122130_02.jpg
 
soak those in Super Clean overnight , or longer , and all the coatings you put on there should detach .
You can always polish clear plastic back to completely transparent .
All kinds of plastic polishing compounds around .
Tamiya makes a set with 2 grits , "fine" and " finish .

When you cut clear parts away from the sprue , cut as far away from the part as possible then shave off / sand away the remaining gate that is left .
This avoids inducing stresses into that section of the part which creates those fissures . Those are interstitial and permanently visible .
 
Drain cleaners are always sodium hydroxide .
like oven cleaners .
but much much more concentrated .

But always check the SDS to verify what you're working with to be sure .
 

Latest posts

Back
Top