TRM
New Member
- Joined
- Mar 18, 2011
- Messages
- 5,024
Hey there,
Last week I had the pleasure of finishing up a review for Armorama: Dragon’s Ersatz M10 in 1/72 scale. Not the most power packed of kits; it is still an interesting subject and a fun box of plastic!
Review: http://www.armorama.com/modules.php?op=modload&name=Reviews&file=index&req=showcontent&id=9052
So after looking through the box and writing the review I figure what better time than now to build! Starting a couple days ago the glue came out. Being a low parts count the construction would be quick…just the way I like it!! Means I can get to painting faster !!
Not wanting to waste too much time I will bring you up to speed on where this “in between†build is at!!
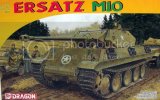
All of the pictures of the kit parts are contained in the Review so I will not take too much time on the parts end of this. But I will start with some box art!!
This moves pretty quickly here and it is a small kit and I had a little time to spare.
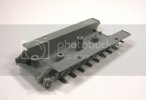
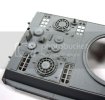
There is a few modifications that I decided to make as I went along. I probably could have went to town on this but the idea was not to bog myself down on a long term conversion type build but rather to get painting and work with some weathering.
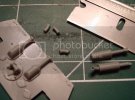
The kit came with the Panther G rear plate having the exhaust installed; however, the pipes were not drilled out. There were three other exhaust options, for other kits, in the box. One of which was the right size and was drilled out. Time to chop and glue.
This is going to seem kind of funny but once the wheels are cleaned up things are pretty much all together.
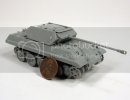
Some more modifications I felt need to be to be addressed. The lift rings throughout this kit were all solid and molded directly to the upper hull. A quick snip and some small gauge wire resolved this issue. The lift rings on the upper rear plate as well as the plates on the side of the turret were thicker on the real tank being made from flat stock steel; some white styrene solved this one.
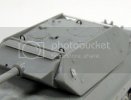
The thought of this kit not having a ton of details on or in the kit is more than valid; however, this tank was a stripped down Panther G with faux armor applied and really was not much more than what is depicted.
The kit was lacking screening for the intakes. Using some Thule and a sharp razor, this was easily rectified. There was probably slat cover plates over the right hand side vents as well as some screening over the fans but I chose to go without. The fan screening was problematic at best. This is where Dragon could have stepped up and supplied a thin screening material for the vents. The slat cover plates for the other vents…let’s chalk that up to, I think they were removed while they made modifications!! Works for me!
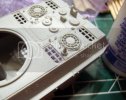
After all that, I decide to remove the vision blocks that were molded solid form to the upper hull. A small chunk of styrene and a couple of snips of PE sheet remnants this was pretty much done. You will notice a small flat plate on the front of the tank. This was a small opening for the Panther’s MG. The door was fashioned from a flat piece of sheet metal and a chain was used to open and close this door. You will also notice the two notches against each front fender at the bottom of the Glacis plate. These were small cutouts for the tow rings. Unfortunately, tow rings were not supplied with this kit. I will be stealing at least one from another kit I have lying around!
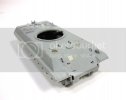
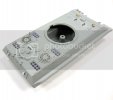
After a couple hours of work, spread out over a couple days, the construction was complete. TIME TO PAINT!! Did I mention I like to PAINT? LOL!! Even more so, I like to weather…so the fun for me is starting!!
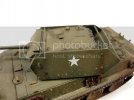
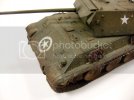
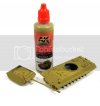
Last night I had to just PAINT!! I broke out the AK Dark Yellow primer. This tank was painted with the German equivalent to the US OD coloring. Dark Yellow was a good starting point for me.
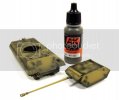
Not letting the grass grow at all under my feet I went right at some pre-shading. I stole the 4BO Dark Base from my AK modulation set and laid down the shade.
I used Olive Green from K4 for the next highlight on this tank.
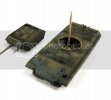
After that I used K4’s Olive drab for some more highlighting throughout.
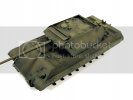
Finally I finished this off with some Life Color Green from their German Camo Set. I think this will work just fine for the weathering soon to come!
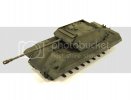
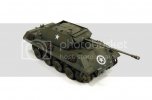
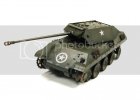
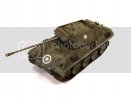
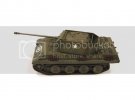
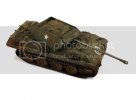
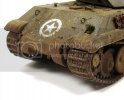
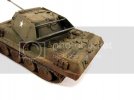
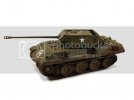
So there you have it, paint is done on the Ersatz M10. I will be hitting a touchup or two and need to work the tracks and Decs of course, then on to some of the funs stuff…weathering!!! Back at this after a little yard work today!!
Thanks for tuning in!!!
| |)
Last week I had the pleasure of finishing up a review for Armorama: Dragon’s Ersatz M10 in 1/72 scale. Not the most power packed of kits; it is still an interesting subject and a fun box of plastic!
Review: http://www.armorama.com/modules.php?op=modload&name=Reviews&file=index&req=showcontent&id=9052
So after looking through the box and writing the review I figure what better time than now to build! Starting a couple days ago the glue came out. Being a low parts count the construction would be quick…just the way I like it!! Means I can get to painting faster !!
Not wanting to waste too much time I will bring you up to speed on where this “in between†build is at!!
All of the pictures of the kit parts are contained in the Review so I will not take too much time on the parts end of this. But I will start with some box art!!

This moves pretty quickly here and it is a small kit and I had a little time to spare.


There is a few modifications that I decided to make as I went along. I probably could have went to town on this but the idea was not to bog myself down on a long term conversion type build but rather to get painting and work with some weathering.
The kit came with the Panther G rear plate having the exhaust installed; however, the pipes were not drilled out. There were three other exhaust options, for other kits, in the box. One of which was the right size and was drilled out. Time to chop and glue.

This is going to seem kind of funny but once the wheels are cleaned up things are pretty much all together.

Some more modifications I felt need to be to be addressed. The lift rings throughout this kit were all solid and molded directly to the upper hull. A quick snip and some small gauge wire resolved this issue. The lift rings on the upper rear plate as well as the plates on the side of the turret were thicker on the real tank being made from flat stock steel; some white styrene solved this one.

The thought of this kit not having a ton of details on or in the kit is more than valid; however, this tank was a stripped down Panther G with faux armor applied and really was not much more than what is depicted.
The kit was lacking screening for the intakes. Using some Thule and a sharp razor, this was easily rectified. There was probably slat cover plates over the right hand side vents as well as some screening over the fans but I chose to go without. The fan screening was problematic at best. This is where Dragon could have stepped up and supplied a thin screening material for the vents. The slat cover plates for the other vents…let’s chalk that up to, I think they were removed while they made modifications!! Works for me!

After all that, I decide to remove the vision blocks that were molded solid form to the upper hull. A small chunk of styrene and a couple of snips of PE sheet remnants this was pretty much done. You will notice a small flat plate on the front of the tank. This was a small opening for the Panther’s MG. The door was fashioned from a flat piece of sheet metal and a chain was used to open and close this door. You will also notice the two notches against each front fender at the bottom of the Glacis plate. These were small cutouts for the tow rings. Unfortunately, tow rings were not supplied with this kit. I will be stealing at least one from another kit I have lying around!


After a couple hours of work, spread out over a couple days, the construction was complete. TIME TO PAINT!! Did I mention I like to PAINT? LOL!! Even more so, I like to weather…so the fun for me is starting!!
Last night I had to just PAINT!! I broke out the AK Dark Yellow primer. This tank was painted with the German equivalent to the US OD coloring. Dark Yellow was a good starting point for me.

Not letting the grass grow at all under my feet I went right at some pre-shading. I stole the 4BO Dark Base from my AK modulation set and laid down the shade.

I used Olive Green from K4 for the next highlight on this tank.

After that I used K4’s Olive drab for some more highlighting throughout.

Finally I finished this off with some Life Color Green from their German Camo Set. I think this will work just fine for the weathering soon to come!

So there you have it, paint is done on the Ersatz M10. I will be hitting a touchup or two and need to work the tracks and Decs of course, then on to some of the funs stuff…weathering!!! Back at this after a little yard work today!!
Thanks for tuning in!!!
| |)

