F-15E Strike Eagle

plummerfan16

New Member
Joined
Dec 8, 2012
Messages
31
Hopefully going to start work on my Revell F-15E Strike Eagle. Had the kit for a little while now, and I'm hoping to start work on it tomorrow. Until now, I hadn't really taken an in depth look at the model. The amount of detail in some areas has really suprised me. So far, I've only found one major thing that will need to be changed.

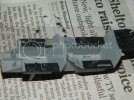
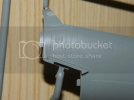
This model has the louvers to the right rear of the cockpit. These are present on the 91 models (I think they were only on 91s, might be on the 98s too), not on the 00s. I've never tried doing anything like this with a model before, so I need some advice on how to do this. Does anyone know how I can make it so this looks just like a normal panel? Thanks.
DSCN9741_zps03de12ee.jpg
 
Apply superglue and sand (you will probably need to rescribe some panel lines and rivets).
 
A lot of times I use a couple coats of Mr. Surfacer 500. I does shrink a little so that's why you need a few coats. But it sands really easy.
 
I agree with the others.But would like to add that if you choose to use superglue...make sure you sand it smooth shortly after drying.Superglue has a tendency to get harder and harder as time passes.Wait too long and you will end up grinding away the surrounding plastic faster than eliminating your superglue.Just wanted to make sure you knew that.I'm really looking forward to your build.I'm working.on a Tamiya 1/32 version myself.... 89-0487
 
This was my first build, i have some pics in my profile area. As I am a beginner myself I cannot offer any advice, sorry. Have fun though.

Darren
 
No worries.... I have a couple of 1/48 'E's that I plan on building down the road.One will be a Lakenheath jet and the other from Mountain Home,so I'll be watching your build with interest!
 
Ok, FINALLY got started on the model, doing very little each day this week, but it's started. I still need to touch up quite a few things (fine painting isn't my strong point), but so far I'm pretty happy with my work on the cockpit.

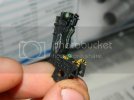
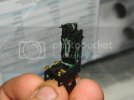
One of the seats is finally together, just a little more paint touch ups and it will be finished.
DSCN9742_zps6a3817a6.jpg
DSCN9743_zps3f6e1b16.jpg

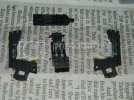
The other seat is just about ready to go together and get touched up.
DSCN9746_zps50aa430e.jpg

The cockpit itself is almost done.
DSCN9745_zpsbc9fe3b4.jpg

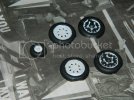
And the wheels, like everything else lol, just need a little touching up.
DSCN9747_zps7550c49a.jpg

So far, that's all I have done. Next step will be consoles and struts, and actually painting the main body of the aircraft. Also, for the panel I asked about in the first post, I bought this stuff made by a company called Deluxe Materials called Perfect Plastic Putty. It's supposed to be used to get rid of gaps. I filled the section and smoothed it out, so hopefully it looks good when I paint over it.
 
Back
Top