lancerunolfsson
Member
- Joined
- Dec 21, 2020
- Messages
- 88
I did build one model back in 1992 or 3, it was a WWII Italian in line prop job but I can't remember specifically which it took me less than 4 hours to build and paint. Spread over two days because I had to leave it over night to let the Testors cement set up.
The reason I'm doing this thread is in hopes that as I build this thing I might get some useful tips with specific problems as I go along. One of the things I'll be doing is stating problems I had and how I overcame them (or didn't). I'm happy to hear feedback on that too.
This one is a MiG-15 Bis. When it gets it's Chinese decals it will be magically transformed into a Shenyang J-2. It's A Smer Model entitled only J.2
I'm about 4 hours in and what I've got done is the Cockpit assembled and the wings assembled. A LOT of time was spent trimming flash and sanding with an emery board.
Honestly my instinct about canopies and Cockpits was to glue the canopy on before I primed the model and spray it flat black with everything else then pick out the panes with the silver like I did with the last model I built.
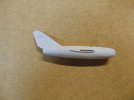
Instead following the vauge assembly diagram I glued the instrument panel well ahead of the hole I assumed to be the hole for the end of the stick. Later I noticed the diagram of the assembled cock pit later in the instructions and saw that that was wrong. There is no hole for the stick and the hole in the deck of the cockpit piece is for nothing in particular. So I moved the panel without breaking it. I promptly lost the stick after I removed it from the stick. So I cut a very short length of stem wire. Heated up one end with my lighter and stuck it home with the needle nose pliers I was holding it with. Then I dicked around forever trying to glue in the pedals. Finally I wound up grinding a cheap pair of tweezers from harbor freight to more precisely handle tiny parts and stuck a little blob of blue tack on the back of the control panel to hold the cross piece of the pedals. Then I glued the pedal in place with Tamiya ultra-thin. When it set up I used an Xacto to trim away the visible blue tack there is just a little bit I could not get but it is pushed in well enough that it will show as a space when the cockpit is painted.
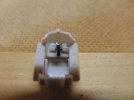
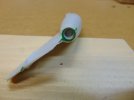
NOw that I look at the Picture I need to get in there with a dental tool and scrap more of the Tack out. Over Iron Sights it looked OK
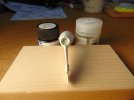
Now when I've scraped and sanded the crap out of the Fuselage this is what I get when I check for fit.
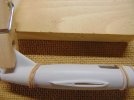
JUst spotted a little piece of crud on the cockpit. Most of it is OK.
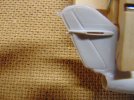
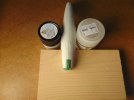
But the Tail is badly out of alignment. Notice how badly the two projections for the inside of the horizontal stabilizers on the vertical stabilizer don't line up. What do you do with something like this? It is not glued yet I was just checking for fit.
Thanks
Lance
The reason I'm doing this thread is in hopes that as I build this thing I might get some useful tips with specific problems as I go along. One of the things I'll be doing is stating problems I had and how I overcame them (or didn't). I'm happy to hear feedback on that too.
This one is a MiG-15 Bis. When it gets it's Chinese decals it will be magically transformed into a Shenyang J-2. It's A Smer Model entitled only J.2
I'm about 4 hours in and what I've got done is the Cockpit assembled and the wings assembled. A LOT of time was spent trimming flash and sanding with an emery board.
Honestly my instinct about canopies and Cockpits was to glue the canopy on before I primed the model and spray it flat black with everything else then pick out the panes with the silver like I did with the last model I built.
Instead following the vauge assembly diagram I glued the instrument panel well ahead of the hole I assumed to be the hole for the end of the stick. Later I noticed the diagram of the assembled cock pit later in the instructions and saw that that was wrong. There is no hole for the stick and the hole in the deck of the cockpit piece is for nothing in particular. So I moved the panel without breaking it. I promptly lost the stick after I removed it from the stick. So I cut a very short length of stem wire. Heated up one end with my lighter and stuck it home with the needle nose pliers I was holding it with. Then I dicked around forever trying to glue in the pedals. Finally I wound up grinding a cheap pair of tweezers from harbor freight to more precisely handle tiny parts and stuck a little blob of blue tack on the back of the control panel to hold the cross piece of the pedals. Then I glued the pedal in place with Tamiya ultra-thin. When it set up I used an Xacto to trim away the visible blue tack there is just a little bit I could not get but it is pushed in well enough that it will show as a space when the cockpit is painted.

NOw that I look at the Picture I need to get in there with a dental tool and scrap more of the Tack out. Over Iron Sights it looked OK
Now when I've scraped and sanded the crap out of the Fuselage this is what I get when I check for fit.

JUst spotted a little piece of crud on the cockpit. Most of it is OK.

But the Tail is badly out of alignment. Notice how badly the two projections for the inside of the horizontal stabilizers on the vertical stabilizer don't line up. What do you do with something like this? It is not glued yet I was just checking for fit.
Thanks
Lance
Last edited:

