Ford built M4A3 Dry Stowage Sherman

Big-John

New Member
Joined
Sep 17, 2011
Messages
1,052
This is a project I have going on over at my Sherman Shop forum. It’s part of a Tamiya Sherman group build that is currently active.

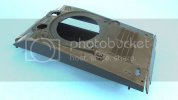
I’ll be building the Ford built M4A3 Dry storage Sherman. The base kit is the Tamiya M4 with numerous parts from the spare parts box.
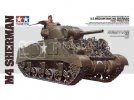
TamiyaM4_zpse61cbef5.jpg

The Tamiya M4 kit has the wrong front plate configuration for an M4, but it does have the correct configuration for an M4A4, which is very close to the M4A3 dry. The big deference is the shape of the radio pot.

The engine deck panels and rear plate were cut out of a spare Tamiya M4A3 hull. The forward plate was cleaned off of the late style filler cap and splash guard. I will rework the plate to the Ford configuration.
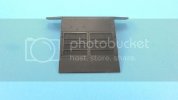
M4A3Ford-1_zps1d67b740.jpg

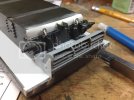
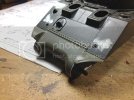
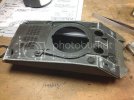
And this is where I am currently at. The early Differential is a Tasca spare. I wanted to get most of the major parts fitted before I do much finish work.

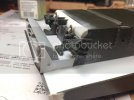
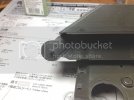
There is a lot more filling and clean up work ahead, but here are some pictures of how it all fits together.
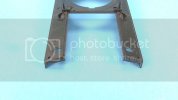
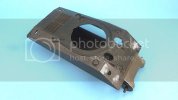
M4A3Ford-2_zps9f8ef93a.jpg

M4A3Ford-3_zpsb4fb627b.jpg

M4A3Ford-4_zps4025a6b6.jpg
 
I’ve been busy working on the rear features of the M4A3. I have rounded the transition piece from the rear plate to the bottom plate, made new ford style tow lugs, and boxed in the rear overhang, along with making some filler panels for the sponsons. The exhaust deflector came from a dragon M4A3 kit.

M4A3Ford-6_zps234122d6.jpg

M4A3Ford-5_zps59546d69.jpg

The next couple of pictures show the Tasca transmission cover and Tasca fenders fitted. Plus the large gaps that had to be filled around the sides of the final drive.

M4A3Ford-7_zpsbd17626d.jpg

M4A3Ford-8_zpscb3e070b.jpg

Now I have a LOT of filling and sanding to be done. Once I get all that work done I should be ready to start refining weld beads.
 
Some nice work there John, the welds look very nice as do the shackles, are they styrene?
 
rookie said:
Some nice work there John, the welds look very nice as do the shackles, are they styrene?

Thanks! Yes, the shackles are leftovers from a Tasca kit.
 
I’ve been staying busy on this one all weekend, Doesn’t seam like I have much accomplished, but there has been a lot of work going into this.

I’ve been working on the weld beads on the hull. The beads were created by gluing .010 X .020 styrene strips down, let it dry, then go back and soften the styrene with extra thin cement and sculpt the bead. The welding work still isn’t completely finished yet as I have some clean up and touch ups to do.

M4A3Ford-10_zps3a37e070.jpg

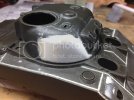
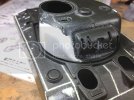
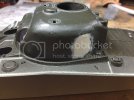
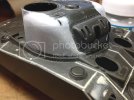
I also made a start on modifying the turret. I wanted to represent a turret manufactured in the spring of 1943 so I deleted the pistol port and created the relocated check casting. Again, still not finished with this yet. This involves a lot of filling and sanding, inspect, refill and sand until I’m satisfied with the shape.

M4A3Ford-11_zpsf9f473f0.jpg

M4A3Ford-12_zpscf4ed38c.jpg

M4A3Ford-13_zps2e858acc.jpg

That’s pretty much it for this update, I’ll continue to weld, shape, and sand!
 
AWESOME DS Sherman John!! Love all the work going into ol' boy here and them welds are L@@k'in sweet!! 8)
 
Hey Thank you Eric!

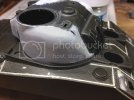
After posting the last round of pics, I noticed the cast cheek armor didn’t looks right, so some more filing and sanding and filling and sanding was in order. Here’s how it looks now with some Mr. Surfacer primer on to blend it all in. I must say that I’m very pleased with how it came out as this was my first attempt at trying to make my own modifications on cheek armor.

M4A3Ford-14_zps1ed4a857.jpg

M4A3Ford-15_zps1dd5c1ea.jpg
 
Sure is some fine work you're doing there John! 8) It keeps amazing me how many versions there are of the Tamiya M4A3. :eek:
 
Thanks Fish!

This doesn’t seam like much of an update, but there was a lot of work done to get to this point.

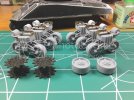
The Tamiya M4 kit has the wrong return roller brackets. The kit brackets are of the up swept variety and should have the straight return roller bracket. To correct this, I chose to use the Dragon suspension from the parts box. The Brass return skids are from Lion Marc Model Designs.

Here is a shot of the finished suspension components.

M4A3Ford-18_zps8e4c2e07.jpg
 

Latest posts

Back
Top