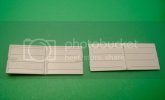
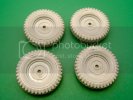
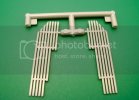
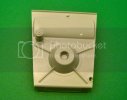
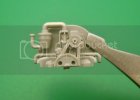
German Kubelwagon with Cold Weather Starter

Thats an interesting little kit Erik !...not seen that before ,are ya gonna hook it up to the back of a big Tiggy ;D

Chris.
 
oh that is nice ill have to keep an eye out for that one
 
Interesting. I guess push starting it with the tank is out of the question. ;D ;D ;D
 
Another cool and not so often seen choice. So will it actually be pulling something when done?
 
;D
Howdy, Erik, my friend ?? ;)

C´mon dude, it´s been 10 days since you posted TWO pictures showing the strenuous "opening box stage" ;D ;D ;D

Don´t tell me aliens abducted you and then you woke up in L. Vegas, with a void in your short term memory... and 2 Grands less in your savings ... ;D ;D

Just jerking, Erik... ;D
RG
 
Hope not!! The probing I've been told is murder!! :eek:

P P P P P P P P pics please 8)
 
Yes Yes .... Pix are forth coming ... I recently discovered a long lost P.E. set floating around th Panzer Shoppe - Edward P.E. set for th Italeri Kubel .... Well I don't see No Italeri Kubel here ... *swipe* parts of it will now go on th Kubel & I should get some pix up by Late tomorrow night !!!

@JELLY - Amigo ... you crack Me up .... !! Saludos ! No Aliens ..... & No Voids in My short trem memory either ... not that I remember .... :eek: .. Wittmann's Tiger has been given Me a fit ... trying to get that Zipped up ..... So .....

I'll really get into th NutZ & BoltZ of this Kubel & have some Pix for Yous Guys !!
 
Howzitgoin'!!!

Nice catch on the PE!! No pressure Erik!! just a bit of fun!! ;) Beside really itching to see Whitman's ride!!!!!!! 8) Keep Rockin'!!!! ;D
 
Here's a lil' update on th Kubel ..... Everything's prepped for th P.E.

DSC08443.jpg
Somewhat of an Exploded View .... Funny ... It reminds Me of th time I had My '63 Bug & thought it was a good Idea to take most of it apart !! :eek:

DSC08444.jpg
Door Handles shaved & ready for th P.E. !!

DSC08445.jpg
Mr. Dissolved Putty will have a go at these Tires !!

DSC08446.jpg
I was excited to see th "Floor Boards" are not molded on ... makes painting them a lil' easier !!

DSC08447.jpg
The Hood is cleaned up & ready for some P.E. bits

DSC08448.jpg
Then here's th Motor .... Some X-Tra work is in order for this Lil' Power plant !!

More pix to follow ... I'll get some work & have it posted by this Week-end !!

CHEERS ......

Sammy Hagar - I Can't Drive 55
 
From th Where are They now files ...... A much needed update !!
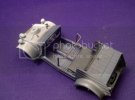
Kubeldriversside.jpg
Shot with Vallejo's German Grey Primer, I then highlighted it with Model Air German Grey + German Camo Beige ( model color) at a 90 degree angle to th floor of th Kubel. The brown around the Oh Sh#t Bar ( which is actually molded on the bar) is , in real life a leather padded wrap, painted with Vallejo Leather Brown, dry brushed with German Camo Beige
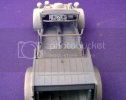
KubelSpeedo.jpg
Th Speedo was picked out with Vallejo Panzer Colors White (#344) & Vallejo Games Black
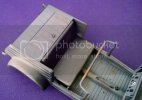
Kubelrearstoragearea.jpg
I did some wear & tear on th interior with German Camo Black/Brown
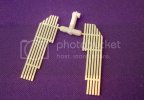
Kubelwoodenslats.jpg
The wooden "Floor Boards" thankfully are molded separately & get a base coat of Tamiya Wooden Deck Tan , I'll come back & dot filter with Brunt Siena & Burnt Umber Oil paint to give it a woody appearance !
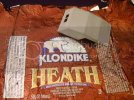
Kubeltopmaterial.jpg
The top in th kit really lacked any texture, so I turned to My good friend th Ice Cream wrapper ! This particular flavor of Klondike Bar has Texture in th wrapper. Once it is separated from it's Wax paper backing, the Foil is really less than a 1/16th of an inch & really pops after some drybrushing. I'll accent th Top under th foil with some Evergreen rod to bring out the Bows in th top, as They are less prominate in th molded version ( more on this to come)
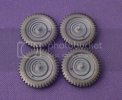
DSC08604.jpg
The Wheels are painted th same way as th interior.
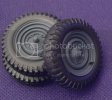
DSC08605.jpg
I used some Brass Rod for the Valve stems !! The rim was drilled & rod inserted & clipped to size
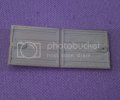
DSC08606.jpg
I used some of the Edward P.E. set for th Italeri Kubel - here attaching the door handles. These were chipped up with Vallejo German Camo Black/Brown
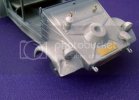
DSC08601.jpg
Since this lil' ride will belong to th Werkstatt Unit .. some Damage was in order. I used My Dremel to inflict some dents upon th Fender !!
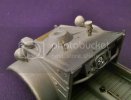
DSC08600.jpg
I used some brass rod to make the wiring for the headlights. Edwards P.E. set was called on for th bump stops for th Windshield, the reinforcement on th hood & the License Plate . I still need to add a piece of brass rod to th filler cap as the real on had a retainer attached to th Cap & th body of th spout.

Well that's all for now ..... Alright , Hold Tight .... Who's up for a Pub Crawl ?
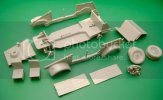
 

Latest posts

Back
Top