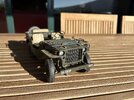
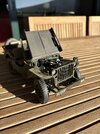
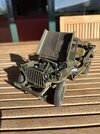
Jeep Willys - 1/4 ton 4x4
- Thread starter GCB
- Start date
- Joined
- Sep 4, 2022
- Messages
- 1,514
Nice!look
The wear on the seats and wooden handles really believable!
Thanks, and yes, not bad for a very simple process: primer and light khaki for the seats and some Tamiya panel liner for the handles.
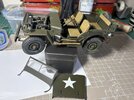
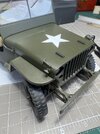
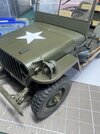
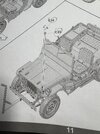
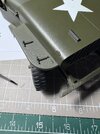
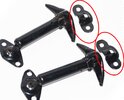
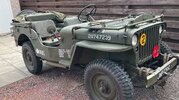
Now, I do have a problem with the hood latches: if I understand well the ones with the bent end are for the top (to secure the windshield) and the ones with the straight ends are to secure the hood.... however, if I glue those, I will not be able to open the hood or they will be holding only with the tiny base..
Forget about them??
Also, weird that there is no part to secure the latch on the hood (see third pic) for this model which is quite detailed... May add something, but once again, will not be able top open the hood... ideas??


- Joined
- Sep 4, 2022
- Messages
- 1,514
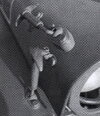

Without getting in to hinges or ball joint pivots, could you drill out the latch base and replace the rod with flexible wire or string of some kind? Then you could possibly remove the latch to open the hood... dunno if that helps...
and for the latch 'catch' , I'd try to cut, bend and drill some spare PE into that shape.
- Joined
- Sep 4, 2022
- Messages
- 1,514
Prototype time!have a look into it.
airdave
Well-Known Member
- Joined
- Oct 11, 2012
- Messages
- 204
Looking at how high the molded attachment is (on the hood) I believe it is the attachment for the windshield latches.
I agree with you, there is no attachment point for the hood hold-down latches.
Weird that it wasn't molded to the hood.
I guess they intended for the builder to pose the model with latches disconnected and hood open.
With this much engine detail, you would not want to permanently fix the hood (in my opinion).
If you pressed some plasticine or molding material against the hood - take an impression of of the existing latch attachments.
Then you could cast a couple of attachment shapes and glue them to the hood.
...
and before I finished my post, you posted your latest pics.
The attachment is a bit bulky, but it works.
- Joined
- Sep 4, 2022
- Messages
- 1,514
Don't wanna hijack this thread, however it would probably be of interest to many if we started a new thread on the subject!
Years ago, (40 years), on a much larger (sculpture) scale, used clay, plaster and paraffin... I had also secured some medical (dental) grade 'quick setting' mold material.
Have you any good reference 'how-to' material on the subject for modelers?
I've often thought about that, or even carving or shaping a part, then creating a mold. I suppose guys creating with resin do it all the time...If you pressed some plasticine or molding material against the hood - take an impression of of the existing latch attachments.
Then you could cast a couple of attachment shapes and glue them to the hood.
Years ago, (40 years), on a much larger (sculpture) scale, used clay, plaster and paraffin... I had also secured some medical (dental) grade 'quick setting' mold material.
Have you any good reference 'how-to' material on the subject for modelers?
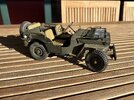
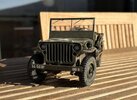
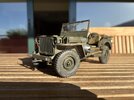
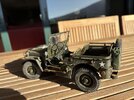
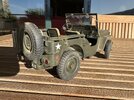
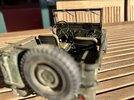
Ok, done... at least I will assume completed.
In all fairness, looks better in reality than pictures. I have seen recently one of your post where you were discussing about the importance of looking good on pictures, but well, too late. Or I should have a proper camera rather than the iPhone (always blaming the tools!!).
There is also a figure with this model that I did not assemble, and the reason is that I am not good enough to paint faces on 1/16 scale. Maybe one day.
Some pictures show with windshield down and other with hood up..


locomotive
Active Member
- Joined
- Mar 2, 2025
- Messages
- 71
Looks brilliant. Be proud of that!
Jakko
Well-Known Member
- Joined
- Oct 9, 2024
- Messages
- 758
Any modern phone or tablet camera is a proper one, really. The problem with them is usually the processing that the camera software does without you asking for it.Or I should have a proper camera rather than the iPhone (always blaming the tools!!).
Similar threads
- Replies
- 93
- Views
- 2K

