Papermodder
Modeller in both Plastic and Paper Card
- Joined
- Jan 2, 2013
- Messages
- 1,224
It's been a while since I posted an update.
I have been taking a rest from the Patlabor project, to direct my attention to a build that is for a gift for my Sister.
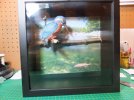
I'm building Kingfisher II by Johan Scherft, who is an amazing papercraft artist of mainly birds. When completed this will include a shadow box diorama. It has been quite a while since last I did a figurine.
First up is the cutout for the body of the bird.
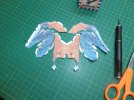
This is singularly the most complicated part of the whole build, with many complex shapes.
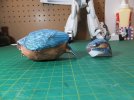
The head was not that bad. Just had to make sure you followed the instructions. There are no printed instructions, so you have to follow his build videos and images. Sometimes just one's imagination and experience, on how a section is assembled.
Here the head and body are mated.
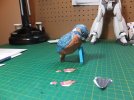
The beak has been the bain of my existence. It was not hard to build. The problem was he wanted the beak reinforced with glue after construction. Three times I made that beak and tried 3 different glues. All three leaked through the thin paper and discoloured the ink. I'm not concerned about it being handled as it will be mounted inside the shadow box. So I build a fourth this time without the filling and mounted it.
The feet were just simple tubes so not difficult.
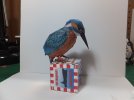
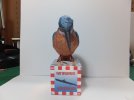
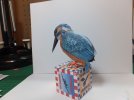
The completed Kingfisher.
Now on to some more elements for the display.
Thank you for following.
Comments and questions are always welcome.
Jim
I have been taking a rest from the Patlabor project, to direct my attention to a build that is for a gift for my Sister.
I'm building Kingfisher II by Johan Scherft, who is an amazing papercraft artist of mainly birds. When completed this will include a shadow box diorama. It has been quite a while since last I did a figurine.
First up is the cutout for the body of the bird.

This is singularly the most complicated part of the whole build, with many complex shapes.

The head was not that bad. Just had to make sure you followed the instructions. There are no printed instructions, so you have to follow his build videos and images. Sometimes just one's imagination and experience, on how a section is assembled.
Here the head and body are mated.

The beak has been the bain of my existence. It was not hard to build. The problem was he wanted the beak reinforced with glue after construction. Three times I made that beak and tried 3 different glues. All three leaked through the thin paper and discoloured the ink. I'm not concerned about it being handled as it will be mounted inside the shadow box. So I build a fourth this time without the filling and mounted it.
The feet were just simple tubes so not difficult.
The completed Kingfisher.


Now on to some more elements for the display.
Thank you for following.
Comments and questions are always welcome.
Jim


