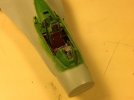
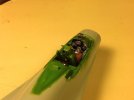
Loud and Proud, F-16 A/C Redtail 1/48 by Academy.

Fork Virus

New Member
Joined
Jun 29, 2011
Messages
166
Hey addicts,I will be working on a Redtail version of an F-16. The kit is by Academy at 1/48. This is a lot of first for me. I'll be going retro with this kit. It's going to have that recognizable paint scheme and flashy exposed metal body. Working on Eduard PE details, never worked on them. With so many details, it looks like a self contained kit. Lastly, I'll be using Vallejo paints, I used mostly enamels. Heard so many great and not so great things about Vallejo, i'm curious to see what happens.

I made an error picking up the wrong decal scale, There 1/72 instead of 1/48, but they don't look to bad and just about right.

This looks fun and challenging, wish me luck!
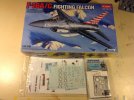
image.jpg
 
Nice kit, this looks to be a fun build. I have done the Tamiya F-16 agressor and I have a Tamiya F-16C in the stash. The fit of those kits is superb. I'm curious about the Academy version, I'll follow along. Let me know if you like it.
 
Thanx guys :D.
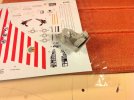
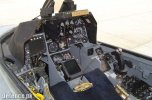
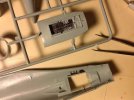
First off, the cockpit in this Academy kit is uninspiring. A decal sheet represent cockpit details. as you can see. Revell made better panels, but that's what Eduard is for.
image.jpg

Few hours in...Building the Eduard control panel without no problems and it was tedious, using medium CA glue. I then cut and sanded down a piece of plastic that protruded on the Academy instrument panel.
image.jpg

Here's the kicker, it appears that the Eduard panel doesn't seem to fit perfectly with the Academy panel. 2, The Eduard panel won't fit nicely onto the "cowl" that's molded on the F-16 cockpit area.
image.jpg
O-nfGNCawUSEF408ZbFIU7YaeKpaOyu4dzydRQcRSMA

image.jpg
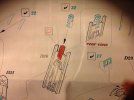
It's suppose to fit like this from this ref, I think the Academy "cowl" part of the cockpit is a bit too cramp to fit the Eduard panel.
image.jpg

You addicts out there got any solutions?
 
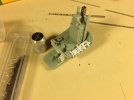
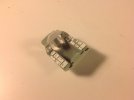
A few hours later, thought I share wwhat did for now... added Eduard detail to the ejector seat...
image.jpg
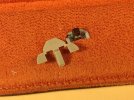
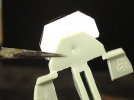
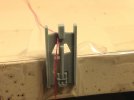
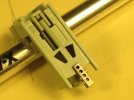
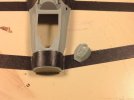
First thing I did is cut that piece of plastic at the top, using thread method. Did a initial cut at the edge I want and pulled the thread down in a sawing motion. Using package tape as a vice grip to hold the piece.
image.jpg
I wanted a clean cut, but I got inpatient, and it was uneven. Drats!
image.jpg
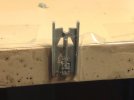
the results were good, and it fit perfectly.
image.jpg
 
I almost forgot, since the side instrument panels lack any details, I thought I make 'em! Side panel 1.0. It's pretty cool, I have to do better. If any of you addicts got any suggestion for DIY side panels, plez let me know.
This build is pretty fun so far and the same time mentally draining, those Eduard kits take a lot of concentration.
image.jpg
 
God I hate when they give you a decal sheet for the instrument panel! Nice work though its looking good. As far as the fit problem just take your time file, cut, putty, finess it in there.
 
Your side panels look great to me, just cutting sheet styrene and scratching works but it looks like thats what your doing. Good job!
 
letsgobrowns82 said:
God I hate when they give you a decal sheet for the instrument panel! Nice work though its looking good. As far as the fit problem just take your time file, cut, putty, finess it in there.

It's the second time I came across a kit with decals for cockpits. The first one was F-18 , small size, that's acceptable. I thought this time at 1/48, being a bigger scale, better cockpit, not this time. I like Academy kits in general, sturdy plastic, barely no flashes, and fun to build.

Part of it is my fault for going for an affordable kit, $29.99. Maybe if I found a more expensive kit, way better details.
 
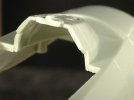
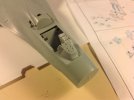
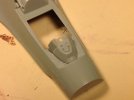
Zup addicts, did some surgery with cockpit cowl. Had to cut it out of the body and sliced some silts to fit in the instrument panel like so. image.jpg
Then put some epoxy putty, to fill in the silts.image.jpg
image.jpg
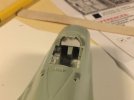
Tested the fit with a fake instru panel, and it fits.
image.jpg
 
Here's a close up of the DIY cockpit, cut up pieces of styrene plastic sheets.
image.jpg
PE details for the cockpit and landing gear.
image.jpg
I am having a blast adding in these Eduard details! It makes working on this model more worth it. ;D
 
Looking great FV!! That do it yourself cockpit makes me want to ditch the 20 dollar resin ones that you can barely see once everything is together anyways.
 
hey said id check out your latest build, great work on the side panels and congrats on the patience with the cowl, i like to buy the cheaper kits and spend hours doing tiny bits of never to be seen scratch ;D this lokin like quite a detailed build, lookin forward to seein her come together. oh yea say the prob you were havin with removing the peice on the back of the seat so i thought id link you a guy who makes all type of saw blades, cuts so thin you have to hold them to the light to see it, RB Productions check out his stuff its made by a modeller for modeling and i can highly recommend it http://www.radubstore.com/
 
Martay said:
hey said id check out your latest build, great work on the side panels and congrats on the patience with the cowl, i like to buy the cheaper kits and spend hours doing tiny bits of never to be seen scratch ;D this lokin like quite a detailed build, lookin forward to seein her come together. oh yea say the prob you were havin with removing the peice on the back of the seat so i thought id link you a guy who makes all type of saw blades, cuts so thin you have to hold them to the light to see it, RB Productions check out his stuff its made by a modeller for modeling and i can highly recommend it http://www.radubstore.com/

Thanx martay. You seemed to be an ace with those inexpensive kits, your craftsmanship seem superb, especially with cockpit detail of the Arado. Thanx for the link as well, getting those blades for Xmas, and some other useful tools as well.
 
Re: Loud and Proud, F-16 A/C Redtail 1/48 by Academy. Updated.

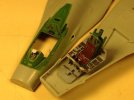
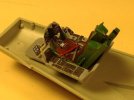
Hey addicts, been awhile, my life was filled with distractions. Finally got a bit of breathing room for this build. Completed adding on Eduard cockpit details, again draining for me and I did what I can for the DIY cockpit panels.

I started using Vallejo paints. Mixed my version of interior green, 2 parts flat yellow and 5 parts flat green. I applied by painting thin coats like what i use to do with illustration board. Painting 2 or 3 coats isn't good enough and not durable either. I'd accidentally scratch the paint and find myself covering up again more than 3 coats that's for sure.

It was suppose to be interior green for cockpit "cradle", but the instrument panel surroundings are neutral gray. So I painted the cradle in neutral grey by mixing yellow, blue, red with a touch of white. Painted brown leather seats and I will leave the metal parts un painted, kind of give it it's retro look.

image.jpg
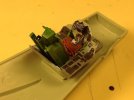
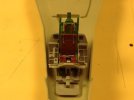
More cockpit details, I did the best I can with Eduard parts and DIY panels.
image.jpg
image.jpg
image.jpg
The cockpit fits with no problems :D
image.jpg
image.jpg

Keep calm and carry on.

Thanx for viewing! ;D
 
WayneBt said:
The cockpit sill should be black as well as the part behind the cockpit.

I know...This is retro build, colors and markings that simulate a WW 2 fighter plane. I thought it would be an interesting pace instead of doing a basic F-16 scheme.
 

Latest posts

Back
Top