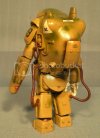
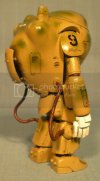
MaschinenKrieger Raptor build

OK, after a long break, here is an update on my Raptor.

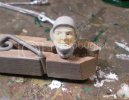
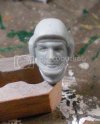
After I got the suit assembled and the basic colors down, I turned to work on the soldier's head. I had laid down a base flesh coat, using an Andrea acrylic:

6_1_Face.jpg

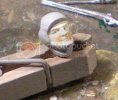
and painted in whites for the eyes. Then I began adding some shading, using oils:

6_2_Face.jpg

I apologize for the washed-out quality of those pictures, I used too bright a light. But in the second photo, you can see a problem that I had missed. Do you see the dark spot in the left eye? That's a bubble in the casting. I didn't notice it, till I started painting the eyes. At this stage, I left it as it was, intending to paint it in.

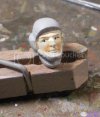
These pics are a little better, taken on the bench. I'm painting his gaze directed to his right, so next, I added some color for his irises:

6_3_Face.jpg

and a better angle:

6_4_Face.jpg

So far, so good. Then I tried to cut in a fine line of black, for the eyelash line:

6_5_Face.jpg

That picture is at the beginning of the process. Upshot is, I messed up the eyes, so, into a bath of Super Clean the head went, and:

6_6_Face.jpg

Yeah, he's got a little paint booger there, too. I cleaned that off. Back to square one, ready for a second pass. I've since filled the bubble in the left eye, primed and laid on the flesh base again. But at that point, I put the whole thing aside, to avoid getting frustrated. We'll come back to the face later...
 
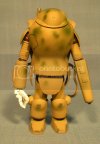
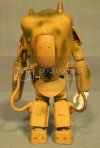
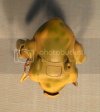
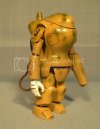
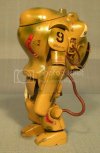
I let the Raptor sit for a couple of months, and worked on and finished some other projects in the meantime. Last weekend, after I got power back, I turned again to the Raptor. I did some preliminary weathering, starting with some pin washes in the various access panel lines and seams in the armor. I used a couple of different acrylic washes, from craft store paints thinned with isopropyl or with water, to Tamiya acrylics, thinner with Tamiya thinner--a violation of my usual rule of using a different medium for a wash, since the base colors are Tamiya acrylics. I also assembled the kit, in preparation for gloss-coating and decals, and then more weathering. Here are five views.

From the front:

7_1_FirstWeathering.jpg

One of the great things about this kit is that a lot of the seams between parts are meant to be there. Not realizing that, I've filled some of them. I'll know better on the next one I build. I also used Andrea acrylic Slate Grey to do some chipping and scraping on the armor. I will return to this, after the decals are on.

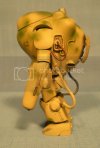
From the left side:

7_2_FirstWeathering.jpg

You can see that the paint is flaking off the soft plastic of the hoses. I have to address that. I intended to use a different color, in any case. I've since learned that most modelers who build MaK kits replace the kit hoses with lengths of wire, wrapped with finer wire. I will use that technique on the ones I build in the future.

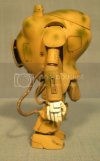
From the right side:

7_4_FirstWeathering.jpg

I also applied some black pastel chalk for heat staining, on the laser rifle and around the motor compartment on the back of the suit. From the back:

7_3_FirstWeathering.jpg

You can't see the motor, of course, since it's now covered by the oblong plate in the center of the pic. I painted it with Tamiya flat aluminum, then laid on a very thin coat, almost a thick wash, of Tamiya flat black. It turned out really nice, and I think I can use it for machine guns on my aircraft builds. And here's a shot from above:

7_5_FirstWeathering.jpg

The access panel in the center was probably the biggest pain in an otherwise relatively easy and fun kit. It straddles the seam between the two halves of the shell, and it's very easy to obliterate the panel line, when cleaning up the seam. It was difficult to pop this one with a wash, since it was so shallow. On the next one, I will re-score that panel, to make it deeper.

So, that's where I am with the Raptor. The next step is a gloss coat and decals, then weathering. It's customary to beat the heck out of MaschinenKrieger subjects, but I'll probably keep it light on this one. My goal now is to finish this in time for my next club meeting, on December 7.

As always, comments/criticisms are welcome, and thanks for looking!
 
Hi Brad, it's great to see so many Ma.K builds here, you guys are on fire!!

Nice color choices, this will be fun to weather.

Good luck!

Linc
 
Thanks, Linc! I saw your Falke over at the MaK forum, I see you've added it here, it's stunning!

Yes, I like the increase in MaK subjects here, too. I'm looking forward to doing more, and carrying forward what I'm learning.
 
You are most welcome Baron. The Baron!

It's a fun genre to learn with isn't it? When kits take me 6mths to put together I'm much more careful and conservative with them but these are just enough investment of time that I don't feel any stress. :)

Good luck getting it in for Dec.

Linc
 
Hi, all, here is my latest update. It took a little longer than I had hoped, but I went about it carefully, in small batches, and the holidays and some theater work came in between, too.

I have all the decals on that I plan on using. That consists of unit/formation signs, and stencils. There were also some kill or mission markings, but I'm leaving those off. Here are the pics:

8-1_DecalsSealed.jpg

The decals are very good. They came off the backing easily and settled down nicely. And in 1/20, you can read them pretty well, too.

8-2_DecalsSealed.jpg

I chose this particular subject from the sheet because I like the boomerang nose art. A soldier's good luck charm--the boomerang always comes back.

8-3_DecalsSealed.jpg

That white triangle on the left shoulder bump was the only one that gave me any problems, which is not surprising, given the curves. I used Solvaset and also poked some holes with a fine sewing needle and got it to settle down.

8-4_DecalsSealed.jpg

The only other problem I had was inadvertantly picking up some stencils while handling the model. Oh, and I mistook color callout #2 for decal placement #2, and put stencils on the shoulder wings, where they do not belong. Thankfully, the decal sheet included many duplicates, including stencils in both white and black. And finally, here's a shot from above:

8-5_DecalsSealed.jpg

Altogether, I applied the decals in 3 passes, which basically followed the photos in the instructions. Once they were on, I painted over the shoulder wings, touched up the hoses, and then applied a second coat of Future, to seal everything. Jon Bius from Agape Modeling (www.agapemodels.com) suggested using higher pressure than I had used in the previous pass. I took his advice and upped the pressure from 5psi to 20psi. The Future went on much better this time.

Not visible in these photos is the work on the interior. I'm moving along painting the interior details, and so, all that's left is to finish the interior, apply some more weathering, and finish the pilot's face. Can I finish by Friday? I think so.

As always, criticism and comments are welcome, and thanks for looking!

YbiC
Brad
 
Thanks, John!

Mine's a Wave kit--I don't know if that makes a difference in the decals. What sort of problem did you find with yours? I have more MaK kits in the stash, so I'm curious to know what to look for.
 
Thanks, Ken!

Did some more chipping last night, the suit is ready for a matte coat and then some oils for filtering. Still working on the pilot's face. I thought after yesterday morning that I was going to have to strip the head a second time, but returning to the bench last night, it looked better than I thought, so, onwards!
 
Nice job... I really have to start looking around for some of the MaK kits. They look like fun builts.

Great job with the painting. Looking forward to the endresult
 
the Baron said:
Thanks, John!

Mine's a Wave kit--I don't know if that makes a difference in the decals. What sort of problem did you find with yours? I have more MaK kits in the stash, so I'm curious to know what to look for.

My decals didn't want to conform around the egg shaped armour, I had to use plenty of micro set (and sol) and even then I resorted to blasting Klear at it to kind of 'stick' it down, sorted it in the end though ;)
 
JohnSimmons said:
the Baron said:
Thanks, John!

Mine's a Wave kit--I don't know if that makes a difference in the decals. What sort of problem did you find with yours? I have more MaK kits in the stash, so I'm curious to know what to look for.

My decals didn't want to conform around the egg shaped armour, I had to use plenty of micro set (and sol) and even then I resorted to blasting Klear at it to kind of 'stick' it down, sorted it in the end though ;)

OK, the same kind of issue I had on the left shoulder blister. Yes, setting solution and some cutting required, definitely. The stencils worked pretty well, though.

One thing I thought of, after applying the stencils, is that I should have applied them before the camo, as if a base coat was applied at the factory, then the stencils, then the field unit taking delivery applied their own camo, and it covered or obscured some of the stencil text. So, I would have applied the dark yellow, then the stencils, then the green blobs, then formation signs. Maybe I'll try that on the next one I build--and I do now have a little MaK stash, so I will definitely add more!
 
Re: MaschinenKrieger Raptor build--FINSHED!!

FINISHED! And in time for tonight's meeting, too.

Hi, all, here's the last installment in my Raptor build. I have off today, so I was able to use the time to finish the pilot's face. He's not going to win any contests, but I'm happy with the result.
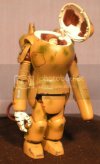
9-1_Finished.jpg

You can see the pilot peeking out over the collar of his suit, and get an idea now of the size and scale of the armor.
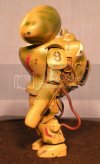
9-2_Finished.jpg

I finished weathering the other night, deciding it was best to stop and not go overboard and cause more damage than could be fixed by tonight. Weathering consisted of applying chips, using Andrea acrylic slate grey, applied with a toothpick; and of applying oils as filters. I used flesh, Naples yellow and Titian white, and focused on the top-facing surfaces, those surfaces that would be exposed most to light. Also, I hoped that in doing so, some of the natural shadows formed by the shape of the suit, would be emphasized. However, it's almost too subtle an effect, so next time, I can let loose a little more.
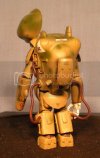
9-3_Finished.jpg

My main worry at the end was finished the pilot's face. I had already started and then stripped the face twice. On this third pass, I overlaid the original pale flesh color that I started with, with Tamiya acrylic flesh. It has more of a tan base to it, the kind of color we get in stage lighting with amber gels. Also, I was reminded that Tamiya acrylics brush much more easily when thinned. I applied these by dipping the brush in the pot, and then into a well filled with Tamiya acrylic thinner, on my palette. Even so, the flesh color got thick during application, and so, on close inspection, the pilot has Edward-James-Olmos-face.
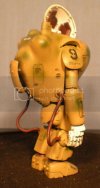
9-4_Finished.jpg

After the base colors were applied--face and eyes--I used oils to try to do some shading. I mixed flesh with a tiny
bit of Prussian blue, in an attempt to reproduce five o'clock shadow, tip of the hat to Planet Figure, for that suggestion. Then I used a little of that flesh color to pick out his forehead, the bridge of his nose and his cheekbones, applying the color then blending it, almost like dry-brushing. But I think these effects get washed out in the light I'm using to take the pictures. I may do another photo session. In any case, as I was working on the face, I kept picturing Shep Paine's diagram from the old "Tips on Building Dioramas" brochures from Monogram, and used that as a guideline.
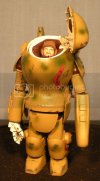
9-5_Finished.jpg

In any case, I'm done! My buddy Scott, who gave me the kit, asked if I'm going to mount the figure on a base. I've been toying with the idea of a vignette of a couple of figures, maybe suiting up for, or returning from, a patrol. So for now, this is how he'll look.

As always, comments and criticisms are welcome, and thanks for looking!

YbiC
Brad
 
Looks great, and I really like the detail you go into in your posts. Very useful for who is trying to learn ;D
 
Thanks for the kind words, guys! Ravhin, I'm glad if you find useful things in my posts. I get a lot of good ideas from everyone else, too, so I try to pay it back ;)

Grendels--open that box and build it!
 

Latest posts

Back
Top