merseajohn's Fine Molds 1/144 Slave 1
- Thread starter JohnSimmons
- Start date
John, duuuuude! 
You're going into a "scale modeler's berserk mode with this" - crash everyone's brains with an extreme skill and master techniques and smash our jaws on the floor ;D
Its unbelievable what are You doing here with this small guy, just 5 stars mate, 5 of 5!!
You're going into a "scale modeler's berserk mode with this" - crash everyone's brains with an extreme skill and master techniques and smash our jaws on the floor ;D
Its unbelievable what are You doing here with this small guy, just 5 stars mate, 5 of 5!!
Jamaicanmodels69
New Member
- Joined
- Apr 17, 2011
- Messages
- 604
beautiful looking sharp!!!
astroboy said:merseajohn is to painting what scratchy is to building!!!!!!!!!!
I think they need to tag team a few things!
Dude, being not to bright about painting myself I can't say I haven't thought about such a kind of teaming up, but hey, there is a huge problem in that: who's shelf the finished masterpiece would stand on??? ;D
Solander said:astroboy said:merseajohn is to painting what scratchy is to building!!!!!!!!!!
I think they need to tag team a few things!
Dude, being not to bright about painting myself I can't say I haven't thought about such a kind of teaming up, but hey, there is a huge problem in that: who's shelf the finished masterpiece would stand on??? ;D
mine....
JohnSimmons
For Spud: I was once Merseajohn
- Joined
- Jan 4, 2011
- Messages
- 5,645
Wow such nice feedback, thanks you lot!
Leighbo: Thanks mate! Now get on with a sci fi kit (prefably star wars lol!)
Squee: Cheers, the only way is just to jump in with your fingers crossed!
Astroboy & Sol I dont think my painting comes even close to Scratchy's building skills!
And cheers Grendels, Jamaicanmodels69, Q, Tanker, Jaitea, Glorfindel and Igard.
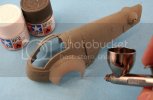
So here's what I've been up to. Painted the body with a mix of xf-22 & xf-2:
Then on came the maskol again (very heavily, allthough I did still take a bit off on a piece of scrap).
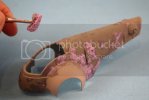
Then a witches brew of xf-14, xf-2 and xf-55 covering the maskol with a several coats sprayed thinley. The reason for this is that if you chuck it all on there in one coat the maskol pulls the paint off rather than leaving it looking chipped.
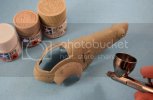
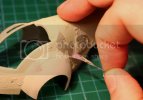
And here's how it stands at the moment, it looks more green in person but still not quite 'green' enough to my liking but I'm hopefully going to fix that with some filters.
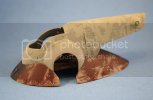
I'm moving back onto the wings again now, updates as always to follow. Thanks again for the comments guys, gives a boost to finish. ;D
Leighbo: Thanks mate! Now get on with a sci fi kit (prefably star wars lol!)
Squee: Cheers, the only way is just to jump in with your fingers crossed!
Astroboy & Sol I dont think my painting comes even close to Scratchy's building skills!
And cheers Grendels, Jamaicanmodels69, Q, Tanker, Jaitea, Glorfindel and Igard.
So here's what I've been up to. Painted the body with a mix of xf-22 & xf-2:

Then on came the maskol again (very heavily, allthough I did still take a bit off on a piece of scrap).

Then a witches brew of xf-14, xf-2 and xf-55 covering the maskol with a several coats sprayed thinley. The reason for this is that if you chuck it all on there in one coat the maskol pulls the paint off rather than leaving it looking chipped.


And here's how it stands at the moment, it looks more green in person but still not quite 'green' enough to my liking but I'm hopefully going to fix that with some filters.

I'm moving back onto the wings again now, updates as always to follow. Thanks again for the comments guys, gives a boost to finish. ;D
blakeh1
Well-Known Member
- Joined
- Oct 26, 2011
- Messages
- 1,161
Looks great so far
I also really like the step by step, particularly in regards to painting and masking. I have an airbrush I am looking to try out for the first time on a model and this gives me a good technique guide to follow for my 1/72 Slave 1
I also really like the step by step, particularly in regards to painting and masking. I have an airbrush I am looking to try out for the first time on a model and this gives me a good technique guide to follow for my 1/72 Slave 1
JohnSimmons
For Spud: I was once Merseajohn
- Joined
- Jan 4, 2011
- Messages
- 5,645
Thankyou Grendels & blakeh1. Another update, got the dark green on the wing arches and the top & side of the body. Started off masking out the wing arches, I used small strips and made sure I burneshed them with a cocktail stick, there's quite a bit of fidely masking with this due to its size.
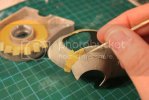
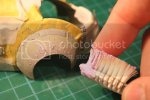
Then came the chipping on the right arch. This was achieved by flicking maskol off an old stiff toothbrush:
The green was a mix of xf-65 and xf-5
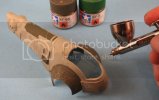
And some quick shots dry fitted again (the wing tips were finished in kahki):
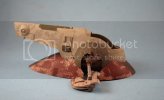
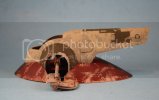
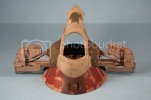
Hope you like it, this kit isn't for the faint hearted, simply because of the paint job, but I think I'm getting there

Then came the chipping on the right arch. This was achieved by flicking maskol off an old stiff toothbrush:

The green was a mix of xf-65 and xf-5

And some quick shots dry fitted again (the wing tips were finished in kahki):


Hope you like it, this kit isn't for the faint hearted, simply because of the paint job, but I think I'm getting there
nicholassagan
sippin on gin + juice
- Joined
- Dec 28, 2011
- Messages
- 2,013
God DAMMIT man this is awesome! 


JohnSimmons
For Spud: I was once Merseajohn
- Joined
- Jan 4, 2011
- Messages
- 5,645
Thankyou Grendels, tmajor, Igard, derex3592 and nicholssagan! Ok another small update. Painted the black around the cockpit (tamiya flat black), got the new panel painted on the right wing arch (tamiya deck tan) still need to add chipped paint to it, got the decals on, added blast marks with Vallejo model air german grey with a very fine brush:
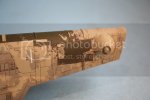
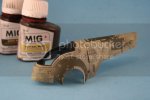
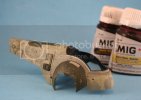
And also gave her a pin wash with mig neautral wash and a little dark wash here and there:
I've got the back panels to the body painted and will give them some weathering tonight.
Hope you like it, I'm still gettin used to the fact that I've given it a wash....usually I dont like to give 'every' panel line a wash because it ends up looking like road map! But the more I looked at the ref pics there is a brownish look goin on... I dont know I'm still havin fun, let me know what you think guys.
MJ

And also gave her a pin wash with mig neautral wash and a little dark wash here and there:


I've got the back panels to the body painted and will give them some weathering tonight.
Hope you like it, I'm still gettin used to the fact that I've given it a wash....usually I dont like to give 'every' panel line a wash because it ends up looking like road map! But the more I looked at the ref pics there is a brownish look goin on... I dont know I'm still havin fun, let me know what you think guys.
MJ
Similar threads
- Replies
- 2
- Views
- 177
