Moebius Space Pod from Lost in Space
- Thread starter MrNatural
- Start date
MrNatural
my head is falling off my head
- Joined
- May 27, 2009
- Messages
- 983
thanks alot i appreciate the compliments keeps me motivated ;D this kit has been a blast to build, definately a challenge, the direciton sheet went out the window after the first step they could improve upon that aspect, im interested to try some of the other moebius kits out there, maybe i'll just build all the lost in space kits they have 
MrNatural
my head is falling off my head
- Joined
- May 27, 2009
- Messages
- 983
miles to go before i sleep
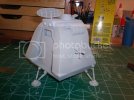
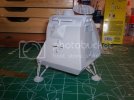
Worked on the robot tonight and got the pod in final primer stage i have to say im pretty stoked about how the seems came out, its nice when hard work pays off there are just a couple little spots that need some touch up work before I paint. thats whats up
robot ready for primer
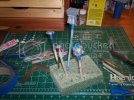
pre paint pod primer action
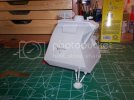
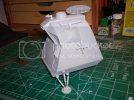
that terrain is callin my name...
Worked on the robot tonight and got the pod in final primer stage i have to say im pretty stoked about how the seems came out, its nice when hard work pays off there are just a couple little spots that need some touch up work before I paint. thats whats up
robot ready for primer

pre paint pod primer action


that terrain is callin my name...
MrNatural
my head is falling off my head
- Joined
- May 27, 2009
- Messages
- 983
airbrushing rules
i love my airbrush. im like a kid on christmas eve when I get to use my airbrush even if it doesnt come out exactly how you imagine, you learn a little bit more everytime you use it. Anyway...I base coated the robot and the pod with tamiya acrylic flat aluminum the pics of the robot are bad but im happy with how the paint job came out. The pod looks good but there are a couple splotchy sections, i think my paint was a little too thick, I also got excited and left a big fat fingerprint on it : . So im going to sand with a super fine grit and give it another coat. yayeah thats a what ima do!
B-9
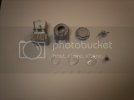
Poddy
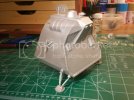
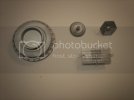
i love my airbrush. im like a kid on christmas eve when I get to use my airbrush even if it doesnt come out exactly how you imagine, you learn a little bit more everytime you use it. Anyway...I base coated the robot and the pod with tamiya acrylic flat aluminum the pics of the robot are bad but im happy with how the paint job came out. The pod looks good but there are a couple splotchy sections, i think my paint was a little too thick, I also got excited and left a big fat fingerprint on it :
B-9

Poddy


MrNatural
my head is falling off my head
- Joined
- May 27, 2009
- Messages
- 983
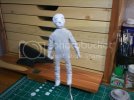
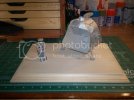
Had to take a few days off from the work bench, starting to feel a little cooky, spending too much time looking down. Anyway, got the robot done and touched up the figure, basically just tried to smooth out the fingerprints and shape the face a little. oh, and i found me a nice base at the hobby shop for 10 bucks, its really rough needs some sanding but i think its pretty rad for the price.. check it out
B-9
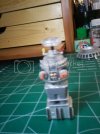
drilled a hole in the figure for a stint to hold during painting and to help the figure stand on the dio
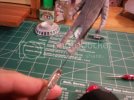
started playin around with positioning on the base
B-9

drilled a hole in the figure for a stint to hold during painting and to help the figure stand on the dio


started playin around with positioning on the base

MrNatural
my head is falling off my head
- Joined
- May 27, 2009
- Messages
- 983
small update
pretty much just tieing up the loose ends at this point a little more paint to do then its diorama time
just did a little masking and started preping my base
low pod light thingy masked up
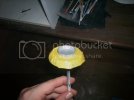
spent about an hour sanding this thing gettin it ready for some stain
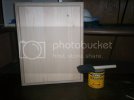
after one coat of stain, i'll do one more coat tomorrow
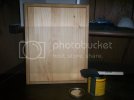
pretty much just tieing up the loose ends at this point a little more paint to do then its diorama time
just did a little masking and started preping my base
low pod light thingy masked up

spent about an hour sanding this thing gettin it ready for some stain

after one coat of stain, i'll do one more coat tomorrow

MrNatural
my head is falling off my head
- Joined
- May 27, 2009
- Messages
- 983
Full Speed Ahead!
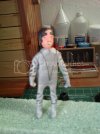
Okie dokie, so, the figure is all done and I did alot of work on the base, so, without any furhter adieu...
Figure is done painted with tamiya silver, model master skin tones, and a tamiya gloss black wash...
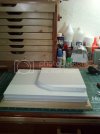
cut out some pieces of foam board to start ruffing out the lay of my terrain
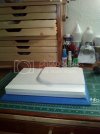
glued em in place with some weldbond and masked off the wood
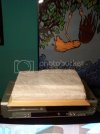
covered the foam with light weight spackle straight out of the can no thinner, after a few hours I could shape and smooth out the spackle with my fingers, this saved on sanding time, once it was totally dry i sanded it a little but, not too much. I went ahead and took mask off after a few hours to avoid large chunks coming off once the spackle totally dried.
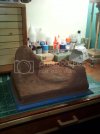
I needed to create some rock formations and boulders for my scene and I read about a product called celluclay in Shep Paine's book How to build Dioramas so I thought I would try it out, this product was right next to the celluclay at the craft store and after close examination it seemed like they are the same thing except this product called FastMache was a few dollars cheaper and to my good fortune works great!
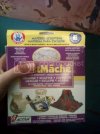
This stuff sort of looks like toilet paper after being put through a food proccessor or something. All you have to do is add water and mix untill your desired consistency you can make it really runny or nice and firm like modeling clay, I considered modeling clay at first, but this stuff seems to go alot further for the price and it dries alot faster. Its a little messy at first untill you get the hang of mixing it to right consistency, but I found it to be perfect for making rock formations and boulders.
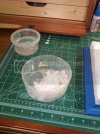
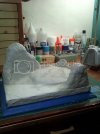
started building up the rocks. I just slowly built up layers letting the mache stiffen slightly before adding more
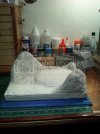
after I got the rocks how I wanted them I took a mixture of water and weldbond and coated all the mache, waited a while and then coated again..
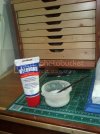
Okie dokie, so, the figure is all done and I did alot of work on the base, so, without any furhter adieu...
Figure is done painted with tamiya silver, model master skin tones, and a tamiya gloss black wash...

cut out some pieces of foam board to start ruffing out the lay of my terrain

glued em in place with some weldbond and masked off the wood

covered the foam with light weight spackle straight out of the can no thinner, after a few hours I could shape and smooth out the spackle with my fingers, this saved on sanding time, once it was totally dry i sanded it a little but, not too much. I went ahead and took mask off after a few hours to avoid large chunks coming off once the spackle totally dried.

I needed to create some rock formations and boulders for my scene and I read about a product called celluclay in Shep Paine's book How to build Dioramas so I thought I would try it out, this product was right next to the celluclay at the craft store and after close examination it seemed like they are the same thing except this product called FastMache was a few dollars cheaper and to my good fortune works great!

This stuff sort of looks like toilet paper after being put through a food proccessor or something. All you have to do is add water and mix untill your desired consistency you can make it really runny or nice and firm like modeling clay, I considered modeling clay at first, but this stuff seems to go alot further for the price and it dries alot faster. Its a little messy at first untill you get the hang of mixing it to right consistency, but I found it to be perfect for making rock formations and boulders.

started building up the rocks. I just slowly built up layers letting the mache stiffen slightly before adding more

after I got the rocks how I wanted them I took a mixture of water and weldbond and coated all the mache, waited a while and then coated again..


S
ScaleModelMadman
Guest
Looks real good to me man!
8)
8)
DreamKnight
Active Member
- Joined
- Dec 8, 2009
- Messages
- 1,160
That looks great man! Can't wait to see it with the Pod! 
MrNatural
my head is falling off my head
- Joined
- May 27, 2009
- Messages
- 983
terrain on the brain
just been workin on the dio painted some rocks and started fleshing out the ground have a look
I made a wash with citadel codex grey and applied several coats to the rock formations untill i have a solid color
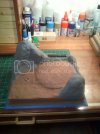
I then made a few different washes with tamiya sky grey, neutral grey, and dark grey and applied them liberally and randomly. I then dry brushed tamiya german grey and sky grey untill my rocks well, looked like rocks basically.
Then I put down some grass, this is a mix of woodland scenics fine green turf and coarse yellow turf, and some found rocks. im going to add some bushes and maybe a tree or two in there somewhere eventually
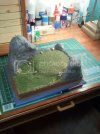
here is a quick teaser shot of the pod on the base im going to finish up the pod tonight
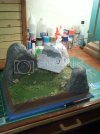
just been workin on the dio painted some rocks and started fleshing out the ground have a look
I made a wash with citadel codex grey and applied several coats to the rock formations untill i have a solid color

I then made a few different washes with tamiya sky grey, neutral grey, and dark grey and applied them liberally and randomly. I then dry brushed tamiya german grey and sky grey untill my rocks well, looked like rocks basically.
Then I put down some grass, this is a mix of woodland scenics fine green turf and coarse yellow turf, and some found rocks. im going to add some bushes and maybe a tree or two in there somewhere eventually

here is a quick teaser shot of the pod on the base im going to finish up the pod tonight


