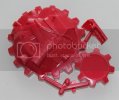
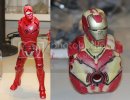
My first thread here, Moebius 1/8 scale Iron Man mk VI suit :D
- Thread starter TDA
- Start date
Last Cavalry
New Member
- Joined
- Sep 26, 2012
- Messages
- 38
EXCELLENT!!!!!!
dasboote34
New Member
- Joined
- Apr 21, 2012
- Messages
- 35
TDA
New Member
- Joined
- May 15, 2012
- Messages
- 60
Thanks for all the great comments guys 
Hi Limpar33 Yeah unless the paint is already formulated for airbrush use (Like the vallejo model air series etc.) it will need thinning. There's several acrylic thinners on the market, but I usually just use windscreen cleaner (like windex etc.) as it's way cheaper and works pretty much as well as any thinners I've tried
  And the model was given a coat of varnish as a last finish, I've never buffed or polished a miniature or kit as a final finish before
Limpar33 said:Hi there, got one of these kits myself, did you thin your Vallejo paints for the airbrush? & what with. I'm a noob and can take all the help I can get. Ps did you polish your model or spray it with a coat?
Hi Limpar33
Limpar33
New Member
- Joined
- Mar 26, 2013
- Messages
- 4
Hi Limpar33  Yeah unless the paint is already formulated for airbrush use (Like the vallejo model air series etc.) it will need thinning. There's several acrylic thinners on the market, but I usually just use windscreen cleaner (like windex etc.) as it's way cheaper and works pretty much as well as any thinners I've tried
  And the model was given a coat of varnish as a last finish, I've never buffed or polished a miniature or kit as a final finish before
[/quote]
Thanks for the advice, I also have the Dragon kit Mk VII, and I was going to just use spray cans, but realised I would compromise the finish. So now thinking of using Tamiya Fine Primer > Vallejo Model Air (Via Airbrush) > Tamiya Clear Red. Hope applying 2 different brands like this doesnt prove problematic.
Ps lovely work its very impressive.
Limpar33
New Member
- Joined
- Mar 26, 2013
- Messages
- 4
TDA said:Okay, apparently it seems that the dragon kit is with pre-painted parts... That really sucks (for me at least, as a modeler) so my first priority will probably still be War Machine...
You can still get this kit unpainted for £30.
TDA
New Member
- Joined
- May 15, 2012
- Messages
- 60
Cool, so the kit comes unpainted as well, I might just have to get it thenLimpar33 said:Thanks for the advice, I also have the Dragon kit Mk VII, and I was going to just use spray cans, but realised I would compromise the finish. So now thinking of using Tamiya Fine Primer > Vallejo Model Air (Via Airbrush) > Tamiya Clear Red. Hope applying 2 different brands like this doesnt prove problematic.
Ps lovely work its very impressive.
And if you apply the different brands of paint with an airbrush I don't see why there should be any problems, but if you apply with brush beware that Tamiya uses isopropanol in their paint which will dissolve most brands of acrylic paint so do some tests first to make sure
I have the dragon unpainted kit, couple of things to not.
its 1/9th scale (but id still like to see it side by side w the Moebius) the arc reactor is actually coloured plastic not clear and the big one for anyone wanting to light the kit is that it has a core frame that the body panels attach to leaving very little room for wiring/lighting, and has a single post to mount to base which will require basing or something to hide any wires running into the base.
The plastic is also quite soft and the fit is not as good as id hope.
On the positives, its a more dynamic pose, where possibe they have obscured panel lines under other panels/plates or where panels are in the actual suit.
The detial is very good and the inner structure makes for a good sold assembly.
TDA
New Member
- Joined
- May 15, 2012
- Messages
- 60
Sounds great WebbyNZ  I am looking to get the first version, as I don't like their revised "battle version" which doesn't look as cool.
And now for the good part, I've been splurging a bit ;D
So, having seen Iron Man 3 on the release date here in Denmark I felt it was time for another Iron Man build, and then I stumbled across this on ebay;


Naturally I had to own this, and was also delighted to find out that Dragon also does the Iron Man 3 War Machine, Iron Patriot, Heartbreaker Armour and Gemeni armour from the movie, all in 1/9 scale. So I might get a few more along the way ;D
I also stumbled across the Moebius War Machine kit for £12.70 which was a freaking steal, so I bought that as well.
I'm currently awaiting both kits and will go through them when they arrive and also have a size comparison between the Moebius 1/8 scale and the Dragon 1/9 scale models to see which looks best.
And now for the good part, I've been splurging a bit ;D
So, having seen Iron Man 3 on the release date here in Denmark I felt it was time for another Iron Man build, and then I stumbled across this on ebay;


Naturally I had to own this, and was also delighted to find out that Dragon also does the Iron Man 3 War Machine, Iron Patriot, Heartbreaker Armour and Gemeni armour from the movie, all in 1/9 scale. So I might get a few more along the way ;D
I also stumbled across the Moebius War Machine kit for £12.70 which was a freaking steal, so I bought that as well.
I'm currently awaiting both kits and will go through them when they arrive and also have a size comparison between the Moebius 1/8 scale and the Dragon 1/9 scale models to see which looks best.
Engineer Jeff
New Member
- Joined
- Jan 13, 2011
- Messages
- 16
Dang it. Now I wanna pick up one of these kits. Nice work!!
TDA
New Member
- Joined
- May 15, 2012
- Messages
- 60
Yeah the hearbreaker suit is on my wish list as well, I'll probably go and buy the iron patriot as well at some point as I'd love to paint himQuaralane said:I wouldn't mind getting that mk42 kit, if only to paint it in a scheme that's a little less 'over the top'
Would really like the Heartbreaker, myself
I am planning to go as movie accurate as I can with my mk 42, I enjoyed the movie and I actually think the over the top golden look is super cool
Hehe it's dangerous work traveling the interwebs, it's paved with temptationsEngineer Jeff said:Dang it. Now I wanna pick up one of these kits. Nice work!!
I am expecting the mk 42 kit any day now, the War Machine kit arrived here yesterday, and to make it all worse I ordered a Black Widow for my girlfriend as she wanted to do that one (and it's crazy cheap atm, I gave £7, and retail is £29.99) and I also ended up buying the revised mk III kit from moebius as it was only £10 ;D So I suddenly went from having one Iron Man to having 4 for myself in less than a month, whoops.
TDA
New Member
- Joined
- May 15, 2012
- Messages
- 60
My Mk 42 Iron man is delayed due to some mixup by the supplier from Asia... Which means I won't get it till after my vacation in July, ohh well.
In the meantime my other kits have shown up, and I'll be going through them in some detail while I wait for my mk 42 kit.
I got the retooled mk III kit from Moebius and War Machine, also from Moebius.
Let's take a look at the mk III kit first:
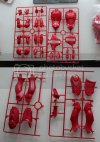
The box is pretty standard for a plastic kit, it comes with all the parts moulded in a shiny red styrene, boxart is good, but not as great as on the Iron Man 2 kits.

You get 4 frames, it's a pretty simple kit with very little flash.

The base comes seperate, and honestly looks awful if I have to be honest, so I won't be using that.

Overall it looks reasonable, and I got it for £9.99 so I'm not complaining, if you have to pay full retail however I'd think twice before buying it as the mk VI kit they do is a lot better.
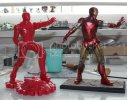
Here's a comparison shot of the 2 kits, the mk III have just been snapped together, nothing fancy.

They are supposed both in 1/8 scale but the mk III kit is somewhat smaller.
Also worth noticing is that the detail on the mk III is a lot softer than the mk VI kit. Now granted the mk III design is a much more curvy design, the parts that should have sharp edges on detail like the helmet is all bland and not very well defined which they all are on the mk VI kit.
The pose on the retooled version is an improvement from the original kit they did but it's still a bit off, the IM 2 kits are better posed than this is.
The base is... well I won't say that here, let's just say that I will not use it, ever.
If you're willing to live with these imperfections I think it's definitely worth buying the kit, as it is Iron Man after all and it's still a decent model seeing as it's obvious from their never Iron Man kits that they have improved their design phase vastly since this was originally designed.
Now if you're like me, and can't live with the imperfections but still want a nice looking mk III iron man kit there's nothing else to do than to fix the kit Now begins the fun part
I have decided that on top of fixing the bland details this will also be my testpiece for lighting it, for when the MK 42 kit arrives. For this I needed to hollow out the eyes as they are moulded onto the faceplate unlike the mk VI and War Machine kit where they are separate pieces.
Then I cut the face plate free, and mounted the bottom piece on the helmet I also removed the positioning struts. The now eyeless faceplate needed some eye lenses, these were made by heating some leftover clear styrene sprue from a cockpit over an open flame, then pressing it lightly into the eye socket from inside the face plate with a rounded object. This gave a nice curved indent for the LED's to fit into. Then I superglued the LED's in place and tested them.
I used a file and some different grades of sandpaper to redefine the detail on the face plate and helmet, then I airbrushed the face plate with Vallejo Model Air (VMA for short) gold and VMA brass. Painted the black line in around his eyes and mounted the lenses, then I painted the inside of the face plate with VMA silver to contain the light to the eyes.
The helmet had most of it's underlying "facial" structure removed to make space for the LED's.
I also drilled out the screws on the faceplate, and will add the ones I forgot.

So far this is going well, I'll likely end up reposing the kit entirely, a I am really not happy with the pose.
Comments and criticism are welcome
In the meantime my other kits have shown up, and I'll be going through them in some detail while I wait for my mk 42 kit.
I got the retooled mk III kit from Moebius and War Machine, also from Moebius.
Let's take a look at the mk III kit first:
The box is pretty standard for a plastic kit, it comes with all the parts moulded in a shiny red styrene, boxart is good, but not as great as on the Iron Man 2 kits.

You get 4 frames, it's a pretty simple kit with very little flash.

The base comes seperate, and honestly looks awful if I have to be honest, so I won't be using that.

Overall it looks reasonable, and I got it for £9.99 so I'm not complaining, if you have to pay full retail however I'd think twice before buying it as the mk VI kit they do is a lot better.
Here's a comparison shot of the 2 kits, the mk III have just been snapped together, nothing fancy.

They are supposed both in 1/8 scale but the mk III kit is somewhat smaller.
Also worth noticing is that the detail on the mk III is a lot softer than the mk VI kit. Now granted the mk III design is a much more curvy design, the parts that should have sharp edges on detail like the helmet is all bland and not very well defined which they all are on the mk VI kit.
The pose on the retooled version is an improvement from the original kit they did but it's still a bit off, the IM 2 kits are better posed than this is.
The base is... well I won't say that here, let's just say that I will not use it, ever.
If you're willing to live with these imperfections I think it's definitely worth buying the kit, as it is Iron Man after all and it's still a decent model seeing as it's obvious from their never Iron Man kits that they have improved their design phase vastly since this was originally designed.
Now if you're like me, and can't live with the imperfections but still want a nice looking mk III iron man kit there's nothing else to do than to fix the kit
I have decided that on top of fixing the bland details this will also be my testpiece for lighting it, for when the MK 42 kit arrives. For this I needed to hollow out the eyes as they are moulded onto the faceplate unlike the mk VI and War Machine kit where they are separate pieces.
Then I cut the face plate free, and mounted the bottom piece on the helmet I also removed the positioning struts. The now eyeless faceplate needed some eye lenses, these were made by heating some leftover clear styrene sprue from a cockpit over an open flame, then pressing it lightly into the eye socket from inside the face plate with a rounded object. This gave a nice curved indent for the LED's to fit into. Then I superglued the LED's in place and tested them.
I used a file and some different grades of sandpaper to redefine the detail on the face plate and helmet, then I airbrushed the face plate with Vallejo Model Air (VMA for short) gold and VMA brass. Painted the black line in around his eyes and mounted the lenses, then I painted the inside of the face plate with VMA silver to contain the light to the eyes.
The helmet had most of it's underlying "facial" structure removed to make space for the LED's.
I also drilled out the screws on the faceplate, and will add the ones I forgot.

So far this is going well, I'll likely end up reposing the kit entirely, a I am really not happy with the pose.
Comments and criticism are welcome
TDA
New Member
- Joined
- May 15, 2012
- Messages
- 60
Been on holiday, but there's a little progress on the mk III model 
Mainly I've been reworking the head and torso, and have decided to completely repose the model. The kit lacks any sharp curves and I've begun re-sculpting many of these to get a more screen accurate look, atm I'm using miliput as it's awesome, and can be sanded afterwards.
I decided to re-sculpt the front of the neck as it was easier than converting the original to look good.
Also started work on the arms and the rest of the lighting.

All the black marker will be removed prior to painting, it's just for guidance and giving me an overview.

Hopefully my mk 42 kit will arrive soon, it was sent on Monday, so it should be here any day now
Mainly I've been reworking the head and torso, and have decided to completely repose the model. The kit lacks any sharp curves and I've begun re-sculpting many of these to get a more screen accurate look, atm I'm using miliput as it's awesome, and can be sanded afterwards.
I decided to re-sculpt the front of the neck as it was easier than converting the original to look good.
Also started work on the arms and the rest of the lighting.

All the black marker will be removed prior to painting, it's just for guidance and giving me an overview.

Hopefully my mk 42 kit will arrive soon, it was sent on Monday, so it should be here any day now
Similar threads
- Replies
- 2
- Views
- 74
- Replies
- 12
- Views
- 358
- Replies
- 6
- Views
- 219
- Replies
- 16
- Views
- 1K
