NYLON GAG MK 1 - FINISHED
- Thread starter The Nylon Gag
- Start date
JohnSimmons
For Spud: I was once Merseajohn
- Joined
- Jan 4, 2011
- Messages
- 5,645
Re: NYLON GAG MK 1?
Great stuff!
Great stuff!
The Nylon Gag
New Member
- Joined
- Nov 14, 2011
- Messages
- 829
panzerace007
New Member
- Joined
- Dec 17, 2010
- Messages
- 2,118
Re: NYLON GAG MK 1?
GAG ,
WoW !! Great scratch work ! I Dig it Bro ! Lookin' really cool ! Great craftsmanship !
GAG ,
WoW !! Great scratch work ! I Dig it Bro ! Lookin' really cool ! Great craftsmanship !
NecronautDrummer
Member
- Joined
- Sep 25, 2011
- Messages
- 804
Re: NYLON GAG MK 1?
Wo, that looks REALLY impressive!
Wo, that looks REALLY impressive!
ModelMakerMike
"It's Slobberin' time""
- Joined
- May 28, 2011
- Messages
- 1,838
Re: NYLON GAG MK 1?
It's looking down right Professional........and Saaahhhweeeeeett!
;D
It's looking down right Professional........and Saaahhhweeeeeett!
;D
The Nylon Gag
New Member
- Joined
- Nov 14, 2011
- Messages
- 829
Re: NYLON GAG MK 1?
Many thanks for the kind words guys, haven't posted since Monday, life 'n' stuff.
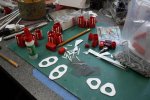
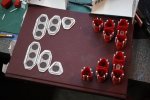
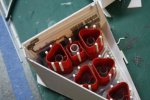
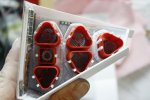
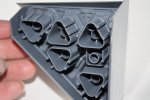
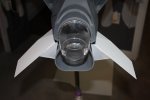
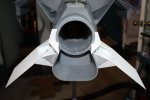
Started by painting the 'hydrogen intakes' they already had a coat of primer so next i darkened the corners and some detail with flat black, the results were i little rough so no pictures, but with some air brush adjustment, a new needle and paint tip, i then applied gun metal, darkened with flat black, with two more gun metal layers working from the center out getting progressively lighter until i was shooting gun metal with clome silver added. The pictures show the differance more than in real life, because of the flash.
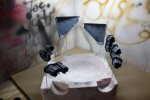
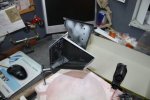
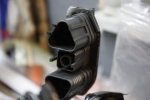
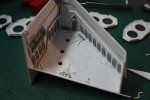
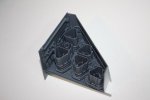
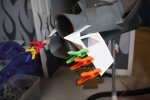
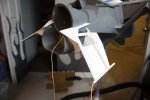
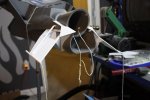
I then started work on the front winglets. the underside will be hollowed out and some details and venting work installed later, i also installed some tubing for the lights i ordered that arrived on friday, thanks starshipmodeller and modelmantom.
Cardboard first.
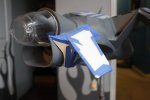
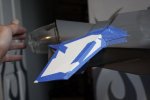
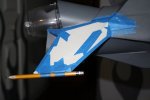
Then styrene (1.00mm > 1.5mm)
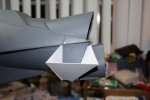
Thats all Folks, hopefully i'll have a new report in the week, take it squeezy peeps, & have a good week,
Gaggles OUT
(comments welcome)
Many thanks for the kind words guys, haven't posted since Monday, life 'n' stuff.
Started by painting the 'hydrogen intakes' they already had a coat of primer so next i darkened the corners and some detail with flat black, the results were i little rough so no pictures, but with some air brush adjustment, a new needle and paint tip, i then applied gun metal, darkened with flat black, with two more gun metal layers working from the center out getting progressively lighter until i was shooting gun metal with clome silver added. The pictures show the differance more than in real life, because of the flash.


I then started work on the front winglets. the underside will be hollowed out and some details and venting work installed later, i also installed some tubing for the lights i ordered that arrived on friday, thanks starshipmodeller and modelmantom.
Cardboard first.


Then styrene (1.00mm > 1.5mm)


Thats all Folks, hopefully i'll have a new report in the week, take it squeezy peeps, & have a good week,
Gaggles OUT
(comments welcome)
The Nylon Gag
New Member
- Joined
- Nov 14, 2011
- Messages
- 829
Re: NYLON GAG MK 1?
Evenin Herdsters,
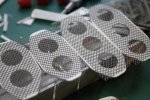
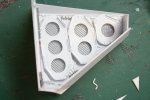
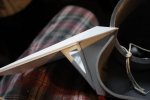
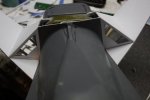
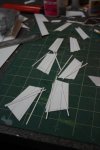
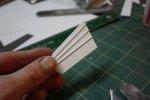
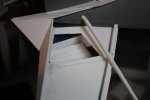
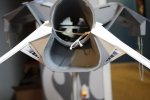
Been doing lots of fiddly stuff on the front winglets. I made two vents with small wings inside, i may also edge the back side vent and add some small details at a later date. But i'm pleased with the results, what do you guys think?
And i realise that painting is going to be a bugger, just flat black with maybe some dry brushing on the tips of the wings.
Need to start pulling wires and deciding on lighting locations, any ideas people?
Thanks for looking,
Gag
Evenin Herdsters,
Been doing lots of fiddly stuff on the front winglets. I made two vents with small wings inside, i may also edge the back side vent and add some small details at a later date. But i'm pleased with the results, what do you guys think?
And i realise that painting is going to be a bugger, just flat black with maybe some dry brushing on the tips of the wings.
Need to start pulling wires and deciding on lighting locations, any ideas people?


Thanks for looking,
Gag
Igard
New Member
- Joined
- May 16, 2011
- Messages
- 2,004
Re: NYLON GAG MK 1?
Gags, I love this build. Those winglets looks just right.
I couldn't even begin to thing how to light this thing. Just go with some ideas and see if you like them.
On the topic of paint. Are you still going down the Red Bull route? If so, perhaps a royal blue would be more suitable and you might consider making some decals. Big decals.
The Nylon Gag
New Member
- Joined
- Nov 14, 2011
- Messages
- 829
Re: NYLON GAG MK 1?
Greatings fellow addicts,
Thanks for the comments guys, i realy appreciate them.
Igard@ Here's the plan with lights :- I've got 3 stobes, 1 under the nose, the other two on the wings some where, either the front central tips or on the outside of the rockets/engines.
- I've got 3 flashers, 1 on the left wing(red), 1 on the right (green) & the third is the dilema, i want flashing in the cockpit, but also the two 'mandibles' on the front would look good flashing?
I want to put about 5 or 6 in each engine/rocket & maybe a combo of light sheet and lots of fiber optics in the cockpit with some flashers.
I think you can also over do the lights, and as i always have a thought about realism with my ship the ones i've chosen seem Ok but maybe a few static 'positioning lights' would also look ok.
As for paint, i was thinking of a Red Bull can type of a paint job, opposite Quarters Metallic Blue and silver, with the undersside maybe a bit darker silver or light grey, not decided yet, any thoughts guys?
May be some allcad would add a 'Metallic sheen' to the colours, not sure as i've never used Allcad.
You can buy some cool after market decals for the various Red Bull Motor Racing teams out there, but on the top i was going to try to mask the logo, but make it a little 'Futured Up' ? Watch this space.
The top central section of the ship has been bothering me lately. Mainly because it was a bit out of square (about 1/8"), so i ripped it off, regretted it instantly, but then realised that i'm still building so it can all change again if what i build doesn't 'go' . It is still a bit twisted but not as bad as it was?
The new section has taken some interest away from the profile, but i think overall it will be O.K when the winglets are complete & the top front section of the main wing is added later.
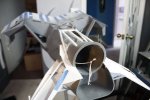

This is with the detail 'tubs' dry fit in place, the new sides will be cleaned up later.


Then i added some detail to the 2 'tubs'


Thats all folks, comments welcome
Gag O'Wan Nylonobie
Greatings fellow addicts,
Thanks for the comments guys, i realy appreciate them.
Igard@ Here's the plan with lights :- I've got 3 stobes, 1 under the nose, the other two on the wings some where, either the front central tips or on the outside of the rockets/engines.
- I've got 3 flashers, 1 on the left wing(red), 1 on the right (green) & the third is the dilema, i want flashing in the cockpit, but also the two 'mandibles' on the front would look good flashing?
I want to put about 5 or 6 in each engine/rocket & maybe a combo of light sheet and lots of fiber optics in the cockpit with some flashers.
I think you can also over do the lights, and as i always have a thought about realism with my ship the ones i've chosen seem Ok but maybe a few static 'positioning lights' would also look ok.
As for paint, i was thinking of a Red Bull can type of a paint job, opposite Quarters Metallic Blue and silver, with the undersside maybe a bit darker silver or light grey, not decided yet, any thoughts guys?
May be some allcad would add a 'Metallic sheen' to the colours, not sure as i've never used Allcad.
You can buy some cool after market decals for the various Red Bull Motor Racing teams out there, but on the top i was going to try to mask the logo, but make it a little 'Futured Up' ?
The top central section of the ship has been bothering me lately. Mainly because it was a bit out of square (about 1/8"), so i ripped it off, regretted it instantly, but then realised that i'm still building so it can all change again if what i build doesn't 'go' . It is still a bit twisted but not as bad as it was?
The new section has taken some interest away from the profile, but i think overall it will be O.K when the winglets are complete & the top front section of the main wing is added later.


This is with the detail 'tubs' dry fit in place, the new sides will be cleaned up later.


Then i added some detail to the 2 'tubs'


Thats all folks, comments welcome
Gag O'Wan Nylonobie
Jamaicanmodels69
New Member
- Joined
- Apr 17, 2011
- Messages
- 604
Re: NYLON GAG MK 1?
Nice was cool to see you mock it up and then make it happen! ;D
Nice was cool to see you mock it up and then make it happen! ;D
The Nylon Gag
New Member
- Joined
- Nov 14, 2011
- Messages
- 829
Re: NYLON GAG MK 1?
Sup Peepsters,
Thanks for the comments guys it means alot ;D, i find it very motivational to log on and see your comments plus the insperation i get from all of the other builds on this forum.
Enough waffle, (mmmmmmmmmmmmmmmm waffles) I re-did the nasty side pieces on the top, they were too cracked up for my taste. The new ones also cracked but its not as bad as before plus i re-shaped them a bit and now they fit better. I think i will be able to cover up the cracks later with greeblies. I'm making this up as i go along you know.??!!?? Well, i have a basic vision of what the various parts should look like but as for specifics, i'm fly'in blind on this one. Is that bad, should i have a more detailed plan? Half the fun for me as an engineer loves solving the problems as i go, i'm havin so much fun. Sorry more waffel (mmmmmmmm-oh stop it?)
Everything in position.
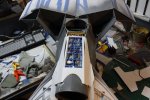
This picture is for you Scott, i'm very happy with how it looks. A bit of weathering and Bingo.
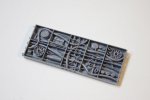
I then started filling in the back section, i plan to put a 'Towing Hitch Stabilization Device' (well thats what i'm gunna call it) on this back face, i have designed a new type of hitch that i think would be some what feezable in 500+ years time on a space tug/delivery truck thinga-ma-jig.
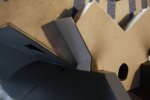
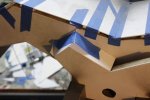
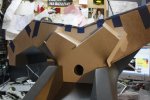
I then cleaned all the edges.
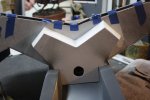
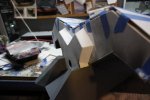
I painted the side intakes on the front winglets. I realy suck at painting so this might get ugly folks.!!!!
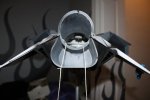
The overspray was caused by me having to vary the angle of the airbrush to hit all the inside surfaces, well thats my excuse and i'm sticking to it! I just noticed that i missed a spot or 3 (I really really suck at painting), i knew i should of painted them before installing them , but knowing me the mess with black superglue finger prints all over the shop would not of been good look for this ship. I can all ways give it another coat of paint later. There's always later.
Thats all for tonight, sorry its a long one, i'm still thinking about my lights, the positioning and insallation methods i'm gunna use. Any ideas would be most welcome?
As always, thanks for looking and comments always welcome.
Cheers,
The McGagster.
Sup Peepsters,
Thanks for the comments guys it means alot ;D, i find it very motivational to log on and see your comments plus the insperation i get from all of the other builds on this forum.
Enough waffle, (mmmmmmmmmmmmmmmm waffles) I re-did the nasty side pieces on the top, they were too cracked up for my taste. The new ones also cracked but its not as bad as before plus i re-shaped them a bit and now they fit better. I think i will be able to cover up the cracks later with greeblies. I'm making this up as i go along you know.??!!?? Well, i have a basic vision of what the various parts should look like but as for specifics, i'm fly'in blind on this one. Is that bad, should i have a more detailed plan? Half the fun for me as an engineer loves solving the problems as i go, i'm havin so much fun. Sorry more waffel (mmmmmmmm-oh stop it?)
Everything in position.

This picture is for you Scott, i'm very happy with how it looks. A bit of weathering and Bingo.

I then started filling in the back section, i plan to put a 'Towing Hitch Stabilization Device' (well thats what i'm gunna call it) on this back face, i have designed a new type of hitch that i think would be some what feezable in 500+ years time on a space tug/delivery truck thinga-ma-jig.


I then cleaned all the edges.


I painted the side intakes on the front winglets. I realy suck at painting so this might get ugly folks.!!!!

The overspray was caused by me having to vary the angle of the airbrush to hit all the inside surfaces, well thats my excuse and i'm sticking to it! I just noticed that i missed a spot or 3 (I really really suck at painting), i knew i should of painted them before installing them , but knowing me the mess with black superglue finger prints all over the shop would not of been good look for this ship. I can all ways give it another coat of paint later. There's always later.
Thats all for tonight, sorry its a long one, i'm still thinking about my lights, the positioning and insallation methods i'm gunna use. Any ideas would be most welcome?
As always, thanks for looking and comments always welcome.
Cheers,
The McGagster.
Similar threads
- Replies
- 28
- Views
- 2K
- Replies
- 2
- Views
- 194
Latest posts
-
-
-
-
-
-
-
Can you make a tank disappear? The Evolution of Tank Camouflage
- Latest: ambivalentmaybe

