trekriffic
Well-Known Member
- Joined
- Jan 6, 2012
- Messages
- 984
I have these inexpensive clip lights I bought at Lowes awhile back for use in photographing my models. I've learned that it is often desirable to diffuse the light, softening it so as to give more even illumination to your subject and reduce the stark contrast between light and dark from strong shadows you would otherwise get from using an uncovered bulb.
I've tried a few methods to achieve this effect; one involved placing translucent florescent lighting panel material over the face of the lamp using duct tape, another used duct tape to tape T-shirt type material to the lamp
Recently, I decided to try something new. The clip lights are 8.5" in diameter. I found these 8" wooden embroidery hoops at Michaels. Unscrewing the outer hoop I hot glued the inner hoop to the outer rim of the lamp:
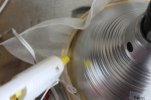 Lamp by trekriffic, on Flickr
Then I placed a square of this frost cover fabric I had laying around for protecting outdoor plants from frost over the front of the lamp. It's very light with tiny holes in it that will allow for air to circulate around the bulb which is an incandescent. I wrapped it over the rim and the inner hoop. Then I screwed the outer hoop down tight over the cloth using the thumbscrew to stretch the fabric tight:
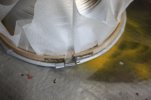 Lamp by trekriffic, on Flickr
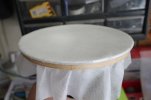 Lamp by trekriffic, on Flickr
Then I trimmed the fabric from around the back side of the outer hoop:
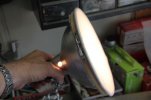 Lamp by trekriffic, on Flickr
I'm pleased to say the hoop and frost cover fabric worked well as a diffusing mechanism:
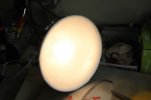 Lamp by trekriffic, on Flickr
The hoop cost less than 2 dollars from Michaels and the fabric (purchased from my local hardware store/garden center) was not too expensive either. Aside from being inexpensive this approach is superior to taping material over the lamp from the perspective of removing the diffusion material more easily by just unscrewing the outer hoop. You may also wish to take shots of your model in scenes using a red, yellow, or some other color glow and swapping out the white cloth for colored cloth should be easy to do if you want to get creative with your lighting effects.
I've tried a few methods to achieve this effect; one involved placing translucent florescent lighting panel material over the face of the lamp using duct tape, another used duct tape to tape T-shirt type material to the lamp
Recently, I decided to try something new. The clip lights are 8.5" in diameter. I found these 8" wooden embroidery hoops at Michaels. Unscrewing the outer hoop I hot glued the inner hoop to the outer rim of the lamp:
 Lamp by trekriffic, on Flickr
Then I placed a square of this frost cover fabric I had laying around for protecting outdoor plants from frost over the front of the lamp. It's very light with tiny holes in it that will allow for air to circulate around the bulb which is an incandescent. I wrapped it over the rim and the inner hoop. Then I screwed the outer hoop down tight over the cloth using the thumbscrew to stretch the fabric tight:
 Lamp by trekriffic, on Flickr
 Lamp by trekriffic, on Flickr
Then I trimmed the fabric from around the back side of the outer hoop:
 Lamp by trekriffic, on Flickr
I'm pleased to say the hoop and frost cover fabric worked well as a diffusing mechanism:
 Lamp by trekriffic, on Flickr
The hoop cost less than 2 dollars from Michaels and the fabric (purchased from my local hardware store/garden center) was not too expensive either. Aside from being inexpensive this approach is superior to taping material over the lamp from the perspective of removing the diffusion material more easily by just unscrewing the outer hoop. You may also wish to take shots of your model in scenes using a red, yellow, or some other color glow and swapping out the white cloth for colored cloth should be easy to do if you want to get creative with your lighting effects.

