Revell - Ferrari F2007 Kimi Raikonnen

I'm back working on the Iceman!

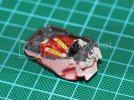
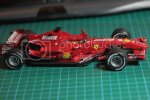
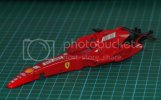
Body is almost done. Only 1 decal still to place, the shell logo on the side pod, but that can only be done once the 2 halves are together.

Unfortunately the paint has a slight orange peel. It's strange, I never used to get this when I first started painting, but it's not that bad, just something i need to watch out for in the future.
KRFerrari003.jpg

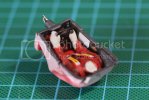
The cockpit so far. I'm close to getting the helmet decals ready for printing.
KRFerrari001.jpg

KRFerrari002.jpg

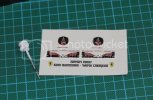
I'm not overly impressed with these hobby design decals. They have a black outline, which is wrong and the they're just not that sharp.
KRFerrari005.jpg

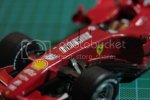
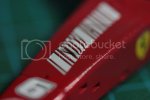
This decal has to lie on top of a vent. It's a bit wonky, but at least the vent is open.
KRFerrari004.jpg

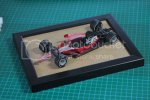
The base is a picutre frame. I'll put a road surface down and add a red and white rumble strip along the side.
KRFerrari006.jpg
 
Jensons been my favorite back to the Lucky Strike ride days but I do like Kimi as well. Theres not many F1 on here because they arnt affordable however I have found some older kits that are under $30. I have a couple I got cheaper on evilbay but when I got them I realized they were damaged. I was unaware that you could order spare parts. I may have to look into that.
 
@Hooterville, never really been a huge Kimi fan, but I'm happy seeing him back in F1. Starting to appreciate him a bit more now. I'm mainly a Jenson, Alonso, Di Resta fan these days. Di Resta coming first since I'm a Scot. :)

@Timson, Just messing around and experimenting with this one, not really too concerned over what race it is. I hate those 'hub caps' that they had back then, so I'm leaving them off the car. Notice there's no track map on the side of the cockpit. Consider this a test session. ;D
 
Igard said:
@Hooterville, never really been a huge Kimi fan, but I'm happy seeing him back in F1. Starting to appreciate him a bit more now. I'm mainly a Jenson, Alonso, Di Resta fan these days. Di Resta coming first since I'm a Scot. :)

Would assume that your a Franchitti and Clarke fan as well lol.
 
hooterville75 said:
Would assume that your a Franchitti and Clarke fan as well lol.

And Jackie Stewart! And David Coulthard! ;D

Thanks Gav!

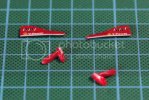
I'm gonna try and get the rear wing done today, scratch some new antennas, and make a start to the base!
 
Thanks John! :)

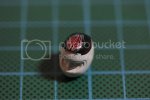
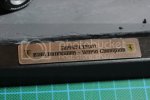
Here are the decals for the helmet and name plaque.

001_zpseec47c53.jpg

Looks like I got the top decal a bit too big!

005_zps7b2c69e4.jpg

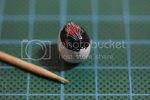
In order for the decal to wrap around the curved surface I had 2 options. 1, to manipulate the image before printing it, 2, to cut a line in the decal. I opted for the 2nd since I probably would have got the image manipulation wrong anyway, and I hate wasting decal paper.

You can see there is a bit of crinkling at the back, but that doesn't matter too much since this will be hidden by the headrest anyway. I'll also touch up a few spots with paint by hand.

006_zpsf5b909fc.jpg

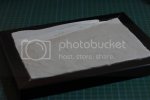
The base as it looks so far. I've used Das modelling clay to build up the layers. Up the top their is the upper part of the rumble strip made out of styrene sheet.

Still needs another layer or 2 to smooth things over, then I might turn to some aves to fix up any cracks where the clay will inevitably shrink!

003_zps584d85f5.jpg

The rear wing. All I have to do now is attach it, attach the antennas, finish the helmet, then fix the lower half of model onto the base (which means finishing the base first!), and I'm done!

002_zpsd2a6bc5b.jpg
 
Looking super man!!!!! Keep up the good work. I envy the scratch building your doing. Maybe someday ha ha lol. Cant wait to see the finished product.
 
Those helmet decals are nearly as difficult to put on as the tyre decals :mad: they make me so mad, unless i can't help it i try to avoid them now

but your doing a nice job mate ;D

Car also looks good buddy 8)

Toe
 
Thanks very much hooterville! My scratch building is still in its infancy, hopefully with practice and experimentation, I'll get to where I want to be with it. Still some ways to go yet.

Gags, cheers bud. Since I made these decals myself, I knew exactly what I was getting into, so I'm not too bothered, it's all good practice. I'm happy since I know I'll do better with them next time. So it's all good.

Though I do admit I'm kicking myself slightly for getting that top decal on the helmet too big. It's about 200% of the size it should be!

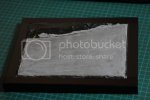
So here's the base as it stands. I tried colouring some plaster of paris to get the right shade for the track surface, but the paint seems to have sunk to the bottom as it cured, making the whole thing look a bit tatty. More like Knockhill, than Monza. ;D

I plan to go over this with some paint to try and get it looking smoother. Might go into some of the deeper scratches and fill them with some putty.

0012.jpg

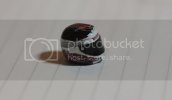
The helmet. All I have to do is add the ferrari logo strip to the visor and it's done. Shame about that top decal, just too big.

0032.jpg

I used some tiny hex rivets for the... eh... rivets. :p

0052.jpg

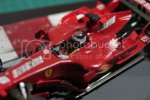
The car minus the drivers head!

009.jpg

Here are the ariels. Just made these with connectors from some capacitors. The front one didn't need to be painted. I think in future, I'll get myself a hard bristled toothbrush and cut some off that for the other antennas.

007.jpg

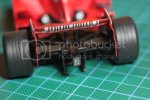
And this is why you should always dry fit your models before painting them. The kit has a problem in that either the rear axel is too short, or the rear wing is too large. This means the wheels are in contact with the rear wing. :mad:

008.jpg

Almost there folks. I'll try and make a push to finish this tomorrow. Warts and all! :)
 
Thanks timson. I thought at first that I'd done something wrong, but I checked around the net and found this is a problem with the kit.

Hooterville, I'm just glad Finland can have a driver who DOESN'T get called, 'The Flying Fin'. Seems they label all the Finish drivers with that moniker. Cheers mate! :)

I don't think I'll get this done today, hopefully by the weekend.
 
Igard said:
Thanks timson. I thought at first that I'd done something wrong, but I checked around the net and found this is a problem with the kit.

Hooterville, I'm just glad Finland can have a driver who DOESN'T get called, 'The Flying Fin'. Seems they label all the Finish drivers with that moniker. Cheers mate! :)

I don't think I'll get this done today, hopefully by the weekend.

If I made the money and got all the girls that Kimi does, you could pretty much call me anything you wanted HA HA HA
 
Thanks Ferris, Quaralane and Toe! :)

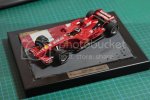
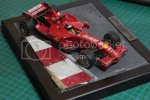
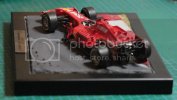
Finally 'finnished' this model. ;D .... no.... ok moving on.

The pictures!

002.jpg

003.jpg

Marbles. Remember all those plastic shavings I kept when I was cutting the driver to fit?

004-1.jpg

005.jpg

Not sure where he's going here. A very unusual line through the corner!

006.jpg

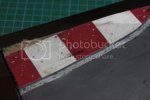
The rumble strip was harder to do than I expected. Some chipping, some washes, a couple of tyre marks. It turned out ok. The main thing is, I learned alot and will do better the next time I attempt one of these.

010.jpg

007-1.jpg

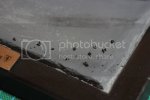
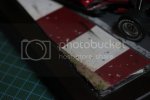
A look at the texture of the surface. Plaster of paris, a bit of sanding and lightly painted neutral grey. Some tyre marks also. A couple of areas of plaster broke off, but were easily glued back down. Cracks are still visible, but this only adds to it I think.

One problem I had was getting it flat. There is a rather nasty slump in one area.

009-1.jpg

008-1.jpg

Thanks for reading! 8)
 

Latest posts

Back
Top