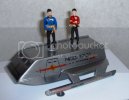
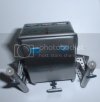
scratch building a 1/50 shuttlecraft

Thanks guys, This is becoming very rewarding, as i have built this it has become obvious that i have overlooked some things and had to come back and make some changes, but thats half the fun isnt it?

it's still going though, just wait until you see what I have planned- hope it works out! lol....
 
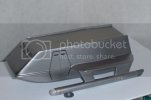
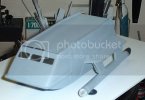
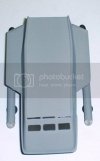
Well here it almost is! I'm posting these for the sake of posterity before i start wet sanding this to finish smoothing it out, maybe has 4 small areas of concern before it gets the base coat for the silver.

Mind you all the details are dryfit now for the pictures...

shuttlescrapdryfit.jpg

shuttlescrapdryfit1.jpg

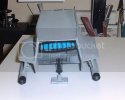
Impulse engine WILL NOT SIT STRAIGHT in the dry fit! lol Well some glue fix that later! B)

shuttlescrapdryfit3.jpg

Shouldnt be letting this out YET, but it gets a crew... of course the shuttle is about 1/50 and these guys came from the bridge kit at about 1/24th, but really who's counting? Its all make believe...

shuttlescrapdryfit2.jpg


:D
 
Wow! Looks like I've missed a few updates, sorry about that Kryptos! Doesn't look like you need any additional motivation though, you're doing a great job!

Nice stuff, mate! :) Liking the mirror universe idea too. ;)
 
Thanks- i'm not here for the motivation, I'm just sharing this build! I think it may surprise a few when its done, but only if my idea works!
 
OK here we are, I'm calling the paint job DONE warts and all, here it is! Alclad II is a very unforgiving paint to say the least- My last prime coat looked near perfect Sunday when I started squirting the Dark Aluminum, man that expensive paint took me to school. It magnified every blemish , scratch and whatever. I tried filling some items but had to drag myself away for fear of damaging the build itself.
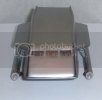
shuttlepainted.jpg

As you can see, the front took some damage from masking, maybe this will even out during the cure?
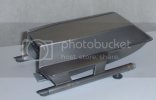
shuttlepainted3.jpg

It does have a good side, the right side! It came out near perfect, though this is not the side that will be shown... :(

shuttlepainted1.jpg

Left side is very presentable, but has some issues with the thickening of the wing ect..
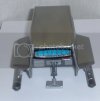
shuttlepainted2.jpg

And finally the rear, here my amateurism becomes apparent, look at the left and then the right- the lower curves are uneven, nitpicking? YES! The body was assembled top first then the bottom in thin sheets (around .20 thick) that were clamped together. This was problematic as I intentionally made the sides unequal and then fixed this using the top and bottom as a guide. It worked, though not as great as i hoped.

For my first ground up scratch build I am pleased, my next one will be better I hope. she'll rest a day or so an then I'll start applying the art.

After doing this, I think scratch building is the way to go. Not a bad ending to a year of returning to models after a decade break! Enjoy CR :drinks
 
Krypto,

I think your being a bit over-critical. I think She is a beaut! Please have Mr. Scott make her ready, I need to go on an away mission and I don't feel like having my molecules scrambled!
 
She's looking just fine.
Scratchbuilding has a fairly steep learning cure. And it looks like you're making the grade to me
 
thanks guys, I'm just very critical towards my work, definitely a learning curve!

Well here it is-

Hand me your agonizer! lol

shuttlescrapdone.jpg

shuttlescrapdone3.jpg

Put up more later when I get some better pics.
 
That paint is superb! And as for the imperfections, they're not bad at all judging from the pics. I've never done a scratchbuild before so I can't say, but this looks fantastic for your first. Really great job.

And isn't it nice to have made your own decals for her? It means 100% of this came from your own creations. I love that. 8)
 
Thanks- Thats Alclad II Dark Aluminum #103 , the supports under the hull were done with regular Aluminum #101, and all the blue is Alclad Transparent Blue # 403--and I tell ya that transparent blue is a kick ass paint! Tint windows or use it as an overcoat. Highly recommended.

There is almost an entire ounce of Alclad on this, it's only 5 5/8 inches long and almost 2 inches wide at the widest part of the body- this doesn't include the wings. The figures came from the bridge kit, I think they are 1/24? The shuttle's scale is around 1/50

And Igard I did cheat on the nacelle decals, lol, they were from stock but i had to cut them up to fit. it is a nice feeling building this thing up into something. ;D
 
WOW! Nice Empire Shuttlecraft. Probably back from surveying a planet bombardment of disloyal
subjects of the Empire. Soooo Coool! Great job. Bill.
 

Latest posts

Back
Top