Star Wars Theme Group Build
- Thread starter TimM63
- Start date
banistersmind
Active Member
- Joined
- May 28, 2024
- Messages
- 57
Looks great! I like using the liquid masking fluid too.
It's one of those products I wish I'd known about years ago. It's a life saver for someone with OCD like me.
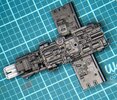
I forgot to mention, I actually performed another modification to the kit in that I cut out the original door in the back of the cockpit. I intend lighting the "tunnel" between the cockpit and the main cabin, just for a bit of interest.
banistersmind
Active Member
- Joined
- May 28, 2024
- Messages
- 57
This looks absolutely brilliant!!
GaryG64
Well-Known Member
- Joined
- Sep 8, 2022
- Messages
- 2,562
That would look very cool.It's one of those products I wish I'd known about years ago. It's a life saver for someone with OCD like me.
I forgot to mention, I actually performed another modification to the kit in that I cut out the original door in the back of the cockpit. I intend lighting the "tunnel" between the cockpit and the main cabin, just for a bit of interest.
View attachment 120225
Pantherman
Well-Known Member
- Joined
- Feb 10, 2022
- Messages
- 4,060
That's definitely chipped...Pantherman
Pantherman
Well-Known Member
- Joined
- Feb 10, 2022
- Messages
- 4,060
I kinda sort have bought another one of these as it was bargain at £14...... PanthermanHyper drive was broken so amazon prime delivered it. Think the box hit a meteor on route......Pantherman
View attachment 119270
RelatableI kinda sort have bought another one of these as it was bargain at £14...... Pantherman
blakeh1
Well-Known Member
- Joined
- Oct 26, 2011
- Messages
- 1,174
chipping turned out great. I will have t give it a try
thank you!chipping turned out great. I will have t give it a try
blakeh1
Well-Known Member
- Joined
- Oct 26, 2011
- Messages
- 1,174
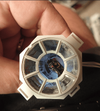
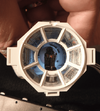
So another decision time that previously led me to procrastination. Use photo-etch or not around the cockpit tunnel to represent the Koolshade parts on the original model?
For any who might not know what that is, Koolshade is same material the Tie Fighters wing panels were made of. Was actually a very fine metal shade that was used as sun blocking window blinds back in the ILM days
Looking closely at the parts, I feel the molded plastic parts are actually better detail than the photo-etch
Left is the plastic parts. These are amazingly fine and crisp and even the holes behind the grilles have depth.
On the right are the alternate parts that you can use to glue the photo-etch onto
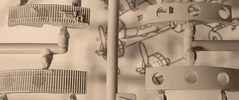
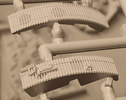
Although I feel the photo-etch while a bit finer detail when it comes to the holes behind it is actually very flat and less overall detailed looking

So the original plastic parts it is
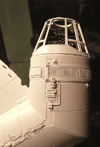
The only downside I see is there is a noticeable seam/gap between two of the pieces. Maybe I made an error in putting together parts as I know from past experience, some other part being a hair off in some different step like the tunnel construction can cause fit issue with other parts later, but I don't see gaps elsewhere. You can see it off the the right above and then here below as well
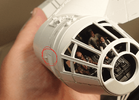
Should not be too noticeable once paint and weathering go on in this area I am hoping. If not I will have to try filling as best I can without screwing up the details
But then again, from this angle it is hard to tell
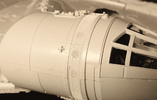
For any who might not know what that is, Koolshade is same material the Tie Fighters wing panels were made of. Was actually a very fine metal shade that was used as sun blocking window blinds back in the ILM days
Looking closely at the parts, I feel the molded plastic parts are actually better detail than the photo-etch
Left is the plastic parts. These are amazingly fine and crisp and even the holes behind the grilles have depth.
On the right are the alternate parts that you can use to glue the photo-etch onto


Although I feel the photo-etch while a bit finer detail when it comes to the holes behind it is actually very flat and less overall detailed looking

So the original plastic parts it is

The only downside I see is there is a noticeable seam/gap between two of the pieces. Maybe I made an error in putting together parts as I know from past experience, some other part being a hair off in some different step like the tunnel construction can cause fit issue with other parts later, but I don't see gaps elsewhere. You can see it off the the right above and then here below as well

Should not be too noticeable once paint and weathering go on in this area I am hoping. If not I will have to try filling as best I can without screwing up the details
But then again, from this angle it is hard to tell

Nikati
Active Member
- Joined
- Dec 26, 2023
- Messages
- 119
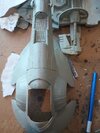
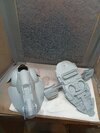
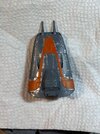
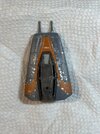
Finally finished the prep and able to prime. I had to mix primer as the gray had was too dark. Did a 1:2 Stynyrez gray to white. I believe it still could've been a few shades lighter. As I have I think 4 other Boba Slave I models this is more of a practice for color and techniques. I'm trying to take notes so I have something to refer to with the next builds with a live finished product. Detail is not great on this kit and the fit wasn't as good as I had hoped. It's coming along slowly. This will be the most complex paint job I have ever done by far.
blakeh1
Well-Known Member
- Joined
- Oct 26, 2011
- Messages
- 1,174
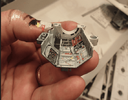
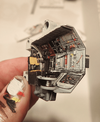
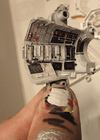
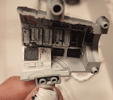
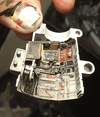
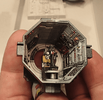
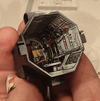
Also finished the other turret. Gave it a bit more time getting the various panel colors to match the set piece
and yes, I use my thumbnail to wipe excess paint off the brush before touching the brush to the model, or test if things are too runny, or check color, or need more thinning etc...
Not going to stress to much over neatness/crisp straight lines, since it only needs to look good from the front angle looking back instead of side on
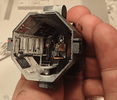


Last edited:
blakeh1
Well-Known Member
- Joined
- Oct 26, 2011
- Messages
- 1,174
View attachment 120263View attachment 120264
Finally finished the prep and able to prime. I had to mix primer as the gray had was too dark. Did a 1:2 Stynyrez gray to white. I believe it still could've been a few shades lighter. As I have I think 4 other Boba Slave I models this is more of a practice for color and techniques. I'm trying to take notes so I have something to refer to with the next builds with a live finished product. Detail is not great on this kit and the fit wasn't as good as I had hoped. It's coming along slowly. This will be the most complex paint job I have ever done by far.
That seam was rough to deal with but looking good
What paints are you going to use?
Nikati
Active Member
- Joined
- Dec 26, 2023
- Messages
- 119
So another decision time that previously led me to procrastination. Use photo-etch or not around the cockpit tunnel to represent the Koolshade parts on the original model?
For any who might not know what that is, Koolshade is same material the Tie Fighters wing panels were made of. Was actually a very fine metal shade that was used as sun blocking window blinds back in the ILM days
Looking closely at the parts, I feel the molded plastic parts are actually better detail than the photo-etch
Left is the plastic parts. These are amazingly fine and crisp and even the holes behind the grilles have depth.
On the right are the alternate parts that you can use to glue the photo-etch onto
View attachment 120259
View attachment 120260
Although I feel the photo-etch while a bit finer detail when it comes to the holes behind it is actually very flat and less overall detailed looking
View attachment 120261
So the original plastic parts it is
View attachment 120262
The only downside I see is there is a noticeable seam/gap between two of the pieces. Maybe I made an error in putting together parts as I know from past experience, some other part being a hair off in some different step like the tunnel construction can cause fit issue with other parts later, but I don't see gaps elsewhere. You can see it off the the right above and then here below as well
View attachment 120266
Should not be too noticeable once paint and weathering go on in this area I am hoping. If not I will have to try filling as best I can without screwing up the details
But then again, from this angle it is hard to tell
View attachment 120265
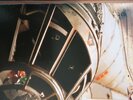 Personally I think I would lean towards the plastic as the mesh part has more depth.
blakeh1
Well-Known Member
- Joined
- Oct 26, 2011
- Messages
- 1,174
Definitely agreeView attachment 120307Personally I think I would lean towards the plastic as the mesh part has more depth.
Nikati
Active Member
- Joined
- Dec 26, 2023
- Messages
- 119
I am trying to match Tamiya paints by eye as best I can. I will need to custom mix about 8 of them. I'll keep track of the ratios for future builds. As long as I can get kinda close with this one I will be very happy. This one will be more of a trial and error for the rest. No idea what I will do for Jango's then lol.That seam was rough to deal with but looking good
What paints are you going to use?
Nikati
Active Member
- Joined
- Dec 26, 2023
- Messages
- 119
BTW that picture is from A New Hope model. Not sure how much different it is on Empire.Definitely agree
Nikati
Active Member
- Joined
- Dec 26, 2023
- Messages
- 119
That is looking awsomeAlso finsihed the other turret. Gave it a bit more time getting the various panel colors to match the set piece
and yes, I use my thumbnail to wipe excess paint off the brush before touching the brush to the model, or test if things are too runny, or check color, or need more thinning etc...
Not going to stress to much over neatness/crisp straight lines, since it only needs to look good from the front angle looking back instead of side on
View attachment 120273
View attachment 120287
View attachment 120278
View attachment 120285
View attachment 120286
View attachment 120288
View attachment 120289
View attachment 120290
View attachment 120291
View attachment 120292
blakeh1
Well-Known Member
- Joined
- Oct 26, 2011
- Messages
- 1,174
BTW that picture is from A New Hope model. Not sure how much different it is on Empire.
Yeah that is definitely the 5 ft rather than the 32" from ESB
On a side note, IIRC apparently that part is there because it was originally built to be able to rotate the cockpit, as well as providing cooling holes for the lights and motors.
In Sculpting a Galaxy, Lorne mentions this..
"At one time, the Falcon's cockpit was to be motorized so that it could be rotated 90 degrees. Lucas had the idea the ship would fly like a sunfish, landing flat, but at take off the body would rotate and the cockpit would remain in the same configuration. Though the end model did not include this feature, the cockpit module remained sleeved and could be rotated"
Of course, not letting it go to waste, they later wound up using the same design concept for the B-Wings
Similar threads
- Replies
- 5
- Views
- 756

