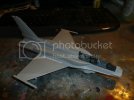
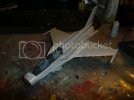
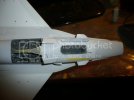
Storm on the horizon... Hasegawa 1/48 F-16I Sufa

fumblethumbs said:
Yeah, that's looking fantastic!
No figures and canopy up??

Thanks, I normally build my models without figures, and aircraft with canopy open up to show the cockpit. Tempted to do a parked and secured one here with FOD guards and RBF tags.
 
Carsenault said:
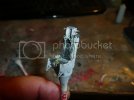
Finished assembling both seats. Was nearly crosseyed after finishing up with all the nano-scale photo-etch parts. I love the Aires cockpit sets but next time I will order the corresponding Quickboost seat(s) to go with it. I test fitted the quick boost seat, and it slides right into place just like the Aires.

Quickboost on the left, Aires on the right...
023.jpg
-

Considering Aires and Quickboost are the same company, I would expect the QB seat to fit like a glove, as it is probably the same seat as what comes in the cockpit set from Aires.
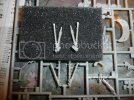
 
I feel your pain with all that PE! That stuff can just blind you after a while.
You've done some pretty spot on work there with that seat. Nice to see you making some good progress. Keep up the good work.
 
Elm City Hobbies said:
Carsenault said:
Finished assembling both seats. Was nearly crosseyed after finishing up with all the nano-scale photo-etch parts. I love the Aires cockpit sets but next time I will order the corresponding Quickboost seat(s) to go with it. I test fitted the quick boost seat, and it slides right into place just like the Aires.

Quickboost on the left, Aires on the right...
023.jpg
-


Considering Aires and Quickboost are the same company, I would expect the QB seat to fit like a glove, as it is probably the same seat as what comes in the cockpit set from Aires.

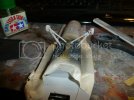
They are exactly the same seats except the QB seats have the belts molded in placem Aires doesnt. I actually had a QB F/A-18 seat at one point that had the Aires logo molded on the side of the casting block. I wont be gluing my seats in place as I intend to someday get more QB F-16 seats and swap the Aires seat for one of them. Ill save the Aires seat for a single seater or one of my F-15As
 
Just discovered an interesting conundrum concerning not just this kit but all other "Block 40" and later Hasegawa F-16 kits... Was just studying the sprues to see what I could assemble while Im waiting for some paint to dry and at first I cant find the main landing gear parts. The standard landing gear parts are there, but the Sufa being a late block F-16 has the heavy duty main landing gear, with thicker struts and braces, and wider wheels. The wheels are in there, and the correct main gear doors are in the box. So I have a look at the parts diagram and guess what, no heavy duty main landing gear. I though that was odd that Hasegawa would tool up special sprues to do special edition kit like the Sufa and not include the correct landing gear parts. So whatever, I dig into the stash to rob my other late block F-16 kit (a block 40 2 seater) and guess what, no HD MLG in there either.
Now Im wondering if Hasy ever did these legs, I go online in search of some aftermarket replacements or corrections, none to be found anywheres... So I'll either have to make my own corrections or see if I can modify my left-over Tamiya MLGs to fit the Aires gear bay.
 
Time for an update!

Slowed down a bit as we were on the go most of the weekend, got quite a bit done today. First off is the MLG struts. As I had posted last week, the wrong type of main gear legs are included in this kit, not even sure if Hasegawa makes the correct type at all. So I decided to raid my spares box and use a set of heavy duty style MLGs left over from my Tamiya F-16C build. They needed to be modified a bit to fit the Aires wheel bay. They are molded in one piece joined by a section of the rear bulkhead. I cut the struts free, then compared them to the Hasy gear, all I needed to do was to attach some new mounting pins to the top of the inner struts using some Evergreen stock. The detail is much nice on the Tamiya legs anyways.

016-1.jpg


004-2.jpg

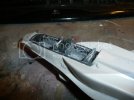
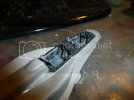
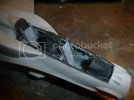
When I did work on the kit over the weekend, it was mostly on the cockpit. I rushed it a bit, so its a little sloppy, still much better than the kit cockpit though. The seats came out really nice.

006-2.jpg

005-2.jpg

004-3.jpg

011.jpg

012-1.jpg

Got the weapons started... Going with the Rafael Spice air to ground and Rafeal Python air to air missiles from the Skunk Models weapons set and 2 AIM-120 AAMRAMs from the kit.

013-1.jpg

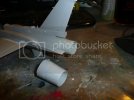
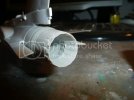
Also, robbed some other Tamiya parts for this build... Using the Tamiya exhaust nozzle instead of the Hasy. Much more detailed and proportionally correct. Just had to sand around the upper side of the Tamiya engine fairing to get it to kit the Hasegawa fuselage.

007-3.jpg

008-1.jpg

And today, I closed up the fuselage and attached the avionics spine, conformal fuel tanks and other lumps and bumps.

003-2.jpg

009-1.jpg

010.jpg
 
Carsenault, that looks great. I have a Kinetic F-16 sitting in my stash and you're tempting me to tear open the box and start on it right away.
 
Looking great Charlie. Good call on swapping the exhaust nozzle. The Tamiya one looks alot better. Cockpit looks great too. Just a small touch of yellow on those seat details and they came alive.
 
Wow, never realized how complex the IAF F-16 camouflage is. I normally use paper masks, but all the extra bits on the Sufa, makes it difficult to keep track of. So I am instead plotting out the camo demarkation lines with a soft pencil then Ill free hand the pattern, That should be interesting. Ill post some pics once I get the main colors painted on.

edit: Just figured out another reason why I was having trouble with the paper masks, As I was plotting the demarkation lines, I couldnt get a few lines to meet up. so I studied the painting guide for a bit and realized the paint guid was wrong. Looks liek they mixed up a few schemes.
 
Argh!!! This camo scheme is gonna fight me ever step of the way. I cant seem to get the hang of applying camo freehand using Vallejo. So one the few brown patches I just sprayed dry out a bit Ill over coat it with primer again and start over. I may try the paper masks again, stay tuned for further stormy weather updates. ::)
 
Figured out what Hasegawa did wrong on thier painting guide so now I now how to go ahead and use thier guide to mask my kit. Funny how a simple little error can mess you up like that. Im not worried about it being exactly right since I have discovered there is no exact standard Sufa camoflage pattern, they all varied a bit, no 2 are exactly the same as far as I can tell.
 
well Charlie, I think you could do the camo perfectly!! but check the decals first where they are place, so the colors blend with the decals...

just my 2 cents
 
Eastrock said:
well Charlie, I think you could do the camo perfectly!! but check the decals first where they are place, so the colors blend with the decals...

just my 2 cents

The only issues with that that I can think of is the tail. The markings I will be using feature a stylized eagle graphic on the tail in blue and tan. it needs to go over a sand or sky colored background on the tail so it will all be visible. other than that, its all high vis markings.
 
Getting withdrawals symptoms... seems like its been a while since I last got a chance to work on the Sufa. Hopefull tomorrow I can get the last of the cacmo colors painted, then start with the post shading process.
 

Latest posts

Back
Top