Studio Scale Y-wing with panels
- Thread starter Jamaicanmodels69
- Start date
Glorfindel
Active Member
- Joined
- May 2, 2011
- Messages
- 1,504
Sweet Molly in the Manger! If I had a tenth of that skill I could paint rocks. Love that your making this in a studio scale.
ModelMakerMike
"It's Slobberin' time""
- Joined
- May 28, 2011
- Messages
- 1,838
You're at it again!!!
Looking awesome....because you are whippin' out yer mad modellin' skillz....yo.
Love it! I have always loved the Y-WINGs.
Looking awesome....because you are whippin' out yer mad modellin' skillz....yo.
Love it! I have always loved the Y-WINGs.
The Nylon Gag
New Member
- Joined
- Nov 14, 2011
- Messages
- 829
Wow, Wow, Wow.
So clean as usual buddy.
Absolutely Inspiring.
Gag
So clean as usual buddy.
Absolutely Inspiring.
Gag
CheesyGrin
New Member
- Joined
- Sep 1, 2012
- Messages
- 152
Craftsmanship. Pure craftsmanship. It's great to watch this progress. Thanks for sharing. ;D
Jamaicanmodels69
New Member
- Joined
- Apr 17, 2011
- Messages
- 604
Thanks guys again much appreciated you
guys help make this fun!! ;D
Well this part turned out to be royal pain it wasn't so
hard to make, but it did end up proving I had one of
the Saturn V rocket bodies in the wrong rotation on
the wing pylon......oh the pain as I had to rip it off!
It was changing the orientation of the left nozzle VS the
right nozzle. SO it's like this the cone is from the 1/144th
scale saturn V kit, I used a piece of PVC and made a ring plate
to mount in the engine, I also had to figure out the fins
that wasn't much fun either....LOL
Getting the inside diameter for the mounting plate
by just using the saturn V engine half.
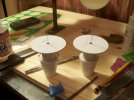
These are the engine nozzles from the Saturn V kit I had
to make fascias and then dremel them out.
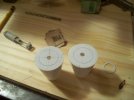
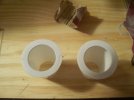
In this picture Is the nozzle and the PVC part....the PVC part
slides into the ring on the nozzle. I had to put a fascia on the
PVC part as well because the LED will mount there.
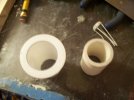
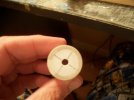
Parts break down.....minus the fins
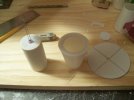
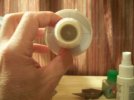
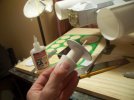
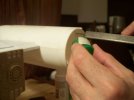
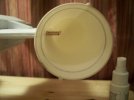
Ok I needed a way to keep the depth of the mounting plate inside
the engine i wanted recessed about 16mil inside. So I got out the
calipers some solvent and some evergreen strip. The mounting disc
has to sit perfect inside and needs to be at 16mil all the way around in
depth, if not it's going to make the nozzle that gets mounted to it looked
cocked. So I Started with the strip styrene and the solvent at 16mil and just just
used the caliper to push it to the right depth and locked it down as I went.
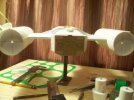
Here is one of the fins I had to cut to fit.....
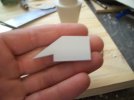
You can see how the marks on the PVC for the fins match the
cross hairs on the mounting plate.
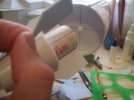
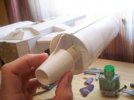
Finished it looked like this
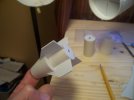
One side down....
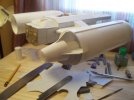
Done and thank you GOD! ;D
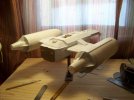
guys help make this fun!! ;D
Well this part turned out to be royal pain it wasn't so
hard to make, but it did end up proving I had one of
the Saturn V rocket bodies in the wrong rotation on
the wing pylon......oh the pain as I had to rip it off!
It was changing the orientation of the left nozzle VS the
right nozzle. SO it's like this the cone is from the 1/144th
scale saturn V kit, I used a piece of PVC and made a ring plate
to mount in the engine, I also had to figure out the fins
that wasn't much fun either....LOL
Getting the inside diameter for the mounting plate
by just using the saturn V engine half.

These are the engine nozzles from the Saturn V kit I had
to make fascias and then dremel them out.


In this picture Is the nozzle and the PVC part....the PVC part
slides into the ring on the nozzle. I had to put a fascia on the
PVC part as well because the LED will mount there.


Parts break down.....minus the fins


Ok I needed a way to keep the depth of the mounting plate inside
the engine i wanted recessed about 16mil inside. So I got out the
calipers some solvent and some evergreen strip. The mounting disc
has to sit perfect inside and needs to be at 16mil all the way around in
depth, if not it's going to make the nozzle that gets mounted to it looked
cocked. So I Started with the strip styrene and the solvent at 16mil and just just
used the caliper to push it to the right depth and locked it down as I went.


Here is one of the fins I had to cut to fit.....

You can see how the marks on the PVC for the fins match the
cross hairs on the mounting plate.


Finished it looked like this

One side down....

Done and thank you GOD! ;D

Jurasikfrank
What a piece of junk...
- Joined
- Mar 25, 2012
- Messages
- 184
Great job !
JohnSimmons
For Spud: I was once Merseajohn
- Joined
- Jan 4, 2011
- Messages
- 5,645
This is going to be amazing when complete! 
ModelMakerMike
"It's Slobberin' time""
- Joined
- May 28, 2011
- Messages
- 1,838
Yes,
it's coming along most swimmingly.
It shall be awesome when finished. I may have asked you this before, but are you an engineer?
it's coming along most swimmingly.
It shall be awesome when finished. I may have asked you this before, but are you an engineer?
Jamaicanmodels69
New Member
- Joined
- Apr 17, 2011
- Messages
- 604
ModelMakerMike said:Yes,
it's coming along most swimmingly.
It shall be awesome when finished. I may have asked you this before, but are you an engineer?
Thanks Guys ...... ;D
Hey Mike I am proof you don't have
to be a engineer to make this stuff!!!!
Glorfindel
Active Member
- Joined
- May 2, 2011
- Messages
- 1,504
I have always wondered if I could build one of these from scratch. Just love the Y-wing. And I have to say your doing great with this.
Jamaicanmodels69
New Member
- Joined
- Apr 17, 2011
- Messages
- 604
Glorfindel said:I have always wondered if I could build one of these from scratch. Just love the Y-wing. And I have to say your doing great with this.
If you spent the time you do on wondering towards doing you probably
would have found out by now you can............... ;D
peza
Member
- Joined
- Jun 27, 2012
- Messages
- 612
eh up buddy.loving ya scratching mym8.
and the answer to glorfindel,i just jumped in on my build not knowing if i could do it,but in all fairness it was`nt until i was comfortable with what i made i started posting!if you never try you never know!.....
what do you say jamaicanmodels69..no guts no glory
cheers peza
and the answer to glorfindel,i just jumped in on my build not knowing if i could do it,but in all fairness it was`nt until i was comfortable with what i made i started posting!if you never try you never know!.....
what do you say jamaicanmodels69..no guts no glory
cheers peza
