Tamiya 1:35 Cromwell
- Thread starter fubar
- Start date
panzerace007
New Member
- Joined
- Dec 17, 2010
- Messages
- 2,118
Enough already ....." Less talk more Work !" ;D
panzerace007
New Member
- Joined
- Dec 17, 2010
- Messages
- 2,118
fubar said:Alright.....alright already. Sheesh....cant a man have a ramble?
Just let me load up the iPod with Iron Maiden and AC/DC and i'll get started. lol
longlance67
cry havoc and let slip the dogs of war -shakespear
- Joined
- Sep 21, 2011
- Messages
- 656
Cant beat some good tunes to build to ;D
longlance67
cry havoc and let slip the dogs of war -shakespear
- Joined
- Sep 21, 2011
- Messages
- 656
Hows the build going mate ? 
looking forward to your update
shane
looking forward to your update
shane
Big-John
New Member
- Joined
- Sep 17, 2011
- Messages
- 1,052
Hey Fubar, looking forward to some cutting and glueing..............and PE bending!
BTW, i'm in "Black Sabath" mode today ;D
Black Sabbath - Iron Man(High Quality)
Black Sabbath Paranoid
BTW, i'm in "Black Sabath" mode today ;D
Black Sabbath - Iron Man(High Quality)
Black Sabbath Paranoid
fubar
New Member
- Joined
- Nov 10, 2011
- Messages
- 502
Um.....er.......oh.........eek. 
I got slightly side tracked with another couple of projects lately but i do plan on starting soon.....just trying to clean a little of the back log of kits i'd already started but not finished. :-[
I have watched the Mig video F.A.Q. 2 today which is all about pigments, if you get the chance it's well worth the watch as it's very imformative and great to see the techniques in action rather than just reading about them!
The plan now is to make the Cromwell muddy and i may have a look for some metal link tracks.....although i have no idea about buying stuff like that, i have a strange urge to weather some up with pigments thanks to that video.
Back soon.
P.S. Black Sabath...........rock on dude, good call. I been listening to Probot while modelling, find it helps calm my mind! ;D
TTFN Matt
spud
Irish and proud of it :)
- Joined
- Jun 29, 2011
- Messages
- 6,918
FUBAR!!!!!!!! pull the finger out! 
but on an other note, http://www.friulmodel.hu/en/atl-43-cromwell-mk-iv-i47/ this is were i bought mine you will need teh blakin it stuff but ya can get it from emodels search for AK 159 on there its about 12 quid but you can use it a few times
but on an other note, http://www.friulmodel.hu/en/atl-43-cromwell-mk-iv-i47/ this is were i bought mine you will need teh blakin it stuff but ya can get it from emodels search for AK 159 on there its about 12 quid but you can use it a few times
fubar
New Member
- Joined
- Nov 10, 2011
- Messages
- 502
spud said:FUBAR!!!!!!!! pull the finger out!
but on an other note, http://www.friulmodel.hu/en/atl-43-cromwell-mk-iv-i47/ this is were i bought mine you will need teh blakin it stuff but ya can get it from emodels search for AK 159 on there its about 12 quid but you can use it a few times
OK Mr. spud help.....the Sherman was just a basic 1/48 scale kit and i knew where to start with that.....but this is MADNESS!!!

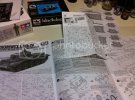
I have an instruction sheet for the kit, i have another for the PE and i also have an AM resin kit that has no instructions......

Wheres best to start? I've managed to suss that some of the PE wont fit on the AM kit because of the hessian tape and baggage....should i start by preping the resin parts, bend up the PE or follow the kit instructions and try to work in the other parts as i go?
I'm gonna go make wheels.....i think thats safe to do. ;D
TTFN Matt
S
ScaleModelMadman
Guest
fubar said:Wheres best to start? I've managed to suss that some of the PE wont fit on the AM kit because of the hessian tape and baggage....should i start by preping the resin parts, bend up the PE or follow the kit instructions and try to work in the other parts as i go?
Matt,
when using photo etch, it's a sort of juggling act between the kit instructions and the PE instructions. When you are starting on a step in the kit Instructions check if there is detail that needs to be removed or replaced by the PE, then you need to decide if it's best handled then, or later in the build. You don't want to have to try and shave off raised detail in an area that is now buried if it's much easier to do before hand.
As far as the resin storage, decide what you are using and where it goes, if there is PE underneath it then you can skip that part. I often mark the instructions sheets with pen/pencil to keep track of what I have done/am skipping etc.
Big-John
New Member
- Joined
- Sep 17, 2011
- Messages
- 1,052
Hi Matt,
Just a tip as to how I do things, I always start with the basic hull construction first. I do this before I do any suspension and wheels. This way you can correct any fit issues with out the wheels being in the way. I would also dry fit any After Market hull pieces in this step. Once the basic hull construction is finished, I move on to suspension and details.
I’m looking forward to this build.
John
fubar
New Member
- Joined
- Nov 10, 2011
- Messages
- 502
Thanks for the advice guys, much appreciated. This all seems a little overwhelming at first glance but i'm sure if i take it slow and careful i'll be fine. :
Saying that, i can see the PE set being my biggest headache, i have several questions about it already.....think i'll open a new PE thread in the tech forum!
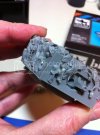
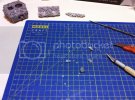
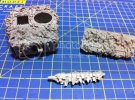
Well i'm under way finally, i spent last night prepping the resin parts. I spent about two hours at it and only got three parts done.....and they haven't been sanded yet either! Whats held me up so much is what i think is very small parts of rubber molding left behind in all the small areas of the hessian netting.....and i mean hundreds of little pieces...


I spent most of my time picking them out with a No. 11 xacto blade as it was the only thing i had which was fine enough to reach in there. I did damage some of the hessian netting as its very flimsey in some places....still it given me some areas to do a little damage to the model now.

Anyways i got 90% of it out and i'm hoping the rest wont show once the primer is on there.....the rest of the resin parts look free of rubber but they do have massive casting blocks that will need removing. Good job i have my helmet.
I start jury service today so have no idea how that will effect my time for modelling....i may get sent home early or loose my evenings, guess i'll see.
I'll open that PE thread first chance i get.
Thanks for looking.
TTFN Matt
Saying that, i can see the PE set being my biggest headache, i have several questions about it already.....think i'll open a new PE thread in the tech forum!
Well i'm under way finally, i spent last night prepping the resin parts. I spent about two hours at it and only got three parts done.....and they haven't been sanded yet either!


I spent most of my time picking them out with a No. 11 xacto blade as it was the only thing i had which was fine enough to reach in there. I did damage some of the hessian netting as its very flimsey in some places....still it given me some areas to do a little damage to the model now.

Anyways i got 90% of it out and i'm hoping the rest wont show once the primer is on there.....the rest of the resin parts look free of rubber but they do have massive casting blocks that will need removing. Good job i have my helmet.
I start jury service today so have no idea how that will effect my time for modelling....i may get sent home early or loose my evenings, guess i'll see.
I'll open that PE thread first chance i get.
Thanks for looking.
TTFN Matt
