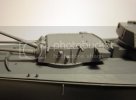
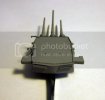
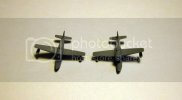
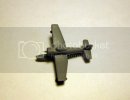
Tamiya 1/350 BB-63 Missouri 1944 version w/ lots of goodies

adampolo13

New Member
Joined
Dec 7, 2011
Messages
2,633
Hello everybody,
Just so you guys don't think I've totally fallen off the face of the planet, I wanted to share this with you guys.
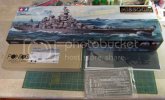
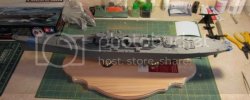
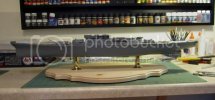
IMG_0971_zpsbbe7ce18.jpg

This is Tamiya's 1/350 Missouri with Pontos "Battleship" kit, Pontos blue wood deck, and Eduard's PE set. My plan is to display this in 1944/45 configuration. I do have to warn you though, this build will be very slow for two reasons. 1. This is my first ship build. 2. My wife and I just had our first child a few weeks ago and I have very very little time to build.

With that being said, here are a few pictures of what I've done so far.

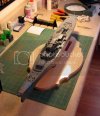
IMG_0972_zpse33c7576.jpg
IMG_0973_zps5b3111dd.jpg

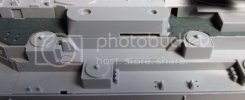
I sanded down the entire hull. There were a ton of little imperfections and a fine line representing the boot. I sanded that all down smooth. Then next thing I did was put the rudders on. As the hull is curved and the connections on the rudders were flat there was a gap. I used white glue to fill that gap. I also attached the shaft supports and dry fit the shafts. Finally I started working on the decking. I removed the molded on anchor chains and have started removing stairs.

Funny thing, now that I've written it down I've done a lot more than it appears. haha

Thanks for checking this out.
 
Wow, PE and wood deck for you first ship, that is indeed a challenge.

Looks great, eager to see how it turns out.

Yeah, the amount of perceptive work done diminishes when you try to put it in words, I have found out that adding a ton of pictures help, I like to take pictures of small steps done on a project. Look much more progressive.
 
Welcome back and congradulations to you and you wife. This is going to be a pretty cool build o follow.
 
Wow nice amount of goodies! I was thinking of purchasing a Pe set for my heller bismarck but, Im not sure if im skilled enough to work with it yet, I figured I should at least complete 2 Models before I tackle that! It looks like an awesome model though I wish you the best of luck and congrats on the family!
 
Haha. I figured you were pretty busy Adam. I remember when I brought my son home from the hospital. I havent yet started mine but soon!
 
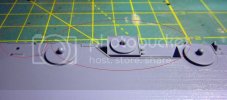
Hey guys, my daughter decided to behave tonight so my wife and I got a little bit of a reprieve. I sat down on the couch and got a few minutes to read instruction manuals etc. One thing I did notice is that I need a bit of help on something. All along the deck where I will eventually end up putting the PE rail is this little lip:
IMG_0974_zps03d3a247.jpg

My question is this:
Does this need to be removed? My best guess is, yes. But I wanted to double check before I went around cutting off more plastic then need by. Although, I did start hacking off all the stairs tonight. ;D

Thanks again!
 
Yes, has to be removed, be very careful to end up with a flat surface. You may want to trace a line with your xacto knife to create a better area contact by digging in the PE into the cut you did with the knife. If you go this way, you need to be super careful.
 
See, I would have said no, in my head I would think the railings would go on top of that, it being sort of a "kick plate" to keep body parts from slipping under the railings in rough seas. But what do I know. Less about ships, and just a guess.

Adam, you live like a 20min drive (OK maybe a bit more) from Fall River and Battleship Cove, go check out the USS Massachusetts there, while not the same class of ship, the Iowa class was just a slightly bigger, faster and better armored version, so they would be very similar. Would give you some great reference for the Missouri.

Or you could just browse through the photos on my Fotki album.

http://public.fotki.com/ScottM/battleship-cove-fal/uss-massachusettes/

Still, well worth seeing if you haven't been there. I didn't get to see all of the ship, because I foolishly wore myself out climbing through the Joseph P Kennedy and the Lionfish (still unbelievable that about 80 people served aboard that tiny sub!), but lots of pictures on the outside.
 
I am with, Scott: Leave it on!

tim-laman-anti-aircraft-guns-on-the-battleship-uss-massachusetts_i-G-26-2625-BA8MD00Z.jpg


However, I do not know how the Pontos railing is designed. It may be attached to the inside or on top of the lip.

Cheers,
Guido
 
Thanks everyone for the kind words and thank you for the advice regarding the coaming! Good thing I've got you guys on my side or I would have gone and cut it off. :D

The good news of the day is I got a good chunk of bench time this morning. The wife and daughter decided they wanted to sleep in until 9am. I am up everyday at 6am, so I had 3 hours at the bench, can't beat that! Whoo Hoo!

I spent a large amount of time meticulously cutting out the Pontos wood decking so that I could dry fit it to the deck. It comes with a self adhesive backing on it. It can be peeled off and stuck in place when ready but since I'm taking it nice and slow on this, double and triple checking all my fits, I needed to get this done. It actually gave me a good boost of enthusiasm for the build because the deck looks so sweet.

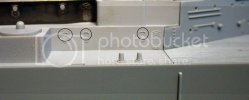
After that was done I went to addressing these stairs and the little gap circled in Red.
IMG_0981_zps0de342f5.jpg

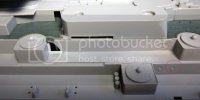
I circled that gap to show that there is also a portion of coaming there as well that has to be replaced. Ugh, was that some work. First I used sheet styrene to get gap level with the deck and then used some very thin pieces to reproduce the coaming. Then I moved on to taking out the stairs which again left another two gaps to be filled. Again, plastic card was used.

The picture below shows the results of filling the gap on the right hand side, replacing the coaming and then attaching the Eduard Photo etch sheet to it. I circled the area where the gap was where the coaming was. I did end hitting it with some primer to test sanding etc. Just as a note, there is a piece of PE that attached to the side of the structure which will cover up that nasty fill job.

IMG_0980_zpse63a0fcb.jpg

This picture shows how crisp the Eduard set is. My question, should I drill out the port holes, paint them black or what?
IMG_0979_zps3e1bf5f7.jpg

Lastly, I decided to start doing a ton of dry fitting of the supper structure. Here are a couple pictures of the dry fit. Please excuse the base, I'm still trying to work out what I'm doing there. I know it may be a little contrary to popular thinking but I like having a base that is smaller than the ship.

IMG_0975_zps83ddb642.jpg

IMG_0976_zps3c2c8b43.jpg

Thanks for checking this out!
 
Nice work!
Aztec stairs- the scourge of the modellista! So much work, just to get clean surface to work with...
Concerning the portholes: Since they are so shallow, I'd drill them, back the hole with sheet and then paint. If you are going for superlatives you can then fill them up with a drop of clear nail polish.
Have fun and keep this going, it looks inspiring.
Cheers,
Huido
 
Hey tailor, thanks for the kind words.

Luckily, I was able to get some more work done today. In fact i got about 6 hours bench time. ;D

I set out the day to work on something a little different as I was a little tired of stairs etc. I've noticed that there is plenty of things to be done when working on ships. ;D

Well, I set out to work on these:
IMG_0983_zps9667080f.jpg

First thing to do was addressing these:
IMG_0985_zps394f366d.jpg
The are just AWFUL!

The Pontos kit came with these thank goodness:
IMG_0984_zpsdae044f3.jpg

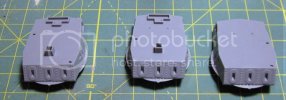
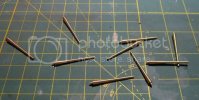
Unfortunately the Pontos kit did not come with resin replacements for the base of the big guns. Sorry I don't know the name of them. So, I cut the barrel away from them and I ended up with these:
IMG_0986_zps74a64b0e.jpg

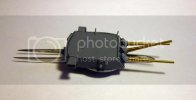
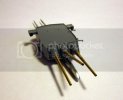
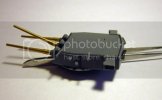
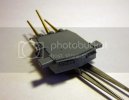
I drilled out them out and put the brass barrels in and then used white glue to fill the gaps. I'm sorry to say I was so entrenched in building that I forgot to take pictures. Well, after many hours of cutting sanding, gluing etc I ended up with the first turret being almost done. I have one more piece of railing to put on and then the life rafts. After that I will put it under a coat of primer and move on to the next project.

IMG_0988_zpsa5a04b26.jpg
IMG_0987_zps06464fa1.jpg
IMG_0990_zps0924d41f.jpg
IMG_0989_zps8fae48a4.jpg

Thanks for checking out my build!
 
Hey guys, unfortunately my huge build plans for the weekend fell through. First, I finally got the courage to start surfing again. I had hung up my wetsuit 2 years ago after my last knee surgery. Then I spent a ton of time with the family. :) Well, with the few hours I got at the bench this weekend, here's what I did.

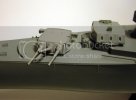
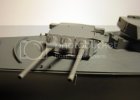
First off, I got the last of the PE on turret no. 1. After that I decided to lay down some primer to check all the gaps and seems. I attached all the guardrails with white glue and filled the seams around the blast bags. I would have had much more time to build if I hadn't of decided to lay down the primer. I have never had a problem with my Badger Krome but with the crazy heat the tip dried up bad and got wicked clogged. I had to put the thing in my sonic cleaner and then very carefully pick the paint out of the tip. I spent almost 2 hours cleaning the brush. Thankfully I got it clean without damaging it. Also, I have a Badger Patriot as a back-up which doesn't have such a fine tip which I used to prime. Anyways, here are the pics of the turret.

IMG_0995_zpsd16ca1cc.jpg
IMG_0996_zpsb0fb3829.jpg
IMG_0998_zps0a86500c.jpg
IMG_1004_zps06ce227f.jpg

After that I got the bug to get the little planes built. I wasn't expecting it to take me as long as it did, there were seam lines on every part. But here they are.
IMG_0991_zpsa84f11ce.jpg
Nicely engraved panel lines.
IMG_0992_zps40c35d0b.jpg

Lastly I turned my attention to the super structure. Getting to this point took almost 3 hours. There was a major seam/gap running down the middle of the two sides. I used super glue to fill and sand smooth. There's also a gap which runs along the seam where the deck fits. I still have some work to do there but again I've used white glue to fix it. Then I started getting some of the Eduard PE attached.
IMG_1001_zps7d0bec76.jpg
IMG_1002_zpsc95f6f17.jpg
IMG_1003_zps473203cc.jpg

A quick dryfit of the super structure.
IMG_0994_zps23329bf0.jpg

Thanks for checking out my build!
 
Hey guys, a small update and a question for you.

First the update...

I have been extremely afraid to commit drilling out the holes in the hull for the base etc. My fear was that I would add/subtract/drill the holes in the wrong place and end up messing up the hull. Well today after work I decided to go for it. The big inspiration being I ordered the paints for this.

So, this is how she will sit on the base:
IMG_1006_zpsecb5a3bb.jpg
(I know some of you may be thinking, "Adam, you really should have a base longer than the ship." But, personally I think the shorter piece of wood allows the viewer to see more of the bottom of the boat. Which I like, so :p.

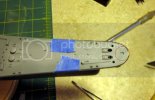
Now on to my question... The bow of the boat has this molded spot in it which I think, but am not sure, is supposed to represent the hole for the bow anchor chain/line.

IMG_1007_zpsa38df77c.jpg

Maybe it's my research skills stink but I can't seem to find a reference picture anywhere that shows this as being there.

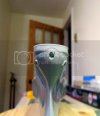
If you look at the front of the boat below, it seams as if the bow should be drilled out, which also seams to be correct to me references.

IMG_1008_zpsb5b9b9a7.jpg

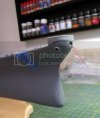
So my question is this: Should I fill the gap on the deck and drill out the bow line hole? Something along the angle below?

IMG_1009_zps29153c57.jpg

Or am I supposed to do something else?

Thanks for following and the help!
 
Hey Adam!! Sorry for missing out on this one til now! Been busy on her!! The Mo is in my top 5 all the way!! After chatting earlier, I am heading down in a bit to crack the box on mine and have a close look at the front hawse! Will get back to you on any thoughts in a bit! ;)
 
That's what I found:

battleship_003.jpg


g700862.jpg


mo1.jpg


If you look at Mighty Mo on Google maps you can see that there is a square deck plate at the very bow. That should be enough for you to put a fair representation of that hawspipe.

Cheers,
Guido
 
Thank you guys for the help. I've decided to fill the current oval and move the Hawse forward. All the reference pictures I've found show the Hawse completely forward and coming strait out of the bow. The oval as she sits now is way to far to the rear of the ship.
 

Latest posts

Back
Top