Tamiya 1/48 Avro Lancaster
- Thread starter rookie
- Start date
scalemodelkid
im a some what smart modeller with my airbrush
- Joined
- Feb 2, 2013
- Messages
- 8
rookie
This is not a toy
- Joined
- May 18, 2012
- Messages
- 937
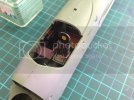
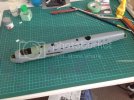
Still have the opportunity to put some belts on the pilots seat but they would have to be scratch built... I've seen a few of you use tamiya tape, what could I use for buckles ? If any one can point me in the right direction to a tutorial would be much appreciated .
Looking very nice!
& google is your friend on making seatbelts
http://www.ratomodeling.com/articles/belts/
http://www.florymodels.co.uk/how-to-scratch-build-seat-belt/
http://hyperscale.com/2007/features/maskingtapeseatbeltsrf_1.htm
& google is your friend on making seatbelts
http://www.ratomodeling.com/articles/belts/
http://www.florymodels.co.uk/how-to-scratch-build-seat-belt/
http://hyperscale.com/2007/features/maskingtapeseatbeltsrf_1.htm
rookie
This is not a toy
- Joined
- May 18, 2012
- Messages
- 937
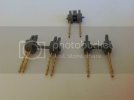
A little more progress today. Landing gear assembled, went together quite nicely . 14 parts for each assembly but they seem good and sturdy.
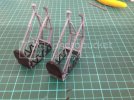
I was hoping to paint and detail these and attach at the final stages, however instructions call for them to be installed when joining the wing halves. Did a dry fit and they won't go in afterwards so looks like ill be masking them up.
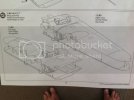
Got the nacelles put together and attached to the wings. Fit isn't that great lots of gaps that will need filling, they are going to be tricky to fill and sand at a 90 degree angle.
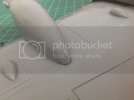
Further problems where the nacelle aligns with the top part of the wing, had to make some shims to fill out the space.
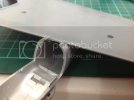
Going to take a lot of sanding and filling to get them right, thankfully not to match detail in theses areas that will get lost.
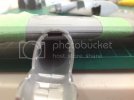
Thanks for looking

I was hoping to paint and detail these and attach at the final stages, however instructions call for them to be installed when joining the wing halves. Did a dry fit and they won't go in afterwards so looks like ill be masking them up.

Got the nacelles put together and attached to the wings. Fit isn't that great lots of gaps that will need filling, they are going to be tricky to fill and sand at a 90 degree angle.

Further problems where the nacelle aligns with the top part of the wing, had to make some shims to fill out the space.

Going to take a lot of sanding and filling to get them right, thankfully not to match detail in theses areas that will get lost.

Thanks for looking
Dave The Chef
New Member
- Joined
- Sep 9, 2010
- Messages
- 108
rookie
This is not a toy
- Joined
- May 18, 2012
- Messages
- 937
Small update, painted and weathered landing gear prior to installation. Used oil paint and AK streaking grime. I also did some work filling and sanding around the nacelles.
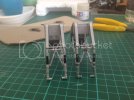
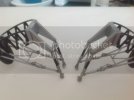
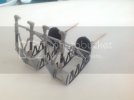
Slowly chipping away at her. I'll be much happier once the wings are finished, but still quite a lot of work to do there.
Thanks for looking


Slowly chipping away at her. I'll be much happier once the wings are finished, but still quite a lot of work to do there.
Thanks for looking
JMac
cut. glue. paint. repeat.
- Joined
- May 24, 2009
- Messages
- 2,812
Just getting caught up again. Great update on the Lanc, the landing gear legs look really good. How are the wings and nacelles coming? Your pictures look like it's going to take some effort - I know you'll get it looking sharp.
Looking forward to your next update.
J
Looking forward to your next update.
J
rookie
This is not a toy
- Joined
- May 18, 2012
- Messages
- 937
Thanks guys.
J the nacelles are pretty average, I needed to finish the gear first because I want the wings put together before I start filling and sanding. The pic I posted is the worst of them , so hopefully won't take too much elbow grease to knock em into shape. I've been working on other sub assembly's in the mean time and have dealt with the gaps around the rear of the nacelles as well.
J the nacelles are pretty average, I needed to finish the gear first because I want the wings put together before I start filling and sanding. The pic I posted is the worst of them , so hopefully won't take too much elbow grease to knock em into shape. I've been working on other sub assembly's in the mean time and have dealt with the gaps around the rear of the nacelles as well.
rookie
This is not a toy
- Joined
- May 18, 2012
- Messages
- 937
Got the wing halves put together today without to much trouble, ther will be a little cleaning and filling required on the leading edges.
Couldn't resist a little dry fit ;D
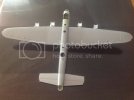
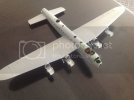
The good news is the wing roots line up beautifully , I might leave them off and paint them separately. On to the nacelles and cowl covers, feel like I'm making some progress. Could be a late entrant in the all open....
Couldn't resist a little dry fit ;D


The good news is the wing roots line up beautifully , I might leave them off and paint them separately. On to the nacelles and cowl covers, feel like I'm making some progress. Could be a late entrant in the all open....
CitizenSwift
New Member
- Joined
- Mar 5, 2013
- Messages
- 21
I used to have this kit when I was a kid. I'm looking forward to following your progress  The internal detailing you've done looks amazing!
rookie
This is not a toy
- Joined
- May 18, 2012
- Messages
- 937
Decided to revive this post here rather than the shelf queen GB considering its officially finished...
http://www.scalemodeladdict.com/SMF/index.php/topic,9970.0.html
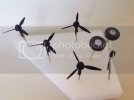
Got the wheels and props painted, just need a wash on the rims.
Spent the last couple of days putting on the decals, still needs a few more applications of sol.
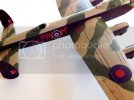
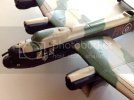
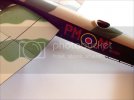
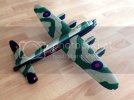
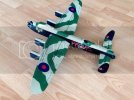
Still needs panel line wash and some dry brushing to pick out some details. I can see the light at the end of the tunnel.
Thanks for looking
http://www.scalemodeladdict.com/SMF/index.php/topic,9970.0.html
Got the wheels and props painted, just need a wash on the rims.

Spent the last couple of days putting on the decals, still needs a few more applications of sol.


Still needs panel line wash and some dry brushing to pick out some details. I can see the light at the end of the tunnel.
Thanks for looking
Glorfindel
Active Member
- Joined
- May 2, 2011
- Messages
- 1,504
Looking good there Rook. Nice and clean. Hey, I do the same thing with the small parts when I'm painting, flat coating them too. Tooth picks in to styrofoam.
adampolo13
New Member
- Joined
- Dec 7, 2011
- Messages
- 2,633
Hey Rookie, she is looking great! One trick I recently learned for suborn decals is to give a quick coat of X-20A Tamiya acrylic thinner. Once you apply it you have to leave it alone completely for a while, 24 hours to be safe, but they should settle down perfectly after that.
Similar threads
- Replies
- 4
- Views
- 257

