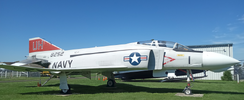
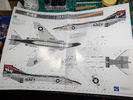
Tamiya 1/48 F-4B (#121)

C'mon Gary, the proper term is "gooderer", get it straight bro!

As far as comparing builds overall a pointless exercise, but if I can get the blue and yellow patina on my nozzles that you got, I'll be a happy camper.
No comparison. At this point in my build,
I'm in the lulling period. In between decals, and finishing accent parts.
Lately I haven't had much mojo to finish this build.
 
No comparison. At this point in my build,
I'm in the lulling period. In between decals, and finishing accent parts.
Lately I haven't had much mojo to finish this build.
Head down, crack on, then on to the next one........... or chuck it in the to do pile.

I'm a great motivational speaker as you can tell.... hehe. Pantherman
 
Head down, crack on, then on to the next one........... or chuck it in the to do pile.
Everyone is different, but doing that would be a disaster for me. It took me a longer time than it should have but I learned to stop working on something is I feel frustration or boredom. Continuing with either condition is exactly how I end up making something into spru-glue.

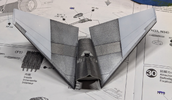
1724872875381.png
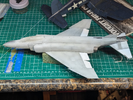
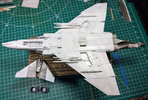
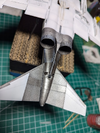
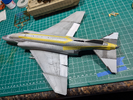
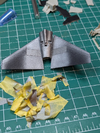
I can see it now, but even when I took this picture I did not realize the lighter silver was missing or thin in areas. Not a disaster, I can always say I meant to do that. When I applied the white to the tips is when I saw it.

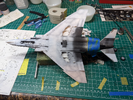
1724872991026.png
This is what I mean. It took massive skill to produce those thin areas, yeah that's it.

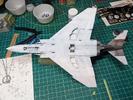
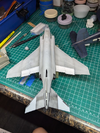
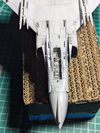
So while I was painting all those little bits white, I figured I might as well load up some more and do the underside.

1724873107760.png
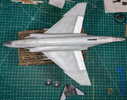
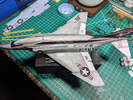
I had to stop here as I had forgotten to mask off the tail section from the white. I think the mottling and panel lines are too strong, needed to adjust that as well.

All that careful masking of the wheel wells was a waste of time. I'm used to WWII aircraft which are seldom the same color on the underside as the wheel wells.

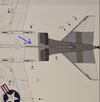
1724873208450.png
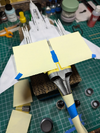
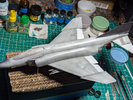
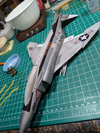
I missed the silver part in between the nacelles, see the blue arrow. Easy to put it in (just a rectangle), so I'll consider if the reward is worth the risk to try and touch up the silver on the elevators when the brush has silver in it.

1724873512008.png

That said, I just put all the Phantom stuff in a box, and brought out the P-38 I 'm working on. Looked at the kit for about 20 seconds and put the Lightning into the closet too, I wanted to change gears and going from plane to plane was not the shift I needed. I want to work on armor for a while. I stopped working on my AFV Club M5 Stuart weeks ago out of frustration, so I grabbed the Bradley to work on for now.
 
Everyone is different, but doing that would be a disaster for me. It took me a longer time than it should have but I learned to stop working on something is I feel frustration or boredom. Continuing with either condition is exactly how I end up making something into spru-glue.

View attachment 123339
I can see it now, but even when I took this picture I did not realize the lighter silver was missing or thin in areas. Not a disaster, I can always say I meant to do that. When I applied the white to the tips is when I saw it.

View attachment 123340
This is what I mean. It took massive skill to produce those thin areas, yeah that's it.

So while I was painting all those little bits white, I figured I might as well load up some more and do the underside.

View attachment 123341
I had to stop here as I had forgotten to mask off the tail section from the white. I think the mottling and panel lines are too strong, needed to adjust that as well.

All that careful masking of the wheel wells was a waste of time. I'm used to WWII aircraft which are seldom the same color on the underside as the wheel wells.

View attachment 123342
I missed the silver part in between the nacelles, see the blue arrow. Easy to put it in (just a rectangle), so I'll consider if the reward is worth the risk to try and touch up the silver on the elevators when the brush has silver in it.

View attachment 123343

That said, I just put all the Phantom stuff in a box, and brought out the P-38 I 'm working on. Looked at the kit for about 20 seconds and put the Lightning into the closet too, I wanted to change gears and going from plane to plane was not the shift I needed. I want to work on armor for a while. I stopped working on my AFV Club M5 Stuart weeks ago out of frustration, so I grabbed the Bradley to work on for now.
I like the shading, obviously a master at work to get that light/dark pattern........hehe. seriously though, it's looking great. PM
 
I was working on the P-38's canopy when I found a flaw in it that required scraping and polishing of clear bits. I decided it was a good time to go ahead and remove that "line" or ridge that runs down the middle of the large bubble-type canopies like the Phantom has.

After removing the line successfully I went ahead and started masking. As mentioned elsewhere I tend to do some assembly-line stuff when I'm working on multiple kits at the same time.

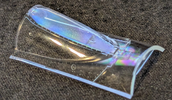
Anyway, I found a similar flaw in the clear plastic on this one too. C'mon Tamiya!

1725478077075.png

It is kinda hard to see, the blob is just forward of the vertical support, so the pilot would see this at 1:00.

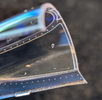
1725478154237.png

Even more close-up which shows the flaw better, but also picks up dust and reflections. But this bubble or blob is actually inside the plastic, unable to feel it on either side. I think I'm just gonna have to live with this one. Unless that Testors clear "window maker" could be used somehow. I should have some on hand this week.
 
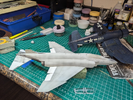
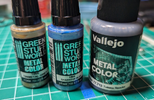
Basecoat is down, I'm not entirely happy with the color. First coat was too dark/tan/brown for my tatste, so I added some lightening, and some more, and a bit more...and I think I overdid it.

1725742629199.png

1725742646107.png

Add to that, I noticed after demasking the canopy that I forgot at least one lightening phase on the canopy. The one mounted on the kit is for closed, I am just using it as a mask. The one I intend to use is "open" and you can see below it is a bit darker/bluer/grayer.

1725742713059.png


I'm not going to make any decisions or changes today. I've learned to let things sit and stew for a while, it might be just fine. After a few coats of clear and some paneling/weathering I think it should darken some more. Plus having those white control surfaces helps the gray look...gray.
 
Last edited:
I decided to leave the color alone and press on. We can call it "sun bleached" at the end of a tour.

Also, I think the gloss clear I just applied did darken it slightly. I'm gonna leave it alone so the clear can dry, I've had issues with the durability of the varnishes in the past, and maybe giving them over 24 hours to fully harden is the trick.

So while the jet is hardening, I moved on to lots of little bits.

1725998371963.png
1725998387441.png

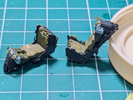
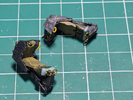
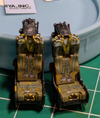
Seats came out okay, kinda wishing I had spent extra for PE, but the way the canopy opens much will be hidden.

1725998465686.png

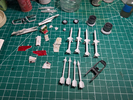
I'm clearly out of my area of expertise with one of these "new" jets (1961 counts as new right?), but maybe someone here knows. What is the deal with the variations in them? Four Sparrows and four Sidewinders, got that. but you can see the front fins on the Sidewinders show two different types, and the longitudinal "bar" on the sparrows is also different, two have one long bar each, two have two shorter ones each.

I thought that was strange and the destructions are no help.
 
I decided to leave the color alone and press on. We can call it "sun bleached" at the end of a tour.

Also, I think the gloss clear I just applied did darken it slightly. I'm gonna leave it alone so the clear can dry, I've had issues with the durability of the varnishes in the past, and maybe giving them over 24 hours to fully harden is the trick.

So while the jet is hardening, I moved on to lots of little bits.

View attachment 124402
View attachment 124403

Seats came out okay, kinda wishing I had spent extra for PE, but the way the canopy opens much will be hidden.

View attachment 124404

I'm clearly out of my area of expertise with one of these "new" jets (1961 counts as new right?), but maybe someone here knows. What is the deal with the variations in them? Four Sparrows and four Sidewinders, got that. but you can see the front fins on the Sidewinders show two different types, and the longitudinal "bar" on the sparrows is also different, two have one long bar each, two have two shorter ones each.

I thought that was strange and the destructions are no help.
When doing armour the different tips are for either high explosive or armour piercing . Just a thought, I'm sure others will correct me. Pantherman
 

Latest posts

Back
Top