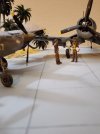
Tamiya Vought F4U-1D Corsair 1/48

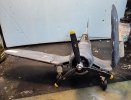
After I rescribed the panel lines that were covered by the decal I reapplied the Mr. Mark Softer which really enhanced the lines once they setteled into the crevices.
I think after I apply a flat coat at the end they should look more like painted ensignias and hopefully mask the lumps and wrinkles from the varnish mishap.
It's looking really good to me, personally I like any "odd bits " as I think it gives your build a unique character that hasn't been seen before.
Sometimes I get so bogged down with getting it perfect that I try to improve the very thing that brings the build to life!!
Pantherman
 
PM, you're probably right. I guess I'm too focused on trying to make it perfect. I think once I finish it will be OK.

At least now I know that Mr. Setter is fairly aggressive. That solution really sucks down the decal onto a surface.

Only my opinion on setting solutions;

I have Micro Sol and Micro Set and they do fairly well, I have Tamiya's Mark Strong too and that works better than Sol and Set. With those being good & better, respectively the two Mr. products, Set and Softer seem to have the best results. Mr. products seem to "melt" the decal and conform to more textures even with thicker decals.
 
Thanks Blake.
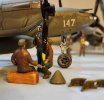
I have a few aftermarket figures I'll be adding. I know I'm not really that good at painting figures.
I'm also thinking of telephone poles and stringing lines between them (only a thought, for now).
My problem is I want to reach the finish line quickly to see the outcome. I have to remind myself that it's not a race.
Learning how to relax and have patience are the keys to this hobby. But the number one key, for me is to have fun! :)
 
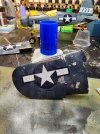
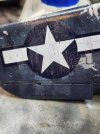
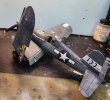
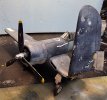
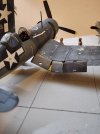
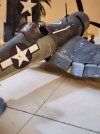
Trying a new technique that I learned from Jon Bius. I did a little chipping with a dental tool and used a sanding stick along the surface of the decal. Tamiya decals are really thick so they can take the abuse. I sponged the top with Vallejo Aluminum Air then I smudged the paint in a downward motion to bring out the ribs of the fabric.
 

Attachments

  • 20230224_183048.jpg
    20230224_183048.jpg
    467.2 KB · Views: 6
  • 20230224_183107.jpg
    20230224_183107.jpg
    377.7 KB · Views: 6
Trying a new technique that I learned from Jon Bius. I did a little chipping with a dental tool and used a sanding stick along the surface of the decal. Tamiya decals are really thick so they can take the abuse. I sponged the top with Vallejo Aluminum Air then I smudged the paint in a downward motion to bring out the ribs of the fabric.
That's looking really good. I like the effect.
Pantherman
 
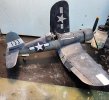
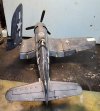
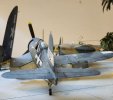
Finished the build and decals. All that is left is reweather with sepia and grey wash coats on the decals.

Next, I'll reapaint the palm trees with better colors and create the diorama.
 

Attachments

  • 20230225_153044.jpg
    20230225_153044.jpg
    438.3 KB · Views: 3
  • 20230225_153109.jpg
    20230225_153109.jpg
    397.1 KB · Views: 3
  • 20230225_153125.jpg
    20230225_153125.jpg
    343.1 KB · Views: 4
  • 20230225_153142.jpg
    20230225_153142.jpg
    355.9 KB · Views: 4
  • 20230225_153204.jpg
    20230225_153204.jpg
    299.8 KB · Views: 4
Last edited:
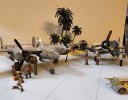
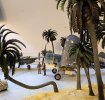
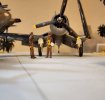
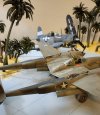
Finished.
I might put some textured sand on the land area and a shrub here and there.
I have some figures I'll be adding in the near future. Other than that, I believe I'm finished with this build. The airfield is a bit small for the 2 planes, but I don't expect them to be taking to the air anytime soon.
 

Attachments

  • 20230227_165359.jpg
    20230227_165359.jpg
    303.7 KB · Views: 14
  • 20230227_165407.jpg
    20230227_165407.jpg
    299.9 KB · Views: 12
  • 20230227_165523.jpg
    20230227_165523.jpg
    161.1 KB · Views: 13
  • 20230227_165543.jpg
    20230227_165543.jpg
    236.6 KB · Views: 13
  • 20230227_165610.jpg
    20230227_165610.jpg
    171.8 KB · Views: 14
  • 20230227_165623.jpg
    20230227_165623.jpg
    172.5 KB · Views: 12
  • 20230227_165646.jpg
    20230227_165646.jpg
    185.7 KB · Views: 12
  • 20230227_165704.jpg
    20230227_165704.jpg
    238.9 KB · Views: 12
  • 20230227_165735.jpg
    20230227_165735.jpg
    273.9 KB · Views: 13
  • 20230227_165752.jpg
    20230227_165752.jpg
    151.4 KB · Views: 14
Finished.
I might put some textured sand on the land area and a shrub here and there.
I have some figures I'll be adding in the near future. Other than that, I believe I'm finished with this build. The airfield is a bit small for the 2 planes, but I don't expect them to be taking to the air anytime soon.
Looking great, nice job. With the final touches done it will be awesome.
Pantherman
 
Figures look great, the weathering on the planes is excellent and I love the placement of things.

I know you mentioned adding some sand texture

If I might add a bit of ":what would I do":...

Currently it is so clean looking compared to everything else it kind of stands out and looks unfinished.

Could use some grime/oil staining and sand colored dusting etc... Something to break up the uniformity of it.
Absolutely. I agree with you. Thanks, Blake. :)
 
Nice work and good luck finding the windows. I just finished an old 1/72 Revell B-17F last year and luckily it had all it's windows!!! I still think Revell's old 60s molds were the best in shape.
 
Nice work and good luck finding the windows. I just finished an old 1/72 Revell B-17F last year and luckily it had all it's windows!!! I still think Revell's old 60s molds were the best in shape.
Thanks.
I have the windows, I just forgot where I put them. lol :D :D
 

Latest posts

Back
Top