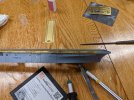
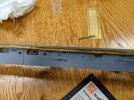
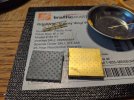
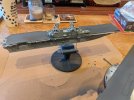
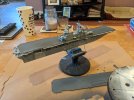
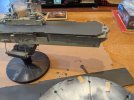
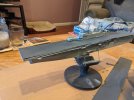
Time to start The kearsarge

wow - thats alot of pe
I agree... I'm gonna do my best and take my time to decipher the instructions and PE I just wish it was a little clearer cause I have found some of the main kits PE overlaps with the after market and though the main kit PE has nice clear instructions it's not as high quality or in depth as the aftermarket kit so if I only new what PE I need from the main kit that's not included or will not interfere with the after market kit it would make life a little easier..

If not I'm gonna go down with the ship trying luckily I still have another main kit coming from china some time this year lol that I can use as a back up if I absolutely need to
 
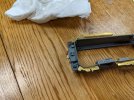
Soo... After many frustrating hours I gotta say who ever thought makeing PE this small and on this thin of brass is the devil, seriously even if I was an expert this stuff would require micro tools to work with and even then the hands of a neuron surgeon.. it's just so fragile

I tried annealing like suggested and it helped bring the tensile strength from 1 and 1/2 bends to 1 an 2/3 of a bend before it breaks so that was sorta helpful..

Trying to make heads or tails of the instructions today I gotta say while the thought of the PE deck was nice after comparing it to the kits deck I'm not that impressed infact I think it removes alot of detail an I'm not sure I'm gonna use it .. also alot of the PE kits appeal is in the extremely fine scale detail of the rails and stairs but some of that stuff is so so tiny even my most precision tools make working with it a mess so I'm trying to salvage what I can use from the PE kit and adapt it to the main kits existing PE which is of a thicker Guage and easier to work with and luckily includes rails and cat walks just not as fine detailed.
 
So now that urumom has provided me with a video that makes me feel slightly whiney lol I've resorted myself and have continued forward to the best of my abilities adding the detail I can and decided I need to find even finer point tweezers.
PXL_20210701_015921141.jpgPXL_20210701_015927849.jpgPXL_20210701_015919181.jpg
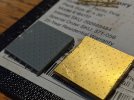
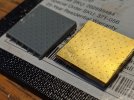
Here's a few updates regarding the railings of the main kit and In there is one of the less intensive after market kit railings.

I've also come back to the witch looks better with the elevators. I've built two the plastic kit one and the PE kit one and placed them side by side keep in mind the safety nets are not added yet but could be added to either.PXL_20210701_155858801.jpgPXL_20210701_155928196.jpg
 

Attachments

  • PXL_20210701_015930463.jpg
    PXL_20210701_015930463.jpg
    1.8 MB · Views: 2
  • PXL_20210701_155922158.jpg
    PXL_20210701_155922158.jpg
    1.2 MB · Views: 3
The pad-eyes are way more to scale with the PE , no ?
Ya the depth in the plastic is off, the trade off is the detail around edges. Which I guess would kinda be covered with safety net when I get there.

Question about acrylic, I imagine there is many differences with air brushing acrylic an enamel but I've noticed my acrylic coats watery even with out thinner and even though it drys smooth it still doesn't come out as clean and fine looking as my enamels some times I find it hides detail more as well. Is this normal do I need more practice with it ?
 
What are you spraying ? Brand ?

Mix them well - with a stir stick if necessary .
Shaking the bottle isn't enough depending on the type
 
I couldn't get all of the colors in either brand so I had to mix. I use model masters and testers enamel regularly so this is all new to me with acrylics..

I had a few wins today with the Photo etch .. I can't say they came out perfect like that video u sent me but much better. I am adding a few pieces here and there that I can easily figure out and seem with in my skill level.

I had a wonderful CA glue explosion .. while trying to use the fine point CA glue applicator tip which is very nice the tip clogged and popped off sending the thin CA glue every where and covering my best to piece of put together CA essentially ruining it.. luckily I had some CA unbonder but it only help so much and idk if the piece can be saved... But you live and learn more pictures to come it's clean up time for today an off to the the salt mines
 
The Tamiya shouldn't obliterate details unless you're just applying too much -- best to do multiple thin coats . or a single thin coat . Less is more .
I don't have much of the Testors acrylics but they seem pretty thick out of the jar . Never airbrushed them , only brush-work .

Acetone will remove all the CA if you need to start over on something .
I just use a sharpened toothpick to apply the CA ,
 
So I have been thinking alittle which is dangerous but never the less I've come to the conclusion I have to make a decision about the over all finished product of my kit..

So the base kit comes with two LCACs and two LCDs plus a small contingency of vehicles, my original thoughts were this was gonna be a stand alone piece of the ship and it's craft but I'm not sure how that would present on a stand so maybe a small display like a diarama waterline up ? But the issue comes I want this to be as compact as possible to fit on my desk at work luckily the hobby master kit comes with the water line up option or the full hull.

Anyone have any thoughts or examples to share that might be helpful
 
lCD is Landing craft deck they also call them LCUs I assume Land craft utility

Used to move people cargo and vehicles
 
So they call both the LCU and the LCM landing craft deck ?
The LCU s have the pilot house along the starboard .
 
So they call both the LCU and the LCM landing craft deck ?
The LCU s have the pilot house along the starboard .
I guess the people who come up with these acronyms aren't very creative but the ones I'm familiar with have a pilot house starboard with a level 2 deck crew quarters and kitchen they were surprisingly big the crew of the boat told me they are equipment to make sea crossing voyages with out the aid of a surface ship to support them but it seems like that would be a rough trip in cramped quarters.
 
Update time!

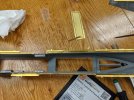
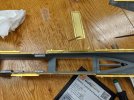
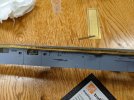
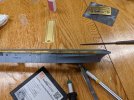
So yesterday I made some great PE progress then messed it up being ham fisted, fixed it and messed something else up it's been a love hate relation ship but the cat walks are on I just got to add as much of the rails as I can safely get on and try and gently clean up some that I mangled in the process.PXL_20210701_015930463.jpgPXL_20210701_015919181.jpgPXL_20210701_015921141.jpg

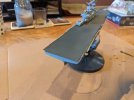
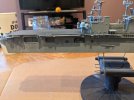
Following the cat walk I thought it was a good time to put alittle coat of paint on the hull so I can see how things were starting to shape up so far ok need to fix and sand a few things kinda went over board on CA glue in places.
I also dry fitted the deck and the hull and the super structure ((keep in mind nothing is mounted)) and compared the PE deck with the kit deck.
PXL_20210704_155415037.jpgPXL_20210704_155403583.jpgPXL_20210704_155354165.jpgPXL_20210704_155338669.jpgPXL_20210704_155331384.jpgPXL_20210704_155327198.jpg
There's still alot of work to go
 
y9biijT.jpg
 
The problem is diving in something this complicated first time. I've never used this stuff either so I went with something a lot less complicated...and watched a ton of you tube vids about it. This looks like the upper end of PE in terms of skill. Good magnifying glasses a must..and maybe a bender.
 
The problem is diving in something this complicated first time. I've never used this stuff either so I went with something a lot less complicated...and watched a ton of you tube vids about it. This looks like the upper end of PE in terms of skill. Good magnifying glasses a must..and maybe a bender.
I have one of those head banded magnifying glass with adjustable lenses.. I got it from horror freight for about 10 bucks, it's helpful however it takes some getting used to. With that said the horror freight set is garbage and the lights do not shine in the direction of were your looking I tried to fix this but wasn't successful, Hobby lobby sells a better set with LED lights centered and better crafted lenses for 20 bucks that I'm probably gonna pick up when I have the chance.

Aside from the headset I also have two helping hands with magnifying glasses, and this tweezer thing called a third hand which is sorta like a tweezer with built in stand.

I don't have a bender but that really hasn't been much of an issue with this PE, but I do plan on picking one up in the future.

Along with this I have a bunch of different exacto knives and probe tips and 4 different types of CA glue ( thick, medium, thin and gel).
 

Latest posts

Back
Top