Trumpeter 1/35 Geschützwagen Tiger für 17cm Kanone (or Big Honkin Gun)
- Thread starter Carsenault
- Start date
Carsenault
Member
- Joined
- May 7, 2009
- Messages
- 846
been workin gaway at this, hopefully not driving Tony crazy with all the camouflage questions.
I've never attempted building anything quite like this before, so Im still sorting out the build sequences. its a puzzle in itself figuring out what to build first or second, when to paint, when to weather... I think I got it sorted out now. I Skipped around a few of the assembly steps so I could paint some assemblies a little easier. No pictures yet, but I have a coat of home made Tamiya red-oxide over most of the interior components and the reverse side of the road wheels.
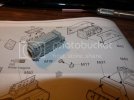
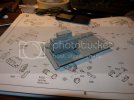
Next came the crew cabin interior bits. I was really impressed with the detail of the transmission assembly, all kinds of nice detail exept... none of it will ever be seen. Here is an example of Trumpeter's habit of over engineering kits. The entire transmission assembly is completely enclosed in a center console, not wuite sure why they even bothered. Oh well, at least I know its in there. The transfer case is also well done, unlike the transmission, all of it is exposed in the cabin. A few other small details round out the interior. All the interior bits were painted white except for the transfer case and seats. Im gonna pick out some detail and do an oil wash before I close off the cab.
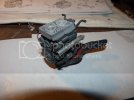
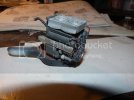
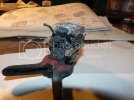
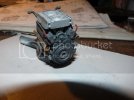
I spent most of the weekend assembkling and painting the engine... And what an engine it is. Very well researched, a bit over engineered but it makes for a very well detail Maybach HL 230, puts all of the model car engines I've ever done to shame (well exept for the 1/12 Ferrari Flat 12 F1 engine). It comprised of 84 parts spread out over 2 and a half sprues. Not a lot of color call outs though so I had to research as I went along to get the colors pretty close. In the end, I used MM Acryl RLM 66 as a base color, and I used various Tamiya acrylics and Alclad aluminium for detail painting.
I've never attempted building anything quite like this before, so Im still sorting out the build sequences. its a puzzle in itself figuring out what to build first or second, when to paint, when to weather... I think I got it sorted out now. I Skipped around a few of the assembly steps so I could paint some assemblies a little easier. No pictures yet, but I have a coat of home made Tamiya red-oxide over most of the interior components and the reverse side of the road wheels.
Next came the crew cabin interior bits. I was really impressed with the detail of the transmission assembly, all kinds of nice detail exept... none of it will ever be seen. Here is an example of Trumpeter's habit of over engineering kits. The entire transmission assembly is completely enclosed in a center console, not wuite sure why they even bothered. Oh well, at least I know its in there. The transfer case is also well done, unlike the transmission, all of it is exposed in the cabin. A few other small details round out the interior. All the interior bits were painted white except for the transfer case and seats. Im gonna pick out some detail and do an oil wash before I close off the cab.


I spent most of the weekend assembkling and painting the engine... And what an engine it is. Very well researched, a bit over engineered but it makes for a very well detail Maybach HL 230, puts all of the model car engines I've ever done to shame (well exept for the 1/12 Ferrari Flat 12 F1 engine). It comprised of 84 parts spread out over 2 and a half sprues. Not a lot of color call outs though so I had to research as I went along to get the colors pretty close. In the end, I used MM Acryl RLM 66 as a base color, and I used various Tamiya acrylics and Alclad aluminium for detail painting.


ModelMakerMike
"It's Slobberin' time""
- Joined
- May 28, 2011
- Messages
- 1,838
HOLY COW.... I gotta see this monster come together!!!
;D
;D
Carsenault
Member
- Joined
- May 7, 2009
- Messages
- 846
TBadger said:Looking great so far! Are those red hoses just breather tubes for the valve covers?
Thanks. Im no mechanic, I dont have a clue what they are for. I have found a few pics online of the real deal, and those hoses lead off to something else. My guess would be that they are part of the lubrication system.
Cave_Dweller
New Member
- Joined
- Mar 18, 2011
- Messages
- 812
That engine looks awesome!
Carsenault
Member
- Joined
- May 7, 2009
- Messages
- 846
Cave_Dweller said:That engine looks awesome!
Thanks.
its a shame very little of it will be seen in the completed model except for the top of the air filters. THe fit of the engine is a bit wonky, so Im debating possibly displaying the engine separately.
Carsenault
Member
- Joined
- May 7, 2009
- Messages
- 846
WayneBt said:Gonna need its own table at CAMS?
Im wondering how many people will think its 1/25 scale and not 1/35. Its got to be at least as big as a 1/25 scale dump truck or Semi tractor.
Carsenault
Member
- Joined
- May 7, 2009
- Messages
- 846
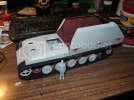
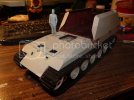
I couldnt resist a quick test fit and scale comparison. Last night, I put all the road wheels on as well as the sprokets and idlers, ran the rubber band tracks over them then the front upper hull and rear side panels were placed onto the chassis. Gee whiz this is big... I hope I have enough paint to finish this one up. I might have to get creative. I measured the model, the chassis alone is 10.5 inches long and 3.5 inches wide, which is over 30 scale feet long by 10 feet wide .
tonight came the scale comparison so I quickly assembled a 1/35 german tank crewman from another kit together... placed it next to the rolling chassis and snapped some pics. Here is the result...
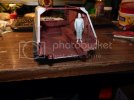
One thing that I did notice with this test fit however is the size of the tracks and or drive sprokets. The cogs of the sproket dont match the spacing of the track links. Im not sure if that is fixable without replacing the tracks. ???
tonight came the scale comparison so I quickly assembled a 1/35 german tank crewman from another kit together... placed it next to the rolling chassis and snapped some pics. Here is the result...


One thing that I did notice with this test fit however is the size of the tracks and or drive sprokets. The cogs of the sproket dont match the spacing of the track links. Im not sure if that is fixable without replacing the tracks. ???
JohnSimmons
For Spud: I was once Merseajohn
- Joined
- Jan 4, 2011
- Messages
- 5,645
What a monster!
Big-John
New Member
- Joined
- Sep 17, 2011
- Messages
- 1,052
I can't see the tracks very well. Does it look like there is only a hole in the tracks for every other tooth? It might be becouse they mixed early tracks with late drive sprokets. If thats the case, then it's replacements tracks, or sand off every other tooth on the drive sprokets.
Edit; Never mind, I see now that every link has a slot for the guide teeth.
Edit; Never mind, I see now that every link has a slot for the guide teeth.
Carsenault
Member
- Joined
- May 7, 2009
- Messages
- 846
Big-John said:I can't see the tracks very well. Does it look like there is only a hole in the tracks for every other tooth? It might be becouse they mixed early tracks with late drive sprokets. If thats the case, then it's replacements tracks, or sand off every other tooth on the drive sprokets.
Edit; Never mind, I see now that every link has a slot for the guide teeth.
Just did some quick measurments and I figured out that for the sprokets to fit the track, they would have to have 16 cogs (or teeth) instead of the 18 it has. Looking at a few pictures of the real thing, they did in fact have 18 cogs so the tracks links are definitely too long. I looked around online for replacement sprokets for this kit, but I couldn't find any. Even if I did, there no guarantee that would fix my problem. What I am thinking of doing is removing a couple of sections of teeth from each side of the wheels, leaving a few adjascent teeth to hold the track. Ill leave all the teeth on the opposite side of the wheels where they would normally be visible. I starting to like the idea of workable track links, I just need to find the right type and hope it would fit better.Because of the length of this beast, I would need at least the equivalent of 3 full runs of track, which means, Id need to buy 2 sets.
Similar threads
- Replies
- 38
- Views
- 7K
- Replies
- 15
- Views
- 2K
