Trumpeter BTR-50 PK
- Thread starter Elm City Hobbies
- Start date
spud
Irish and proud of it :)
- Joined
- Jun 29, 2011
- Messages
- 6,918
Friul Tracks are between £22 - £28 in the uk depending on the track of course, The conversion is a killler i have to admit by the time the model is built your looking at almost $100 or more
oh and with Friul ya wouldn't be loosing them guide teeth ;D
oh and with Friul ya wouldn't be loosing them guide teeth ;D
Elm City Hobbies
Active Member
- Joined
- May 7, 2009
- Messages
- 3,241
Yeah, not really sure why Trumpeter didn't mold the guide teeth onto the track link....either way, everything is cut off of the sprue, track links are cleaned up.
My wife thinks I am nuts (well everyone thinks I am nuts), and looked at me with about 10 eyes while asking me if I was really going to try and assemble them.
Well I didn't buy them to sit there in the box and look pretty....that being said, I may also get 10 links in and say screw it. Will see how it goes.
Tracks give you 180 links, and 360 guide teeth (2 for each link that have to be glued on). The kit however only needs 84 links per side, so 164 total....so Trumpeter give you a health dose of extras in case the carpet monster rears it's ugly head. If I don't loose too many and some are left over, I can always use the extras and mount them on the vehicle.
While I cleaned up the links....I tried to cut as close as I could to minimize the sprue tabs on the guide teeth, as they would be impossible to clean up individually....the plan is to assemble the tracks, let the glue dry and then go in lightly with a sanding stick and clean up the top of the guide teeth.....maybe this is how Trumpeter designed it, dunno.
I like Fruili tracks...and I do have quite a few sets for various vehicles, but they are expensive, more so than these tracks, which is why I wanted to give them a try. They have a set coming out for their recently released Jagdpanzer E100, which I would like to build the kit for the 46+ group build starting in Sept., so figured this was a "practice run" for those tracks......mind you those tracks will likely be about twice the size of these.
Elm City Hobbies
Active Member
- Joined
- May 7, 2009
- Messages
- 3,241
OK....tracks are done!
Not as bad as I was expecting, they still need a little clean up as I wasn't going to even attempt to clean up the sprue attachment point on each of the guide horns.
Hopefully I can lightly fun a sanding stick down them to take most of it off....if not....just going to leave it as is...and pile it full of rust and dust! LOL
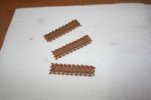
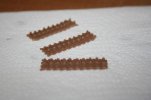
I just did them in small 10 link sections, easier to handle and not as daunting looking as a full run of tracks. Some links had to be glued, as the push fit on some of them are pretty loose....enough working ones I should be able to put them together and no one will notice.
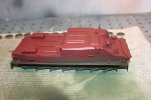
Also got some primer on the kit itself....Russian Green on the bottom, German Red Brown on the top, as basis for chipping....if you look at the desert tan on in the photo at the top...you can see that the vehicle had it's Russian Green over sprayed with the desert tan, and with the tan chipping away, it shows the green through in some places (mostly lower part of the hull), and rusty brown on top where it has worn through both the tan and green layers of paint. Hence the funky 2 tone primer! LOL

Not as bad as I was expecting, they still need a little clean up as I wasn't going to even attempt to clean up the sprue attachment point on each of the guide horns.
Hopefully I can lightly fun a sanding stick down them to take most of it off....if not....just going to leave it as is...and pile it full of rust and dust! LOL


I just did them in small 10 link sections, easier to handle and not as daunting looking as a full run of tracks. Some links had to be glued, as the push fit on some of them are pretty loose....enough working ones I should be able to put them together and no one will notice.
Also got some primer on the kit itself....Russian Green on the bottom, German Red Brown on the top, as basis for chipping....if you look at the desert tan on in the photo at the top...you can see that the vehicle had it's Russian Green over sprayed with the desert tan, and with the tan chipping away, it shows the green through in some places (mostly lower part of the hull), and rusty brown on top where it has worn through both the tan and green layers of paint. Hence the funky 2 tone primer! LOL


Elm City Hobbies
Active Member
- Joined
- May 7, 2009
- Messages
- 3,241
OK....finally got off of my can and got this thing base coated.
I had worried as I did the primer and then the chipping fluid well over 3-4 months ago, I wasn't sure if the chipping fluid had a life span to it after it had been sprayed, but I forged ahead anyway.
Ken had given me a tip about using Tamiya paint for the color coat, since it chips better, and to use water to thin it instead of Tamiya thinner, makes it easier to come off.
Well my fears about the chipping fluid being too far gone after spraying was alleviated as the water in the paint mixture actually started working on the chipping fluid as soon as it was on the kit, and actually was leaving some pretty cool designs on the upper surfaces of the BTR.
I however chickened out in leaving it as is, and I mixed up a final coat with Tamiya thinner and spray it on last. One of those things you feel you should do....but hindsight being 20/20, the patterns forming on the upper surface were looking pretty cool. But....too late now.
Paint is a mixture of about 2 to 1 Tamiya Desert Yellow and Buff. And then I added 1 part Deck Tan in the end and sprayed it on the upper surfaces only just to give it a little lighter shade. Personally I don't think it worked, as it all looks the same to me. LOL
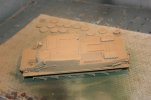
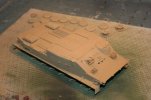
Next is chipping, will probably do that tonight after my wife hits the hay, probably could be doing it now as I am sure the paint is dry enough, but a few more hours won't hurt it.
I had worried as I did the primer and then the chipping fluid well over 3-4 months ago, I wasn't sure if the chipping fluid had a life span to it after it had been sprayed, but I forged ahead anyway.
Ken had given me a tip about using Tamiya paint for the color coat, since it chips better, and to use water to thin it instead of Tamiya thinner, makes it easier to come off.
Well my fears about the chipping fluid being too far gone after spraying was alleviated as the water in the paint mixture actually started working on the chipping fluid as soon as it was on the kit, and actually was leaving some pretty cool designs on the upper surfaces of the BTR.
I however chickened out in leaving it as is, and I mixed up a final coat with Tamiya thinner and spray it on last. One of those things you feel you should do....but hindsight being 20/20, the patterns forming on the upper surface were looking pretty cool. But....too late now.
Paint is a mixture of about 2 to 1 Tamiya Desert Yellow and Buff. And then I added 1 part Deck Tan in the end and sprayed it on the upper surfaces only just to give it a little lighter shade. Personally I don't think it worked, as it all looks the same to me. LOL


Next is chipping, will probably do that tonight after my wife hits the hay, probably could be doing it now as I am sure the paint is dry enough, but a few more hours won't hurt it.
Subhuman1
New Member
- Joined
- Aug 7, 2012
- Messages
- 237
Looking good, what about just touching the end of a cement brush to the tip of the guide horns to bring those sprue stubs down? instead of trying to fight them with a sanding stick. after weathering, you will probably not know the difference anyways. Just a thought.
Elm City Hobbies
Active Member
- Joined
- May 7, 2009
- Messages
- 3,241
OK, chipping done. Next time, I am taking Ken's suggestions to heart to get this thing chipped as soon as the paint was dry. Did the sides last night....wasn't so bad. Left the front, top and back till today. Marginally harder to chip and while some parts came out OK and I am happy over all, there are some parts that just to me don't seem like they did come out.
You be the judge....too much over the top on the chipping?
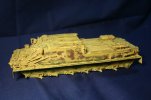
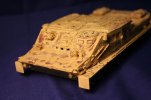
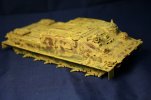
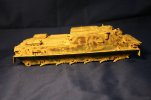
The top seems to be a little more spotted in the chips...not 100% happy with it, but will have to live with it.
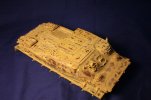
I do like that back panel of the crew compartment however!

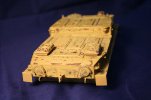
You be the judge....too much over the top on the chipping?


The top seems to be a little more spotted in the chips...not 100% happy with it, but will have to live with it.

I do like that back panel of the crew compartment however!


