You are using an out of date browser. It may not display this or other websites correctly.
You should upgrade or use an alternative browser.
You should upgrade or use an alternative browser.
Trumpeter F4F-3 Early 1/32
- Thread starter fightnjoe
- Start date
fightnjoe
i keep turning up....just like a bad penny....
- Joined
- Jul 10, 2013
- Messages
- 457
Another really quick update.
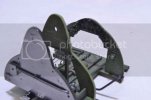
The cockpit comes closer to being finished.
Some detail painting as well as a pretty heavy handed wash with Acrylics.


Other than the seat and headrest it is done. I am a bit put off by the seat though and will be searching for a replacement. Next up will be to finish it off and then set it aside.
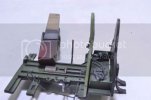
I also did a bit more on the firewall and gave it color and an over all wash.

The color is Alclad Chrome over Testors Gloss Gray. I still have to pick out some of the details. And I will say this now. The chain gear are going to stay. I had zero luck trying to get my hands on replacements. I know they are out there but I had no luck finding chain that looked anywhere near what the real chain looked like.
Time to put color on the engine/landing gear mount and get it detailed.
All comments, critiques, and criticism are encouraged.
Joe
The cockpit comes closer to being finished.
Some detail painting as well as a pretty heavy handed wash with Acrylics.


Other than the seat and headrest it is done. I am a bit put off by the seat though and will be searching for a replacement. Next up will be to finish it off and then set it aside.
I also did a bit more on the firewall and gave it color and an over all wash.

The color is Alclad Chrome over Testors Gloss Gray. I still have to pick out some of the details. And I will say this now. The chain gear are going to stay. I had zero luck trying to get my hands on replacements. I know they are out there but I had no luck finding chain that looked anywhere near what the real chain looked like.
Time to put color on the engine/landing gear mount and get it detailed.
All comments, critiques, and criticism are encouraged.
Joe
fightnjoe
i keep turning up....just like a bad penny....
- Joined
- Jul 10, 2013
- Messages
- 457
An update.
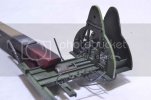
The cockpit is finished off. From the kit we have the floor, rear bulkhead, inner frame (where the seat rests), the control stick, and the instrument panel and frame. The seat is a resin cast of the seat out of the Hasegawa P-40E. All the detail work is scratchbuilt.


The firewall is almost complete. I went with the molded in chains for the gear as I could not get my hands on decent replacements. I also added a number of things that I had seen in pictures but were not represented in the kit.

Now next, logically, should be the engine. I am going to detour just a bit and work on the landing gear as there are some hoses and fittings that will need to be constructed and they fit into the firewall.
All comments, critiques, and criticism are encouraged.
Joe
The cockpit is finished off. From the kit we have the floor, rear bulkhead, inner frame (where the seat rests), the control stick, and the instrument panel and frame. The seat is a resin cast of the seat out of the Hasegawa P-40E. All the detail work is scratchbuilt.


The firewall is almost complete. I went with the molded in chains for the gear as I could not get my hands on decent replacements. I also added a number of things that I had seen in pictures but were not represented in the kit.

Now next, logically, should be the engine. I am going to detour just a bit and work on the landing gear as there are some hoses and fittings that will need to be constructed and they fit into the firewall.
All comments, critiques, and criticism are encouraged.
Joe
fightnjoe
i keep turning up....just like a bad penny....
- Joined
- Jul 10, 2013
- Messages
- 457
Back again and the interior is getting close.
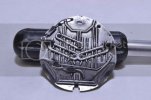
With a bit of fixing on the cockpit I was able to move on to working on the engine. Once the parts were cleaned up a bit I used Alclad Polished Aluminium, Gloss Grey, Gloss Black, and a wash of Acrylic Black.


To this point other than a bit of wiring the forward sections are now done.


There are just a couple of items left and then I can hook it all up and close her up.

Oh so very very close.
Next will be finishing up the little stuff and then installing into the fuselage and closing it up.
All comments, critiques, and criticism are encouraged.
Joe
With a bit of fixing on the cockpit I was able to move on to working on the engine. Once the parts were cleaned up a bit I used Alclad Polished Aluminium, Gloss Grey, Gloss Black, and a wash of Acrylic Black.


To this point other than a bit of wiring the forward sections are now done.


There are just a couple of items left and then I can hook it all up and close her up.

Oh so very very close.
Next will be finishing up the little stuff and then installing into the fuselage and closing it up.
All comments, critiques, and criticism are encouraged.
Joe
fightnjoe
i keep turning up....just like a bad penny....
- Joined
- Jul 10, 2013
- Messages
- 457
Just a quick update.
All the components have been installed into the fuselage.

And the fuselage has now been closed up.

There were some issues with the fuselage seam. It was of my own making. There is just a few small items to finish off for clean up but it looks pretty good to me.
Next up will be beginning on the wings.
All comments, critiques, and criticism are encouraged.
Joe
All the components have been installed into the fuselage.

And the fuselage has now been closed up.

There were some issues with the fuselage seam. It was of my own making. There is just a few small items to finish off for clean up but it looks pretty good to me.
Next up will be beginning on the wings.
All comments, critiques, and criticism are encouraged.
Joe
fightnjoe
i keep turning up....just like a bad penny....
- Joined
- Jul 10, 2013
- Messages
- 457
Ok, a redo of sorts.
I was not happy at all with the previous pictures. Part of this is I am working on my picture taking and trying to get good print level pictures.
To that end here are a couple of others. These are marginally better.


I have started the seam work and will continue with that as well as working on the wings.
All comments, critiques, and criticism are encouraged.
Joe
I was not happy at all with the previous pictures. Part of this is I am working on my picture taking and trying to get good print level pictures.
To that end here are a couple of others. These are marginally better.


I have started the seam work and will continue with that as well as working on the wings.
All comments, critiques, and criticism are encouraged.
Joe
