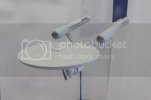
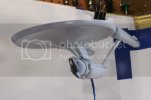
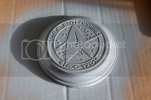
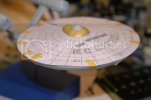
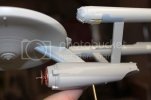
W.I.P. ---1/1000 TOS Enterprise by Polar Lights

fumblethumbs said:
You truly are mad aren't you! Sounds like a great plan of attack!

Yeah. I tend to get caught up in the minutiae I know. Can't help it when it comes to this subject though.
 
Updates from last night...

So after work last night I skipped (errrr... make that strided purposefully) out to the garage and spent about an hour on the old girl.

First thing I wanted to do before spraying her with Testors black enamel was to drill holes for the lights on the spine over the shuttle bay and the tops of the bussard collars.
I figured it would be easier to see what I was drilling against a gray exterior as opposed to one painted black.

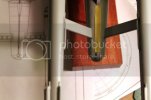
For the spine lights, I drew a line down the center of a piece of Tamiya masking tape and using my drafting calipers took measurements off Alan Sinclair's blueprint (which I had previously blown up to match the size of the model) and transferred the location of the three tiny lights onto the tape using the front edge of the stern beacon as my reference point.
After that I laid the tape down as close to the centerline of the secondary hull as I could using my drafting calipers to measure where the pencil line was centering it from the front edge of the hangar beacon, between the nacelle struts, and up to the centerline of the dorsal.
Then I took my straight pointed dental pick and pressed it thru the tape where I'd marked where the lights should be leaving indents for drilling into the model...


IMG_1349.jpg


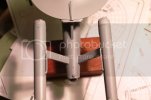
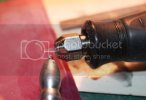
I removed the tape and drilled with my pinvise.
The center hole of the three spine lights is about 33% larger than the other two.
The holes on the bussard collars are the same size as the middle hole of the spine lights...


IMG_1350.jpg

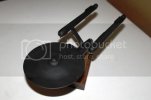
Here she is after the black paint had dried...

IMG_1353.jpg

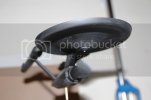
And after giving her a light sanding to smooth everything out.
Of course, she'll need dusting off after this.
Sanding really attracts any crap floating around in the air doesn't it?


IMG_1355.jpg

So tomorrow it'll be time for the basecoat to be airbrushed.
Before I do that, though, I'll mask off the areas I want left black such as the ridged baffles behind the bussard collars and the impulse engine vents.

Once I'm done with the painting I'll turn clear green and red acrylic rod in my dremel and insert them into the holes I drilled out last night.
I figure I'll just glue on the tiny teardrop shaped lights on the edge of the saucer outboard of the running lights.
I'm not sure yet if I'll just use the decals for the blinkers on the sides of the shuttle bay or if I need to drill more holes and make those out of clear rod.
If I do that I might as well turn some brass tubing for the metal collars around those lights.
You can see them here...

image62.jpg

I'll probably make the bulbs for these as they don't sit flush to the surface like a decal would and I'm really trying to be a stickler for details on this build if you hadn't guessed that already! ::)

Anyway, as always, thanks for reading along!
;D
 
So Sunday I turned the second strobe light on my dremel/lathe. Turned out pretty good IIDSSM.

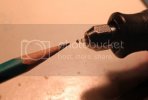
Here's the stock piece of acrylic rod being turned to the correct diameter in the collete...

IMG_1359.jpg

Here's the 1/16" OD brass "collar" on my fingertip. Prior to slicing it off the tubing I bevelled the edges using a needle file...

IMG_1361.jpg

Here's the collar in place and ready for gluing onto the clear rod. I'll slice it off the stock with my miter saw... very carefully...

IMG_1362.jpg

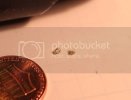
The finished strobes next to a penny for comparison...

IMG_1366-1.jpg

Once I've got the basecoat on I'll glue them into the holes I've drilled into the hull with CA.
I may put a small drop of fluorescent white paint on them too as they are unlit otherwise.
 
*gets binoculars out*

Ah, yes I can see what you're doing now. ;D

Awesome stuff, Trek. I love what you're doing. Just shows what's possible at this scale.
 
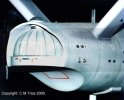
So went into work yesterday and visited the TrekCore site where I printed off this still from Space Seed.

I'm using it to get the color just right on the leading edge of the dorsal. It looks to be bluish gray color to me.

I'm going to do a few tests on a scrap piece of styrene sheet putting some of the hull color next to different formulations for the other color. I'll start with 3 parts hull color to 1 part Intermedate Blue and see if that gives me the slightly darker value I want. I also got a bottle of MM Azure Blue which is a light blue with a grey tint to it. I'll add a little of that in combination with the other two colors. I'll use the same color on the undersides of the nacelles in that scalloped area behind the flux constrictors.

There is alo a lighter variation of this color on the trailing edge of the dorsal; it's very subtle and barely noticeable though.

This should be fun!

P.S. I never noticed this before but, at least in this picture, there seems to be a definite pattern to the weathering on the bussard dome collar. Not just random streaks but almost bullet shaped rounds pointing rearward spaced evenly around the circumference. Has anyone else ever noticed this?


[attachment deleted by admin]
 
I have never noticed it, but I haven't really studied her with a model build in mind.

I am learning quite a bit about both the A-wing and the Millennium Falcon right now. It is nice to learn about details when you build up a model.
 
Today's update...

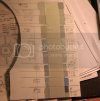
Did a little experimenting with different ratios of Shady Cove, Intermediate Blue, and Azure Blue to see what looked best next to the basecoat for the front and back edges of the connecting dorsal:

IMG_1376.jpg

I'm leaning towards using the fifth from the bottom on the righthand side for the front of the dorsal.
It's about 8 parts Shady Cove to 1 part Azure Blue. Could even go a little lighter but it's close.
Maybe 12 to 1 would be better.
The trailing edge needs to be even lighter; leaning towards second from the top on the lefthand side-20 parts Shady Cove to 1 part Azure Blue.
Again I'll probably go even lighter, say 25 to 1.
Funny thing is I was thinking the two accent colors woudl give me a bluish tint but when combined with the slightly greenish tint of Shady Cove the hues lean more towards green or a neutral grey.


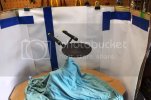
Here's the Enterprise cleaned up, dusted, and ready for her first coat of Shady Cove.
Like my homemade painting booth?
I know, pretty fancy:


IMG_1367.jpg

I cut some thin strips of Tamiya tape and masked the grooves between the shuttle bay doors.
Once basecoated and the tape is removed the slots will be black; I'll then spray them with a second thinner coat of the basecoat so the slots will be a light gray when done.
The nacelle endcaps are masked as I don't want their grooves to disappear under multiple coats of the basecoat and the darker gray final coat (possibly a mix of Aggressor Gray and Euro Gray?) so they will stay masked until I give them their final paint coat.


IMG_1370.jpg

After airbrushing the first coat of Shady Cove.
You can see why so many people think the Enterprise is white.
She looks white in these photos but she's defintely a light gray color as is evident when you look at my experimental color chart at the beginning of this post:


IMG_1372.jpg

IMG_1374.jpg

Shady Cove is an oil-based gloss enamel so you have to allow 6-8 hours for drying time before handling.
Hopefully I'll be able to do some light sanding with polishing pads tomorrow.
Once it's good and dry I'll spray with Dullcote then draw the gridlines on the upper saucer and paint the rust ring.
I'll also do a little weathering with pastels and gel ink pens. This will be followed with another thinned down spray of the basecoat.
The rust ring, gridlines, and weathering needs to be very subtle at this scale.

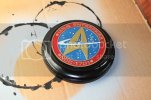
Here's the base I'm using. It's from The Model Base Guy. Tamiya primer went on very nicely.


IMG_1377.jpg

Next pics will be of the gridlines and the rust ring I think.

Thanks for reading!
 
I have always thought that she was some version of grey and not white. Nice little update!
 
Updates from this weekend...

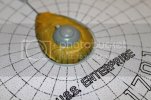
So I figured the paint was finally dry enough and gave her a light spray with Dullcote on the upper saucer. Then I cut out the upper saucer from Alan Sinclair's blueprints (sized to fit the dimensions of the model) and taped it to the top of the saucer:
IMG_1378.jpg

I made a series of pencil marks around the base of the B-C deck and the saucer rim where the radial gridlines terminated:
CopyofIMG_1379.jpg

Then I removed the paper template and using a mechanical pencil and a length of Evergreen strip cut to size I drew the radial gridlines:
CopyofIMG_1382.jpg

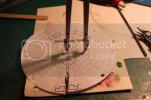
Taking measurements from the blueprint I used a drafting compass to draw the circular gridlines:
IMG_1384.jpg
 
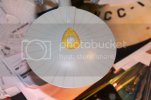
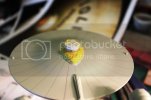
I didn't want the compass needle to mar the upper dome so I cut a short piece of acrylic tubing that fit perfectly over the bridge deck (with a slot cut out to accomodate the turboshaft bump) and glued a round piece of styrene to the top. This would serve as a nesting place for the compass needle. Then I taped it to the top of the B-C deck housing:
CopyofIMG_1383.jpg

The first few circles were too close in for the compass so I made a template from thin sheet using a circle template and used that for the first circle which had to be notched to the shape of the B-C deck rear. Then I used the circle template to make the next 2 circles. After that I used the compass:
IMG_1385.jpg

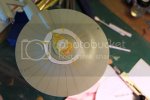
The saucer after drawing the gridlines:
IMG_1386.jpg

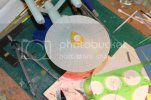
Masking tape was removed and any stray pencil marks were removed using a Magic Rub eraser:
IMG_1387.jpg
 
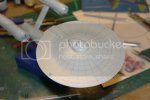
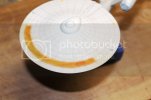
The rust ring was rubbed in using Tamiya pastel chalk and a foam applicator then sealed with Dullcote. Note that It doesn't go all the way around; this I confirmed by close examination of studio model pics and by what other Enterprise "experts" have written in other thread:
IMG_1390.jpg

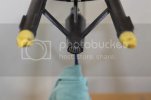
Accent colors were brush painted on the front of the dorsal and lower front of the nacelles using a mix of the hull color and Azure Blue enamel. Some of the masking tape still needs to be removed around the flux constrictors in this pic:
IMG_1391.jpg

Lest anyone be alarmed in thinking I made the gridlines and accent colors too stark let me allay those fears; the colors you see now are not the finished product. I plan to mix up a thinned down batch of the basecolor (perhaps tinted a little more towards the green side with a few extra drops of olive drab and SAC bomber green) and airbrush it over the entire model with special emphasis on these areas to tone them down. When I'm done the gridlines and rust ring will be much more subtle and the other areas will be muted and somewhere between a bluish and greenish tint. To be honest, the main reason for drawing the gridlines was to make it easier to locate where the 4 rectangular windows go around the rim of the saucer.
It also helped in positioning the rust "ring".


So that's where I'm at right now. Comments welcome as always. ;D

Oh... almost forgot... I finished painting the base. Just needs a coat or two of Future:

IMG_1388.jpg
 
Trek, this is right up there as one of my favourite threads on these forums!

I'm intrigued and hooked on your every word! Loving it all. Superb work on that base. This is gonna look so, so good when complete. 8)
 

Latest posts

Back
Top