Zoukei-mura 1/32 Fw 190 A-4

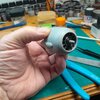
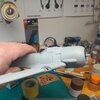
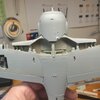
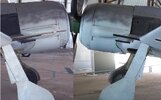
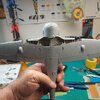
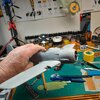
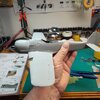
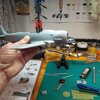
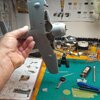
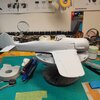
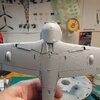
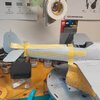
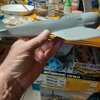
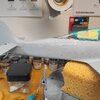
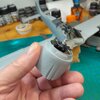
Everything fit in perfectly just like the picture with my finger. It's when I started putting on the side pieces and the round front that I ran into trouble. I swear, it's almost like too much paint and just that little bit expanded it or swelled it or something to make it just not fit perfectly by a millimeter or two. And I airbrushed everything

View attachment 133981

View attachment 133982

I read on another forum some times ago, and got stuck in my mind, that ZM kits have such tight fitting that even a thin layer of paint can create problems like yours.
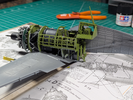
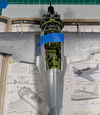
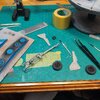
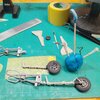
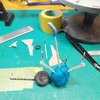
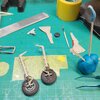
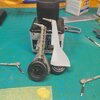
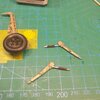
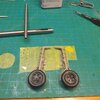
That's what I'm thinking and you seconded it so that's what I'm going to blame it on. I tried to get into the engine or whatever I thought was doing it and all I succeeded in doing is making this a closed cowl model. It's a habit of mine to make sure nothing comes loose. Oh well. Live and learn. Working on the landing gear. Going to head out back and get some painting accomplished

20250111_164430.jpg

20250112_131924.jpg

20250112_132212.jpg
 
I swear, it's almost like too much paint and just that little bit expanded it or swelled it or something to make it just not fit perfectly by a millimeter or two.
I'm no expert on ZM having yet to finish one. Hell, I'm no "expert" on much of anything.

I do not think paint thickness is your issue, maybe a contributing factor, but not the only issue. On my Bf109 and J2M3 the destructions had the engine built a day or few weeks before these panels get attached. I assume you did the same?

On both of mine, there's no jig or even measurement (down to 100th of a mm?) of where your engine mounts should be in relation to each other. Yet I think it is that important as the glue and paint cure to hardness.

On my Messerschmitt, I did have some issues with the cowl panels closing the gaps. Now mine was an inverted V-12 not a radial, so my bigger issues were where the cowl panels covered the exhaust. I chalked it up to the fact that the cowl panels I chose to use were the "open" version and that meant they would not fit right in the "closed" position. Those closed parts are still on the sprue.

However, with the MGs on top of the engine, they were square with the block and all was good, the engine mounts looked good too. Until I mounted the engine mounts to the firewall, and they were skewed! :eek:

I', getting close to attaching the cowling around my other ZM kit with a radial, and that older kit does not have a provision for "open" cowl. I'm a bit worried I'll have the same or similar issue. But I'll keep you updated.

Here's my current state...
1736722095459.png
Well not quite, I did attach the other half of the fuselage.

1736722189967.png
But I think these pictures show what I mean about the faith you must have that the engine is mounted correctly, with no good way to be sure.

That is IF you follow the destructions completely. I'm thinking I'll be using the cowl panels to test engine mounting for any future ZM kits. I do love their approach!
 
I'm no expert on ZM having yet to finish one. Hell, I'm no "expert" on much of anything.

I do not think paint thickness is your issue, maybe a contributing factor, but not the only issue. On my Bf109 and J2M3 the destructions had the engine built a day or few weeks before these panels get attached. I assume you did the same?

On both of mine, there's no jig or even measurement (down to 100th of a mm?) of where your engine mounts should be in relation to each other. Yet I think it is that important as the glue and paint cure to hardness.

On my Messerschmitt, I did have some issues with the cowl panels closing the gaps. Now mine was an inverted V-12 not a radial, so my bigger issues were where the cowl panels covered the exhaust. I chalked it up to the fact that the cowl panels I chose to use were the "open" version and that meant they would not fit right in the "closed" position. Those closed parts are still on the sprue.

However, with the MGs on top of the engine, they were square with the block and all was good, the engine mounts looked good too. Until I mounted the engine mounts to the firewall, and they were skewed! :eek:

I', getting close to attaching the cowling around my other ZM kit with a radial, and that older kit does not have a provision for "open" cowl. I'm a bit worried I'll have the same or similar issue. But I'll keep you updated.

Here's my current state...
View attachment 134158
Well not quite, I did attach the other half of the fuselage.

View attachment 134159
But I think these pictures show what I mean about the faith you must have that the engine is mounted correctly, with no good way to be sure.

That is IF you follow the destructions completely. I'm thinking I'll be using the cowl panels to test engine mounting for any future ZM kits. I do love their approach!
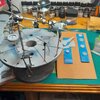
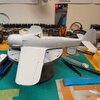
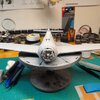
That plane looks great. Yeah I don't think it's the paint either to tell the truth. I think I messed up a little bit on the body and Wing attachment and a little bit on the engine and with both of those factors it just did not work. What did work was snip snip and yep that fits.

20250112_145428.jpg

20250112_171741.jpg

20250112_173217.jpg

20250112_174255.jpg
 
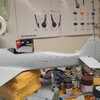
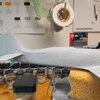
Those landing gear are insanely good! You nailed the RLM02 in my opinion as well.

I think that gap at the leading edge of the wing can be covered, with patience.
 
Those landing gear are insanely good! You nailed the RLM02 in my opinion as well.

I think that gap at the leading edge of the wing can be covered, with patience.
Thank you. That Gap at the Leading Edge I haven't even looked at. But now that I did sneak a peek at it it does need a little work. That rlm02? That's actually xf-14 which is Japanese aircraft Gray and I know I added another color to it I just can't remember which one.
 
I'd say don't go crazy with putty filling gaps since these aircraft were not perfect when new.
The fit of panels was not as aero-tight as it is today.

The cowlings on these FW190s are never perfectly fitted and one side always seems to fit better than the other.

That leading edge gap is not really a gap, its a loose overlap..
The designer of this model appears to have ended the front of the wings and fuselage right at the engine cowling (underside).
Thus eliminating the slight overlap of the cowling (over the fuselage) and making it more difficult to tighten up that gap.

Maybe the cowling can be trimmed inside? to allow it to fit a bit tighter?
But I would still not worry about a gap.

fw190 detaiil.jpg
 
Back
Top