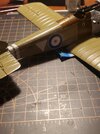
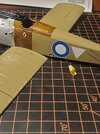
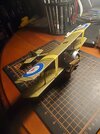
Here comes Snoopy in his Sopwith Camel.

I was doing the decals on the fuselage and since it's the alternate scheme I tried applying the "S". That did not go well at all. The decals are so thin. That "S" folded onto itself repeatedly and tore to bits when I tried to straighten it. Happened to both of them. So, no "S" for this scheme.
 
I was doing the decals on the fuselage and since it's the alternate scheme I tried applying the "S". That did not go well at all. The decals are so thin. That "S" folded onto itself repeatedly and tore to bits when I tried to straighten it. Happened to both of them. So, no "S" for this scheme.
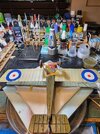
They are very thin, the thinnest I have ever worked with.
It shows all of the detail once applied so not much in ways of a setting solution, like Mr. Softer.
They are nice decals, but they are too thin and can tear easily.

what I've done is added a little Windex to my decal water.
As the decals are in the water I wet that area with the Windex water with my cotton bud. It seems to aid in placement for me
 
Always an adventure...lol... I decided to finish the decals before putting the top wing on. Most went fine but one meatball for the fuselage roundel disintegrated on me. Once everything is sealed I will paint it on. Not looking forward to that.

20231207_221838.jpg

20231207_221906.jpg
 
Always an adventure...lol... I decided to finish the decals before putting the top wing on. Most went fine but one meatball for the fuselage roundel disintegrated on me. Once everything is sealed I will paint it on. Not looking forward to that.

View attachment 110016

View attachment 110017
I can relate. I had to paint the tail decal on because I did the rigging before the decal.
 
I wish I would have put the fuselage stripes on before I rigged the rear. I had to put that decal under the rigging and so it didn't line up as neatly as it should have. Lesson learned there.
 
I wish I would have put the fuselage stripes on before I rigged the rear. I had to put that decal under the rigging and so it didn't line up as neatly as it should have. Lesson learned there.
I have so many whoops. Needless to say, this will be my last WWI plane, for a while. It has been a fun & challenging build,
 
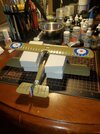
Aggravation can lead to inspiration. After trying, and failing again, to attach the upper wing I had an idea. Support it with a couple piles of makeup sponges. This should help a lot.

Anyone else having problems uploading pictures?
 
Aggravation can lead to inspiration. After trying, and failing again, to attach the upper wing I had an idea. Support it with a couple piles of makeup sponges. This should help a lot.

Anyone else having problems uploading pictures?
I can't see any pics posted recently.
 
Aggravation can lead to inspiration. After trying, and failing again, to attach the upper wing I had an idea. Support it with a couple piles of makeup sponges. This should help a lot.

Anyone else having problems uploading pictures?
The top wing seems to have been a challenge for us all, brother. I know it was for me.
Yes.Trouble uploading and viewing post's photos.
 
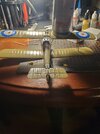
Stopping for the night but I got a lot done tonight. Just need to finish the rigging and then do paint touch ups.

View attachment 110246
It's looking great. I found that I had to use a drop of CA on all the wing spar joints because there seemed to be slight tension pulling the wing's apart.

Maybe leave the tape on until the rigging is set as that will help keep everything in place. Pantherman
 
Back
Top