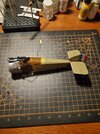
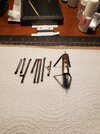
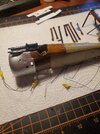
Here comes Snoopy in his Sopwith Camel.
- Thread starter GaryG64
- Start date
Pantherman
Well-Known Member
- Joined
- Feb 10, 2022
- Messages
- 4,075
Thanks. Not quite the "I only do German armour " of a year ago, is it.Nice !
But the more builds you have a go at the better you're skills improve I believe.
Pantherman
TimM63
Well-Known Member
- Joined
- Mar 6, 2023
- Messages
- 2,301
Outstanding build. Love the color scheme, the rigging is nice and tight, and a perfect job with the finicky decals.Well I'm calling this one. Quite a challenge but most enjoyable especially with the groups help along the way.
I will certainly be doing a few more of these in the future but I think its about time I got back to my tank's. Pantherman
View attachment 109713View attachment 109714View attachment 109715View attachment 109716View attachment 109717View attachment 109718
This was a challenging kit but rewarding when you get it finished.
I really enjoy these group builds. Sharing the tips along the way.
Pantherman
Well-Known Member
- Joined
- Feb 10, 2022
- Messages
- 4,075
Thanks. The group builds are fantastic fun. I have built stuff I would never of dreamed of doing. PanthermanOutstanding build. Love the color scheme, the rigging is nice and tight, and a perfect job with the finicky decals.
This was a challenging kit but rewarding when you get it finished.
I really enjoy these group builds. Sharing the tops along the way.
TimM63
Well-Known Member
- Joined
- Mar 6, 2023
- Messages
- 2,301
I would've never thought I would built an Adam-12 police car but there it is on the shelf. Who knew?Thanks. The group builds are fantastic fun. I have built stuff I would never of dreamed of doing. Pantherman
GaryG64
Well-Known Member
- Joined
- Sep 8, 2022
- Messages
- 2,562
Looks very nice! The colors and decals are very nice and crisp! Outstanding job, brother.Well I'm calling this one. Quite a challenge but most enjoyable especially with the groups help along the way.
I will certainly be doing a few more of these in the future but I think its about time I got back to my tank's. Pantherman
View attachment 109713View attachment 109714View attachment 109715View attachment 109716View attachment 109717View attachment 109718
GaryG64
Well-Known Member
- Joined
- Sep 8, 2022
- Messages
- 2,562
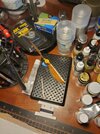
It's just up to you and me now.I am so far behind...lol... I finished most of the painting today. Tomorrow I will seal the "wood" an start on assembly.
View attachment 109745
I just put on a few decals and am struggling with the tip wing, which is still setting off to the side.
GaryG64
Well-Known Member
- Joined
- Sep 8, 2022
- Messages
- 2,562
Ditto. I cannot remember the last time I built a car... decades, for certain.I would've never thought I would built an Adam-12 police car but there it is on the shelf. Who knew?
GaryG64
Well-Known Member
- Joined
- Sep 8, 2022
- Messages
- 2,562
I agree. We've taken our armor and other aircraft knowledge, tips &tricks to apply to our past previous builds. And with the group builds we have learned more techniques to helps up in future builds.Thanks. Not quite the "I only do German armour " of a year ago, is it.
But the more builds you have a go at the better you're skills improve I believe.
Pantherman
Yes... it's time to rest for a couple of builds with my 3 brothers until we decide on a new build at a later date.
GaryG64
Well-Known Member
- Joined
- Sep 8, 2022
- Messages
- 2,562
I enjoy building with you three. I have learned a lot more with y'all by my side.Outstanding build. Love the color scheme, the rigging is nice and tight, and a perfect job with the finicky decals.
This was a challenging kit but rewarding when you get it finished.
I really enjoy these group builds. Sharing the tips along the way.
I have come to really appreciate you 3, we are the 4 Musketeers!
GaryG64
Well-Known Member
- Joined
- Sep 8, 2022
- Messages
- 2,562
True. I never would have considered a police car, a pink SAS Panther, a small tri-wing, and a bi-plane, and they are all displayed except the bi-plane yet.Thanks. The group builds are fantastic fun. I have built stuff I would never of dreamed of doing. Pantherman
GaryG64
Well-Known Member
- Joined
- Sep 8, 2022
- Messages
- 2,562
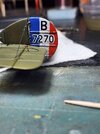
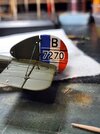
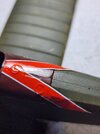
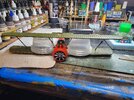
Some decals applied. Since wr were having problems with these I remembered s trick I read about many years ago. Using a couple of drops of dishwashing liquid in the decal water to help slide them into place easier.
1. Place a couple of drops of dishwashing liquid in you decal water.
2. Place decal in soap & water solution.
3. Use a cotton bud to apply the same water to the area decal will be applied.
4. Apply decal, move into place.
5. Use dry cotton bud to absorb excess water from decal and surface.
6. Let dry and apply setting solution. Voila!
I tried a different approach and used a little Windex. It worked OK, but not as successful as the soap.
The top wing has proved to be difficult


Pantherman
Well-Known Member
- Joined
- Feb 10, 2022
- Messages
- 4,075
Thanks.Looks very nice! The colors and decals are very nice and crisp! Outstanding job, brother.
Pantherman
Well-Known Member
- Joined
- Feb 10, 2022
- Messages
- 4,075
Have to agree with you about the top wing, it's a real pain in the a........rm.Some decals applied. Since wr were having problems with these I remembered s trick I read about many years ago. Using a couple of drops of dishwashing liquid in the decal water to help slide them into place easier.
1. Place a couple of drops of dishwashing liquid in you decal water.
2. Place decal in soap & water solution.
3. Use a cotton bud to apply the same water to the area decal will be applied.
4. Apply decal, move into place.
5. Use dry cotton bud to absorb excess water from decal and surface.
6. Let dry and apply setting solution. Voila!
I tried a different approach and used a little Windex. It worked OK, but not as successful as the soap.
The top wing has proved to be difficult
View attachment 109747
View attachment 109748
View attachment 109749
View attachment 109750
I went the other way and fitted the wing struts first and let it set for a few days but when I fitted the fuselage struts I realised that I needed the top wing to come forward.
I had to gently pull the top wing forward without breaking the wing struts and tape it in position to get everything to line up. Nightmare but it worked. Pantherman
GaryG64
Well-Known Member
- Joined
- Sep 8, 2022
- Messages
- 2,562
Thanks. I'll try that.Have to agree with you about the top wing, it's a real pain in the a........rm.
I went the other way and fitted the wing struts first and let it set for a few days but when I fitted the fuselage struts I realised that I needed the top wing to come forward.
I had to gently pull the top wing forward without breaking the wing struts and tape it in position to get everything to line up. Nightmare but it worked. Pantherman
TimM63
Well-Known Member
- Joined
- Mar 6, 2023
- Messages
- 2,301
The top wing is definitely frustrating. I had to walk away a few times. Eventually after many cuss words and more than a few drops of superglue I was able to get it on and lined up.Some decals applied. Since wr were having problems with these I remembered s trick I read about many years ago. Using a couple of drops of dishwashing liquid in the decal water to help slide them into place easier.
1. Place a couple of drops of dishwashing liquid in you decal water.
2. Place decal in soap & water solution.
3. Use a cotton bud to apply the same water to the area decal will be applied.
4. Apply decal, move into place.
5. Use dry cotton bud to absorb excess water from decal and surface.
6. Let dry and apply setting solution. Voila!
I tried a different approach and used a little Windex. It worked OK, but not as successful as the soap.
The top wing has proved to be difficult
View attachment 109747
View attachment 109748
View attachment 109749
View attachment 109750
Similar threads
- Replies
- 5
- Views
- 402

